Configuring Single Sign-On (SSO) for CodeTogether
To integrate CodeTogether with your organization's identity provider, configure the SSO settings in the cthq.properties file. This setup supports providers compatible with the OpenID Connect (OIDC) protocol, such as GitHub, GitLab, Keycloak, Azure AD, and others.
CodeTogether requires Single Sign-On (SSO) for user authentication. All deployments must be integrated with an SSO provider.
If your organization does not currently have an SSO provider, please contact your CodeTogether technical support representative for guidance on configuration of your specific SSO connection.
General SSO Configuration
INTEL_FQDN Configuration
INTEL_FQDN is defined in your .env file and represents the public hostname(FQDN) of the Intel service (e.g. intel.example.com).
For example:
INTEL_FQDN=intel.example.com
Base URLs
When running with docker compose these values are configured in the .env file. If you are running the server without docker compose, you will need to set these values in the cthq.properties file.
hq.base.url=https://${INTEL_FQDN}
hq.collab.url=https://${COLLAB_FQDN}
hq.collab.secret=${INTEL_SECRET}
SSO Provider Configuration
You can configure SSO providers using the following common properties:
provider: The name of the SSO provider (e.g. keycloak, github, google). client.id: The client/application ID issued by the SSO provider. .secret: The secret key provided by the SSO provider. client.issuer.url: The issuer or discovery URL of the provider. .uri: The URI to which the provider should redirect after authentication. Additional optional values: auth.uri, token.uri, info.uri, logout.uri, jwt.set.uri
hq.sso.tenants=github,gitlab
hq.sso.provider=<provider_name>  # e.g. github, gitlab, keycloak
hq.sso.label=<Provider Label>    # Display name for the SSO option
hq.sso.client.id=<client_id>
hq.sso.client.secret=<client_secret>
hq.sso.redirect.uri=https://<server-fqdn>/api/v1/auth/sso/success/insights
Single-Tenant SSO Configuration
Use this if your deployment is configured to use only one SSO provider.
hq.sso.provider=github
hq.sso..label=GitHub
hq.sso.client.id=<github_client_id> ## Replace with your GitHub client ID
hq.sso.client.secret=<github_client_secret> ## Replace with your GitHub client secret
hq.sso.redirect.uri=https://${INTEL_FQDN}/api/v1/auth/sso/success/insights ## configure with .env with docker compose
hq.sso.auth.uri=https://github.com/login/oauth/authorize
hq.sso.token.uri=https://github.com/login/oauth/access_token
hq.sso.info.uri=https://api.github.com/user
hq.sso.jwt.set.uri=https://token.actions.githubusercontent.com/.well-known/jwks
hq.sso.logout.uri=https://github.com/logout
Multi-Tenant SSO Configuration
Use this if you support multiple SSO providers. Each provider must be listed under hq.sso.tenants, and each configuration block must be prefixed accordingly.
hq.sso.tenants=github,gitlab

# GitHub Configuration
hq.sso.github.provider=github
hq.sso.github.label=GitHub
hq.sso.github.client.id=<github_client_id>
hq.sso.github.client.secret=<github_client_secret>
hq.sso.github.redirect.uri=https://${INTEL_FQDN}/api/v1/auth/sso/success/insights ## configure with .env with docker compose
hq.sso.github.auth.uri=https://github.com/login/oauth/authorize
hq.sso.github.token.uri=https://github.com/login/oauth/access_token
hq.sso.github.info.uri=https://api.github.com/user
hq.sso.github.jwt.set.uri=https://token.actions.githubusercontent.com/.well-known/jwks
hq.sso.github.logout.uri=https://github.com/logout

# GitLab Configuration
hq.sso.gitlab.provider=gitlab
hq.sso.gitlab.label=GitLab
hq.sso.gitlab.client.id=<gitlab_client_id>
hq.sso.gitlab.client.secret=<gitlab_client_secret>
hq.sso.gitlab.redirect.uri=https://${INTEL_FQDN}/api/v1/auth/sso/success/insights ## configure with .env with docker compose
Example: Single SSO Configurations
Keycloak
hq.sso.provider=keycloak
hq.sso.label=Keycloak
hq.sso.client.id=codetogether
hq.sso.client.secret=***
hq.sso.client.issuer.url=https://auth.edge.codetogether.com/realms/codetogether
hq.sso.redirect.uri=https://${INTEL_FQDN}/api/v1/auth/sso/success/insights
Azure
hq.sso.provider=azure
hq.sso.client.id=***
hq.sso.client.secret=***
hq.sso.client.issuer.url=https://login.microsoftonline.com/<tenant-id>/v2.0
hq.sso.redirect.uri=https://${INTEL_FQDN}/api/v1/auth/sso/success/insights
GitHub
hq.sso.provider=github
hq.sso.label=GitHub
hq.sso.client.id=***
hq.sso.client.secret=***
hq.sso.redirect.uri=https://${INTEL_FQDN}/api/v1/auth/sso/success/insights
hq.sso.auth.uri=https://github.com/login/oauth/authorize
hq.sso.token.uri=https://github.com/login/oauth/access_token
hq.sso.info.uri=https://api.github.com/user
hq.sso.logout.uri=https://github.com/logout
hq.sso.jwt.set.uri=https://token.actions.githubusercontent.com/.well-known/jwks
Google
hq.sso.provider=google
hq.sso.label=Google
hq.sso.client.id=***
hq.sso.client.secret=***
hq.sso.client.issuer.url=https://accounts.google.com
hq.sso.redirect.uri=https://${INTEL_FQDN}/api/v1/auth/sso/success/insights
Ping Identity
hq.sso.provider=ping
hq.sso.label=Ping Identity
hq.sso.client.id=***
hq.sso.client.secret=***
hq.sso.scope=openid,profile,email
hq.sso.client.issuer.url=https://auth.pingone.com/***
hq.sso.redirect.uri=https://${INTEL_FQDN}/api/v1/auth/sso/success/insights
hq.sso.name.attr=sub
hq.sso.client.authentication.method=client_secret_post
If you're unsure which authentication method to use, check your Ping Identity admin console or refer to the official Ping documentation. Using an incorrect method may cause token endpoint authentication to fail.
If you don't have an SSO configuration in place, use Keycloak SSO instead. The following steps outline how to proceed.
Keycloak Initial Setup (Optional)
To be able to start using Keycloak as your SSO provider, you need to perform the following steps:
- Create a realm.
- Create a client.
- Create a role.
- Create at least one user.
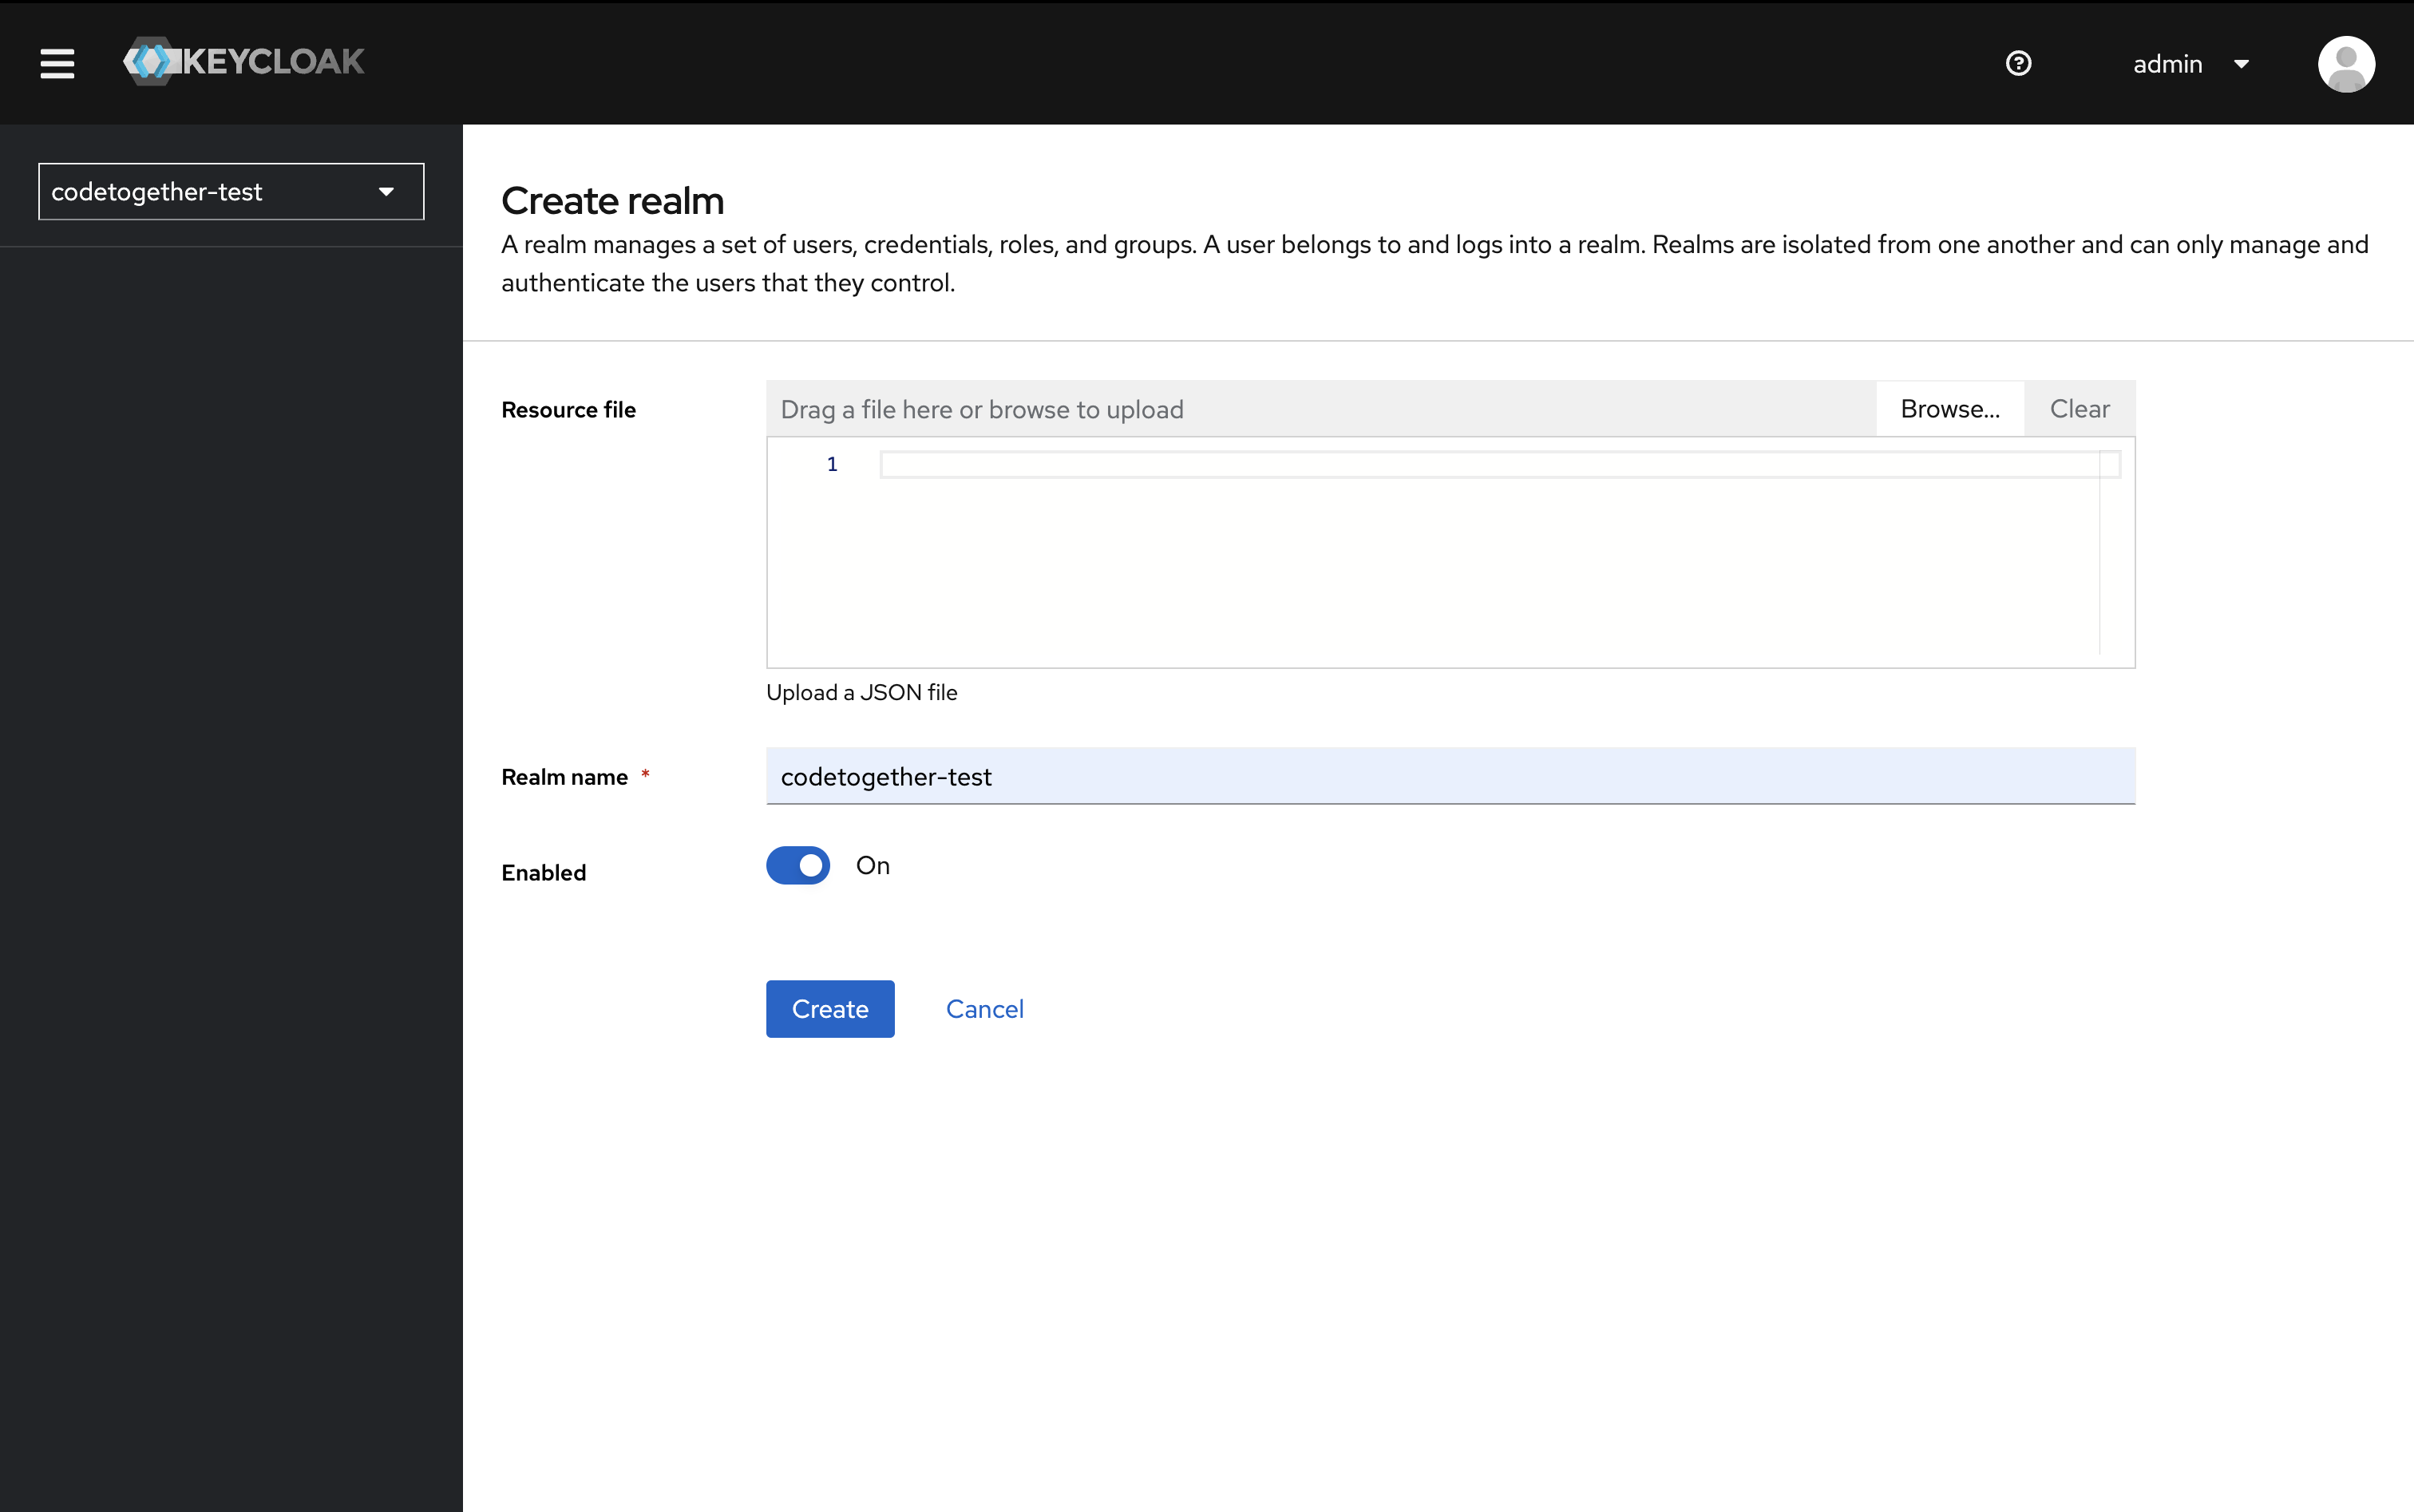
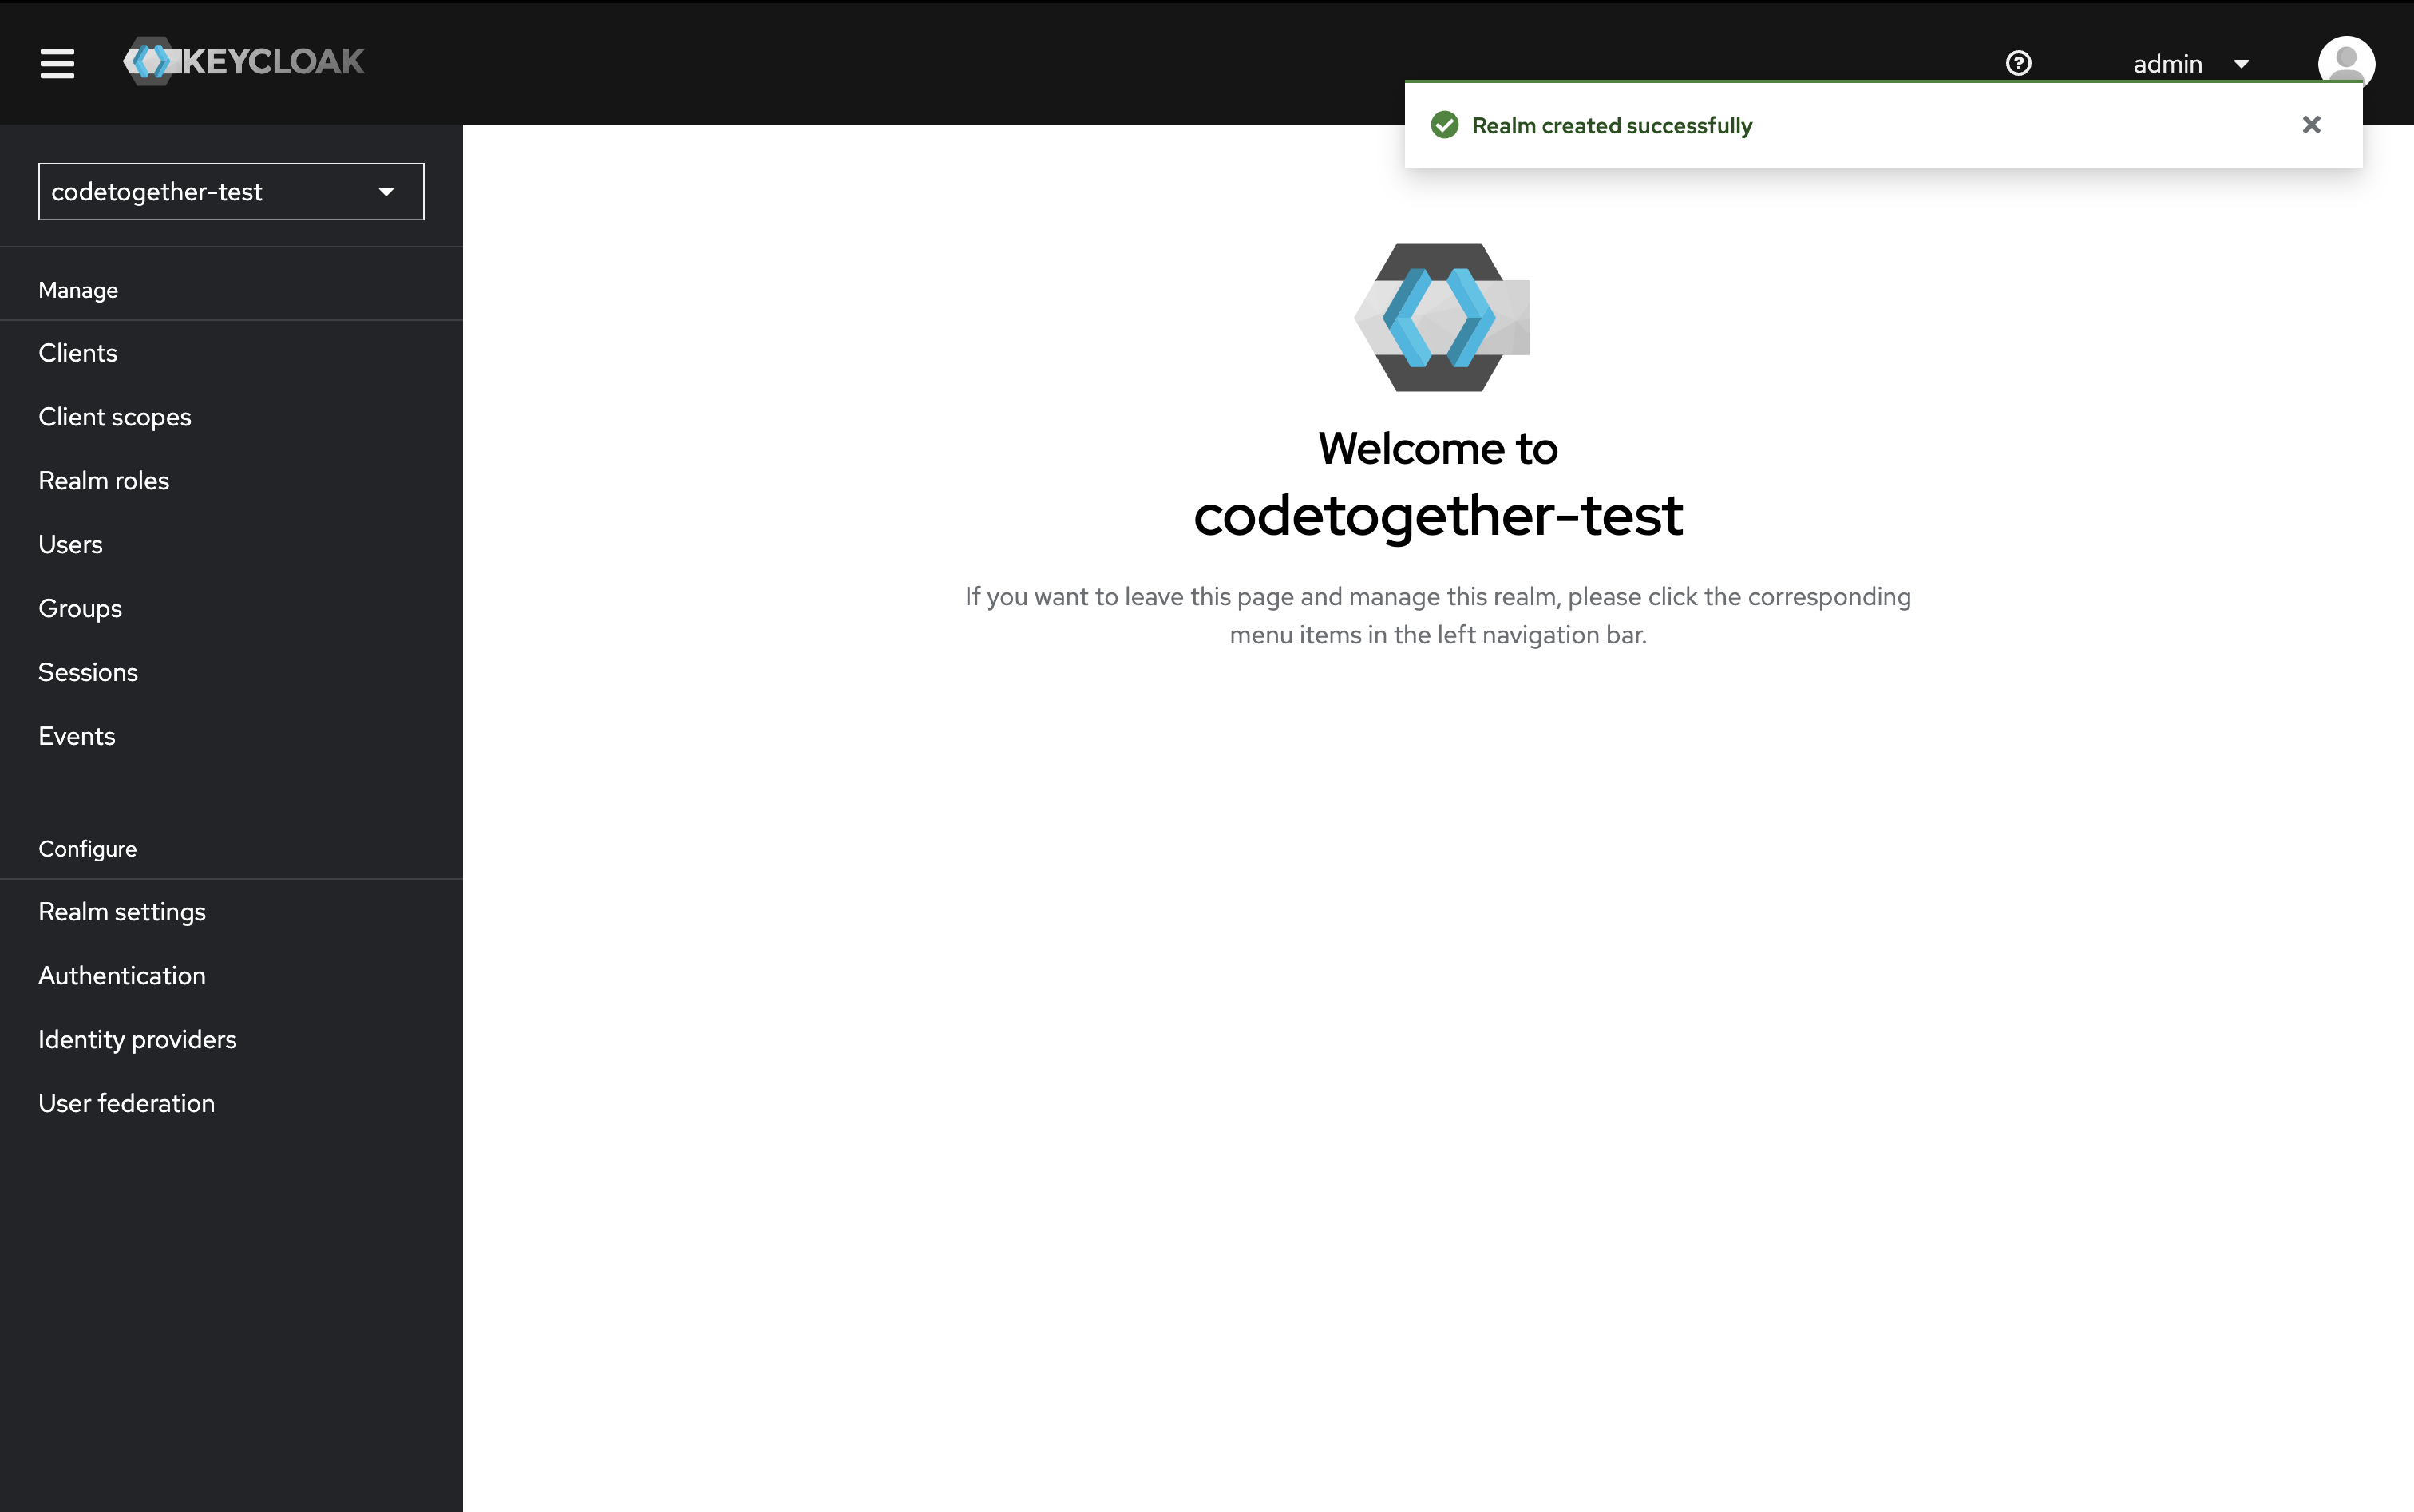
Create a Realm
- Click on the realms dropdown menu, and then click Create realm.
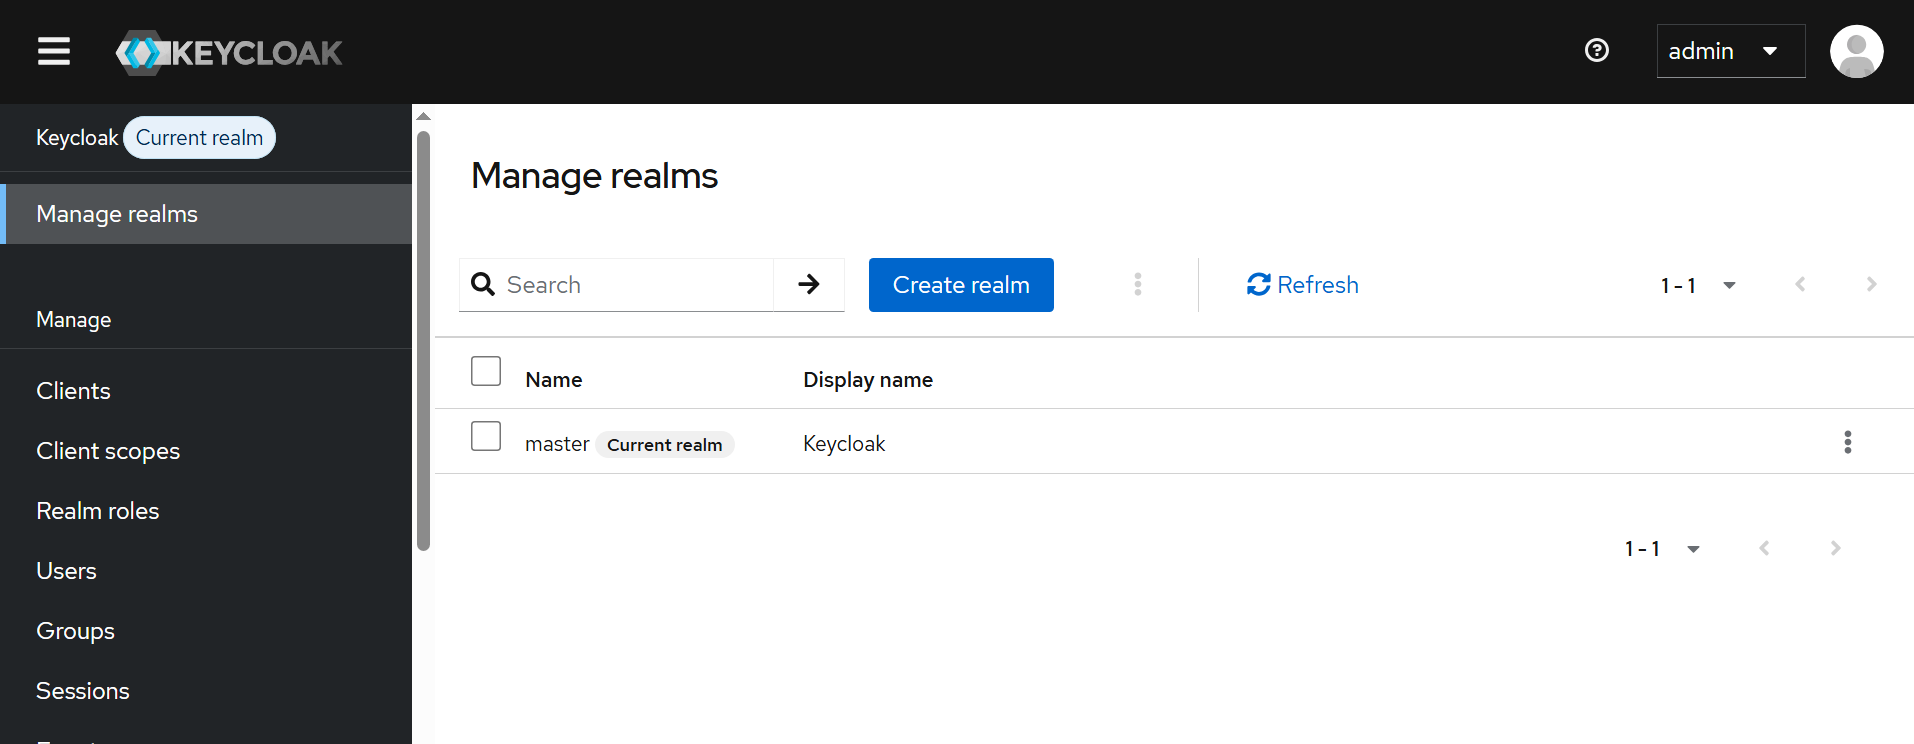
- Specify the realm name: you can use any name, for example
codetogether. - Click Create.
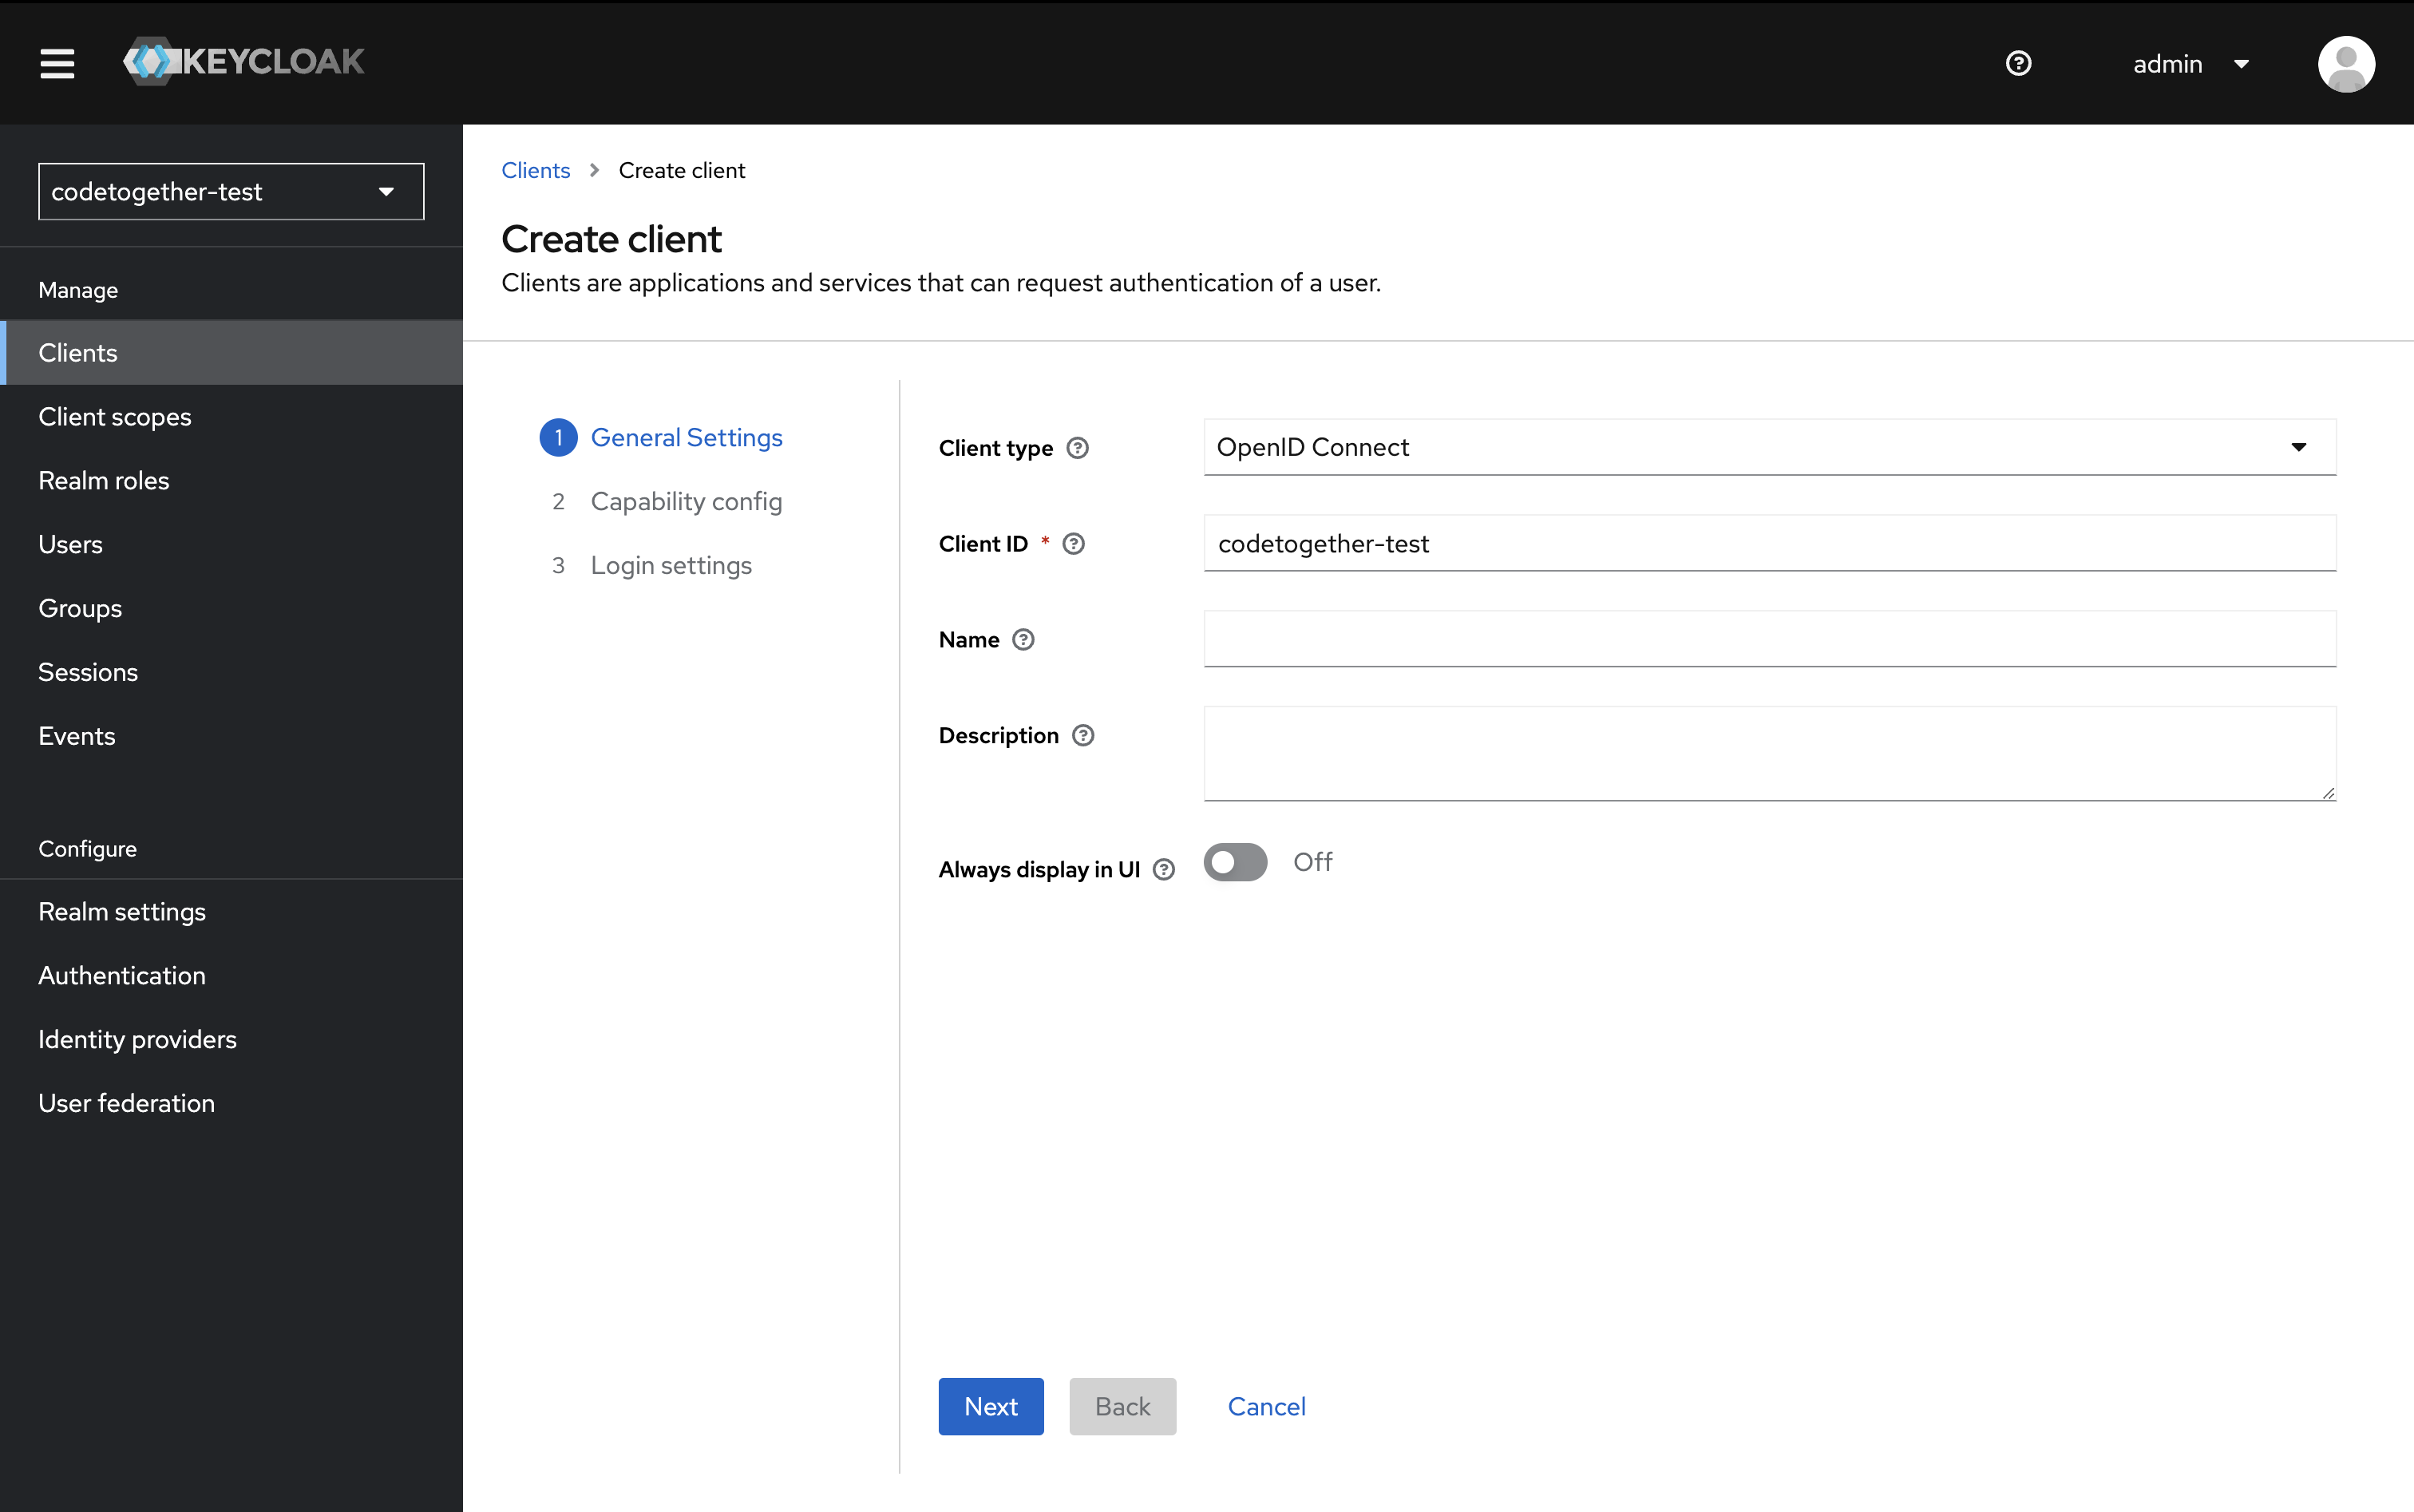
Create a Client
You must select the realm you just created from the realms dropdown before continuing.
- In the left-hand panel, click Clients, then click Create client.
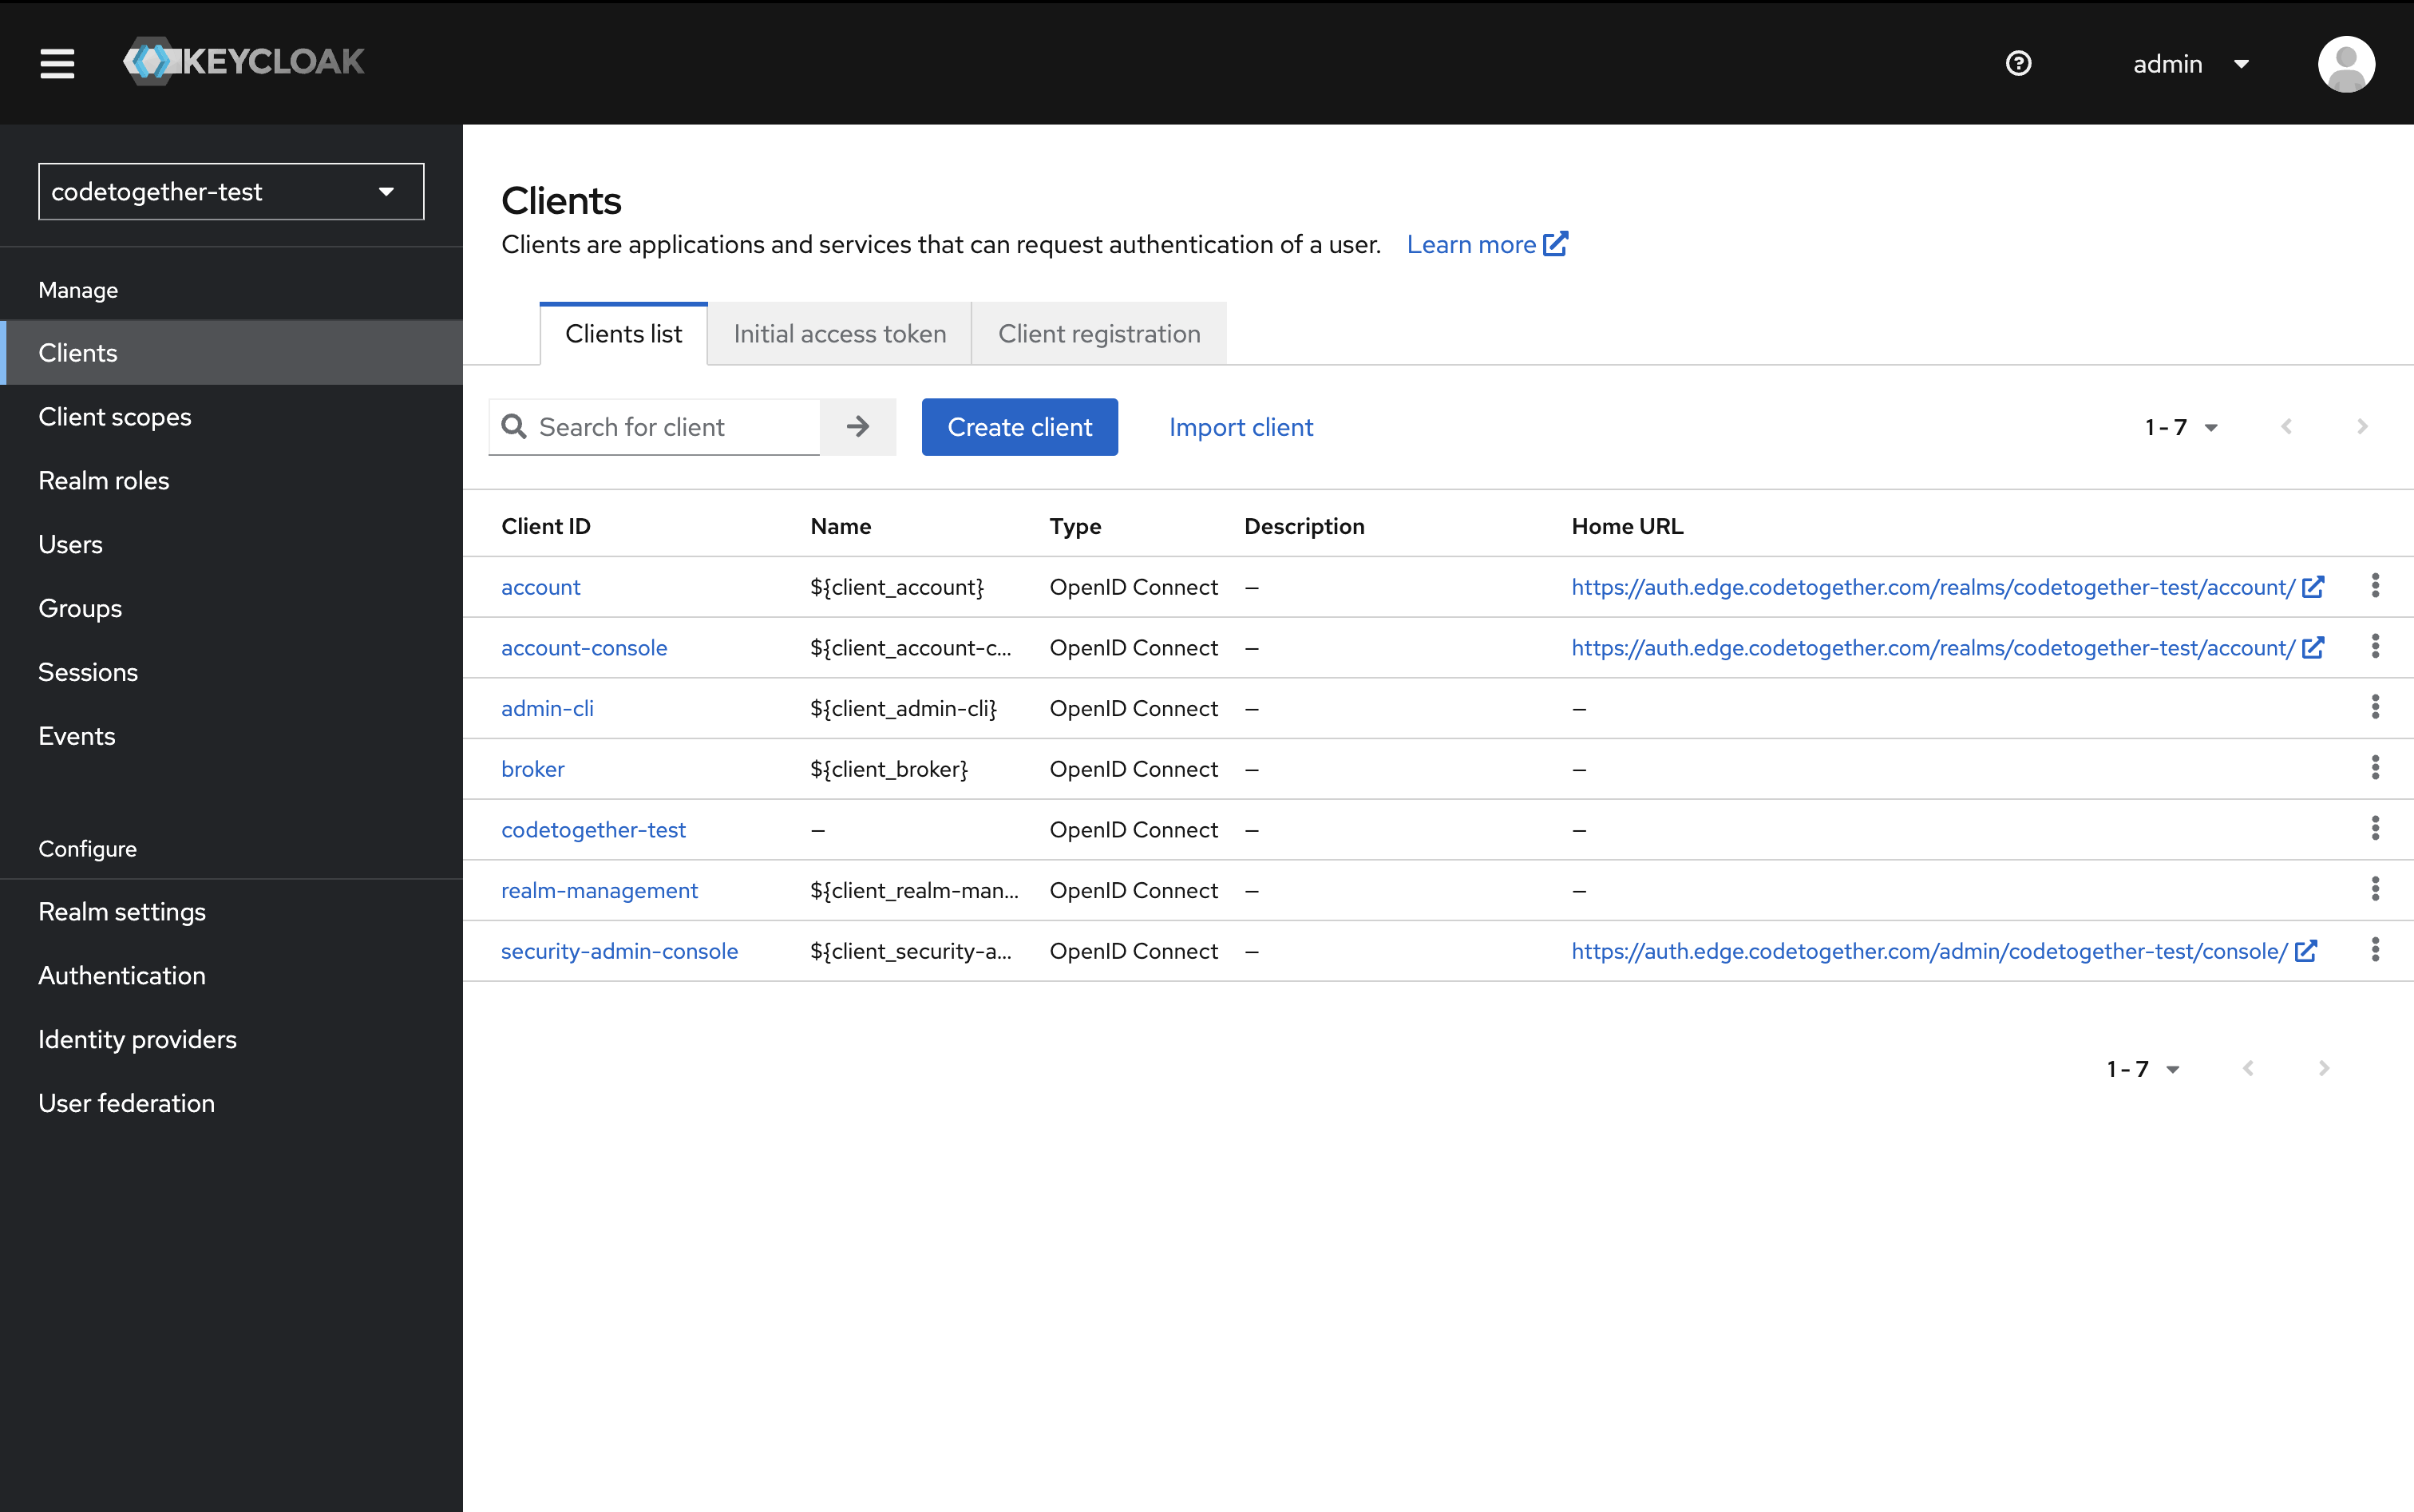
- Specify the client ID: it can be any name, but as a best practice, use the same name as the realm — for example,
codetogether— and click Next.
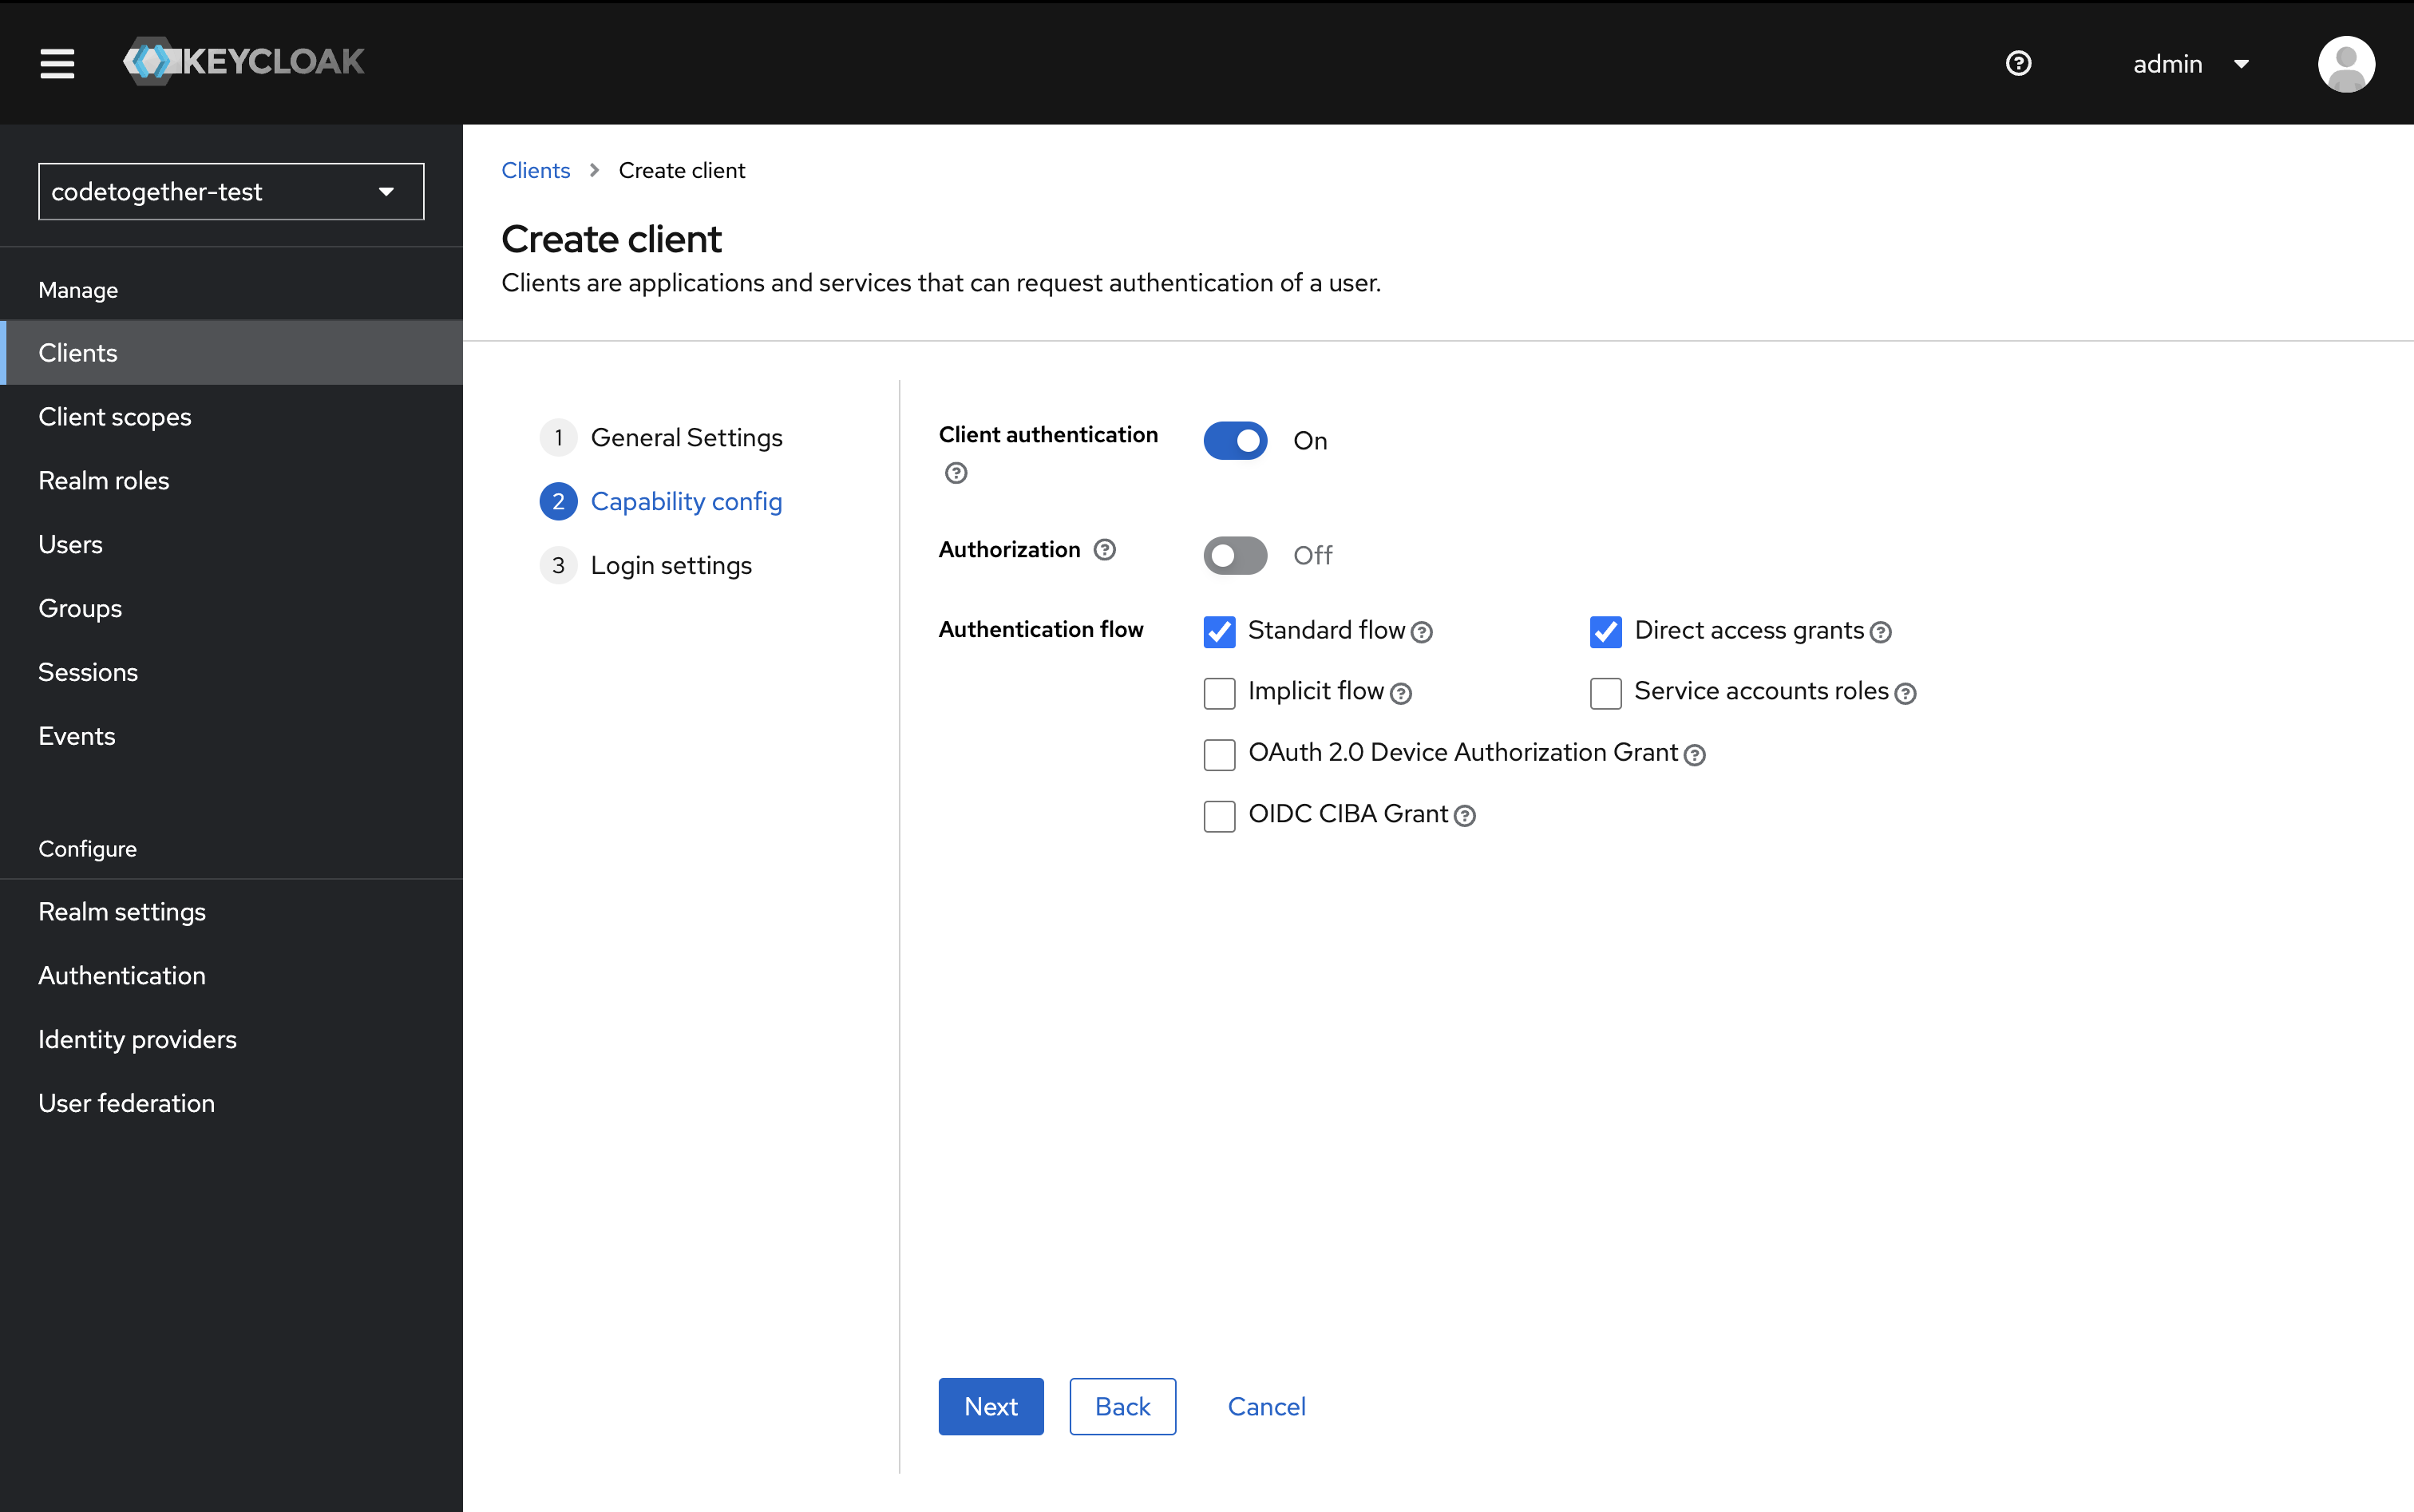
- In the Capability Config section:
- Client authentication: On
- Authentication flow: Enable Standard flow and Direct access grants Then click Next.
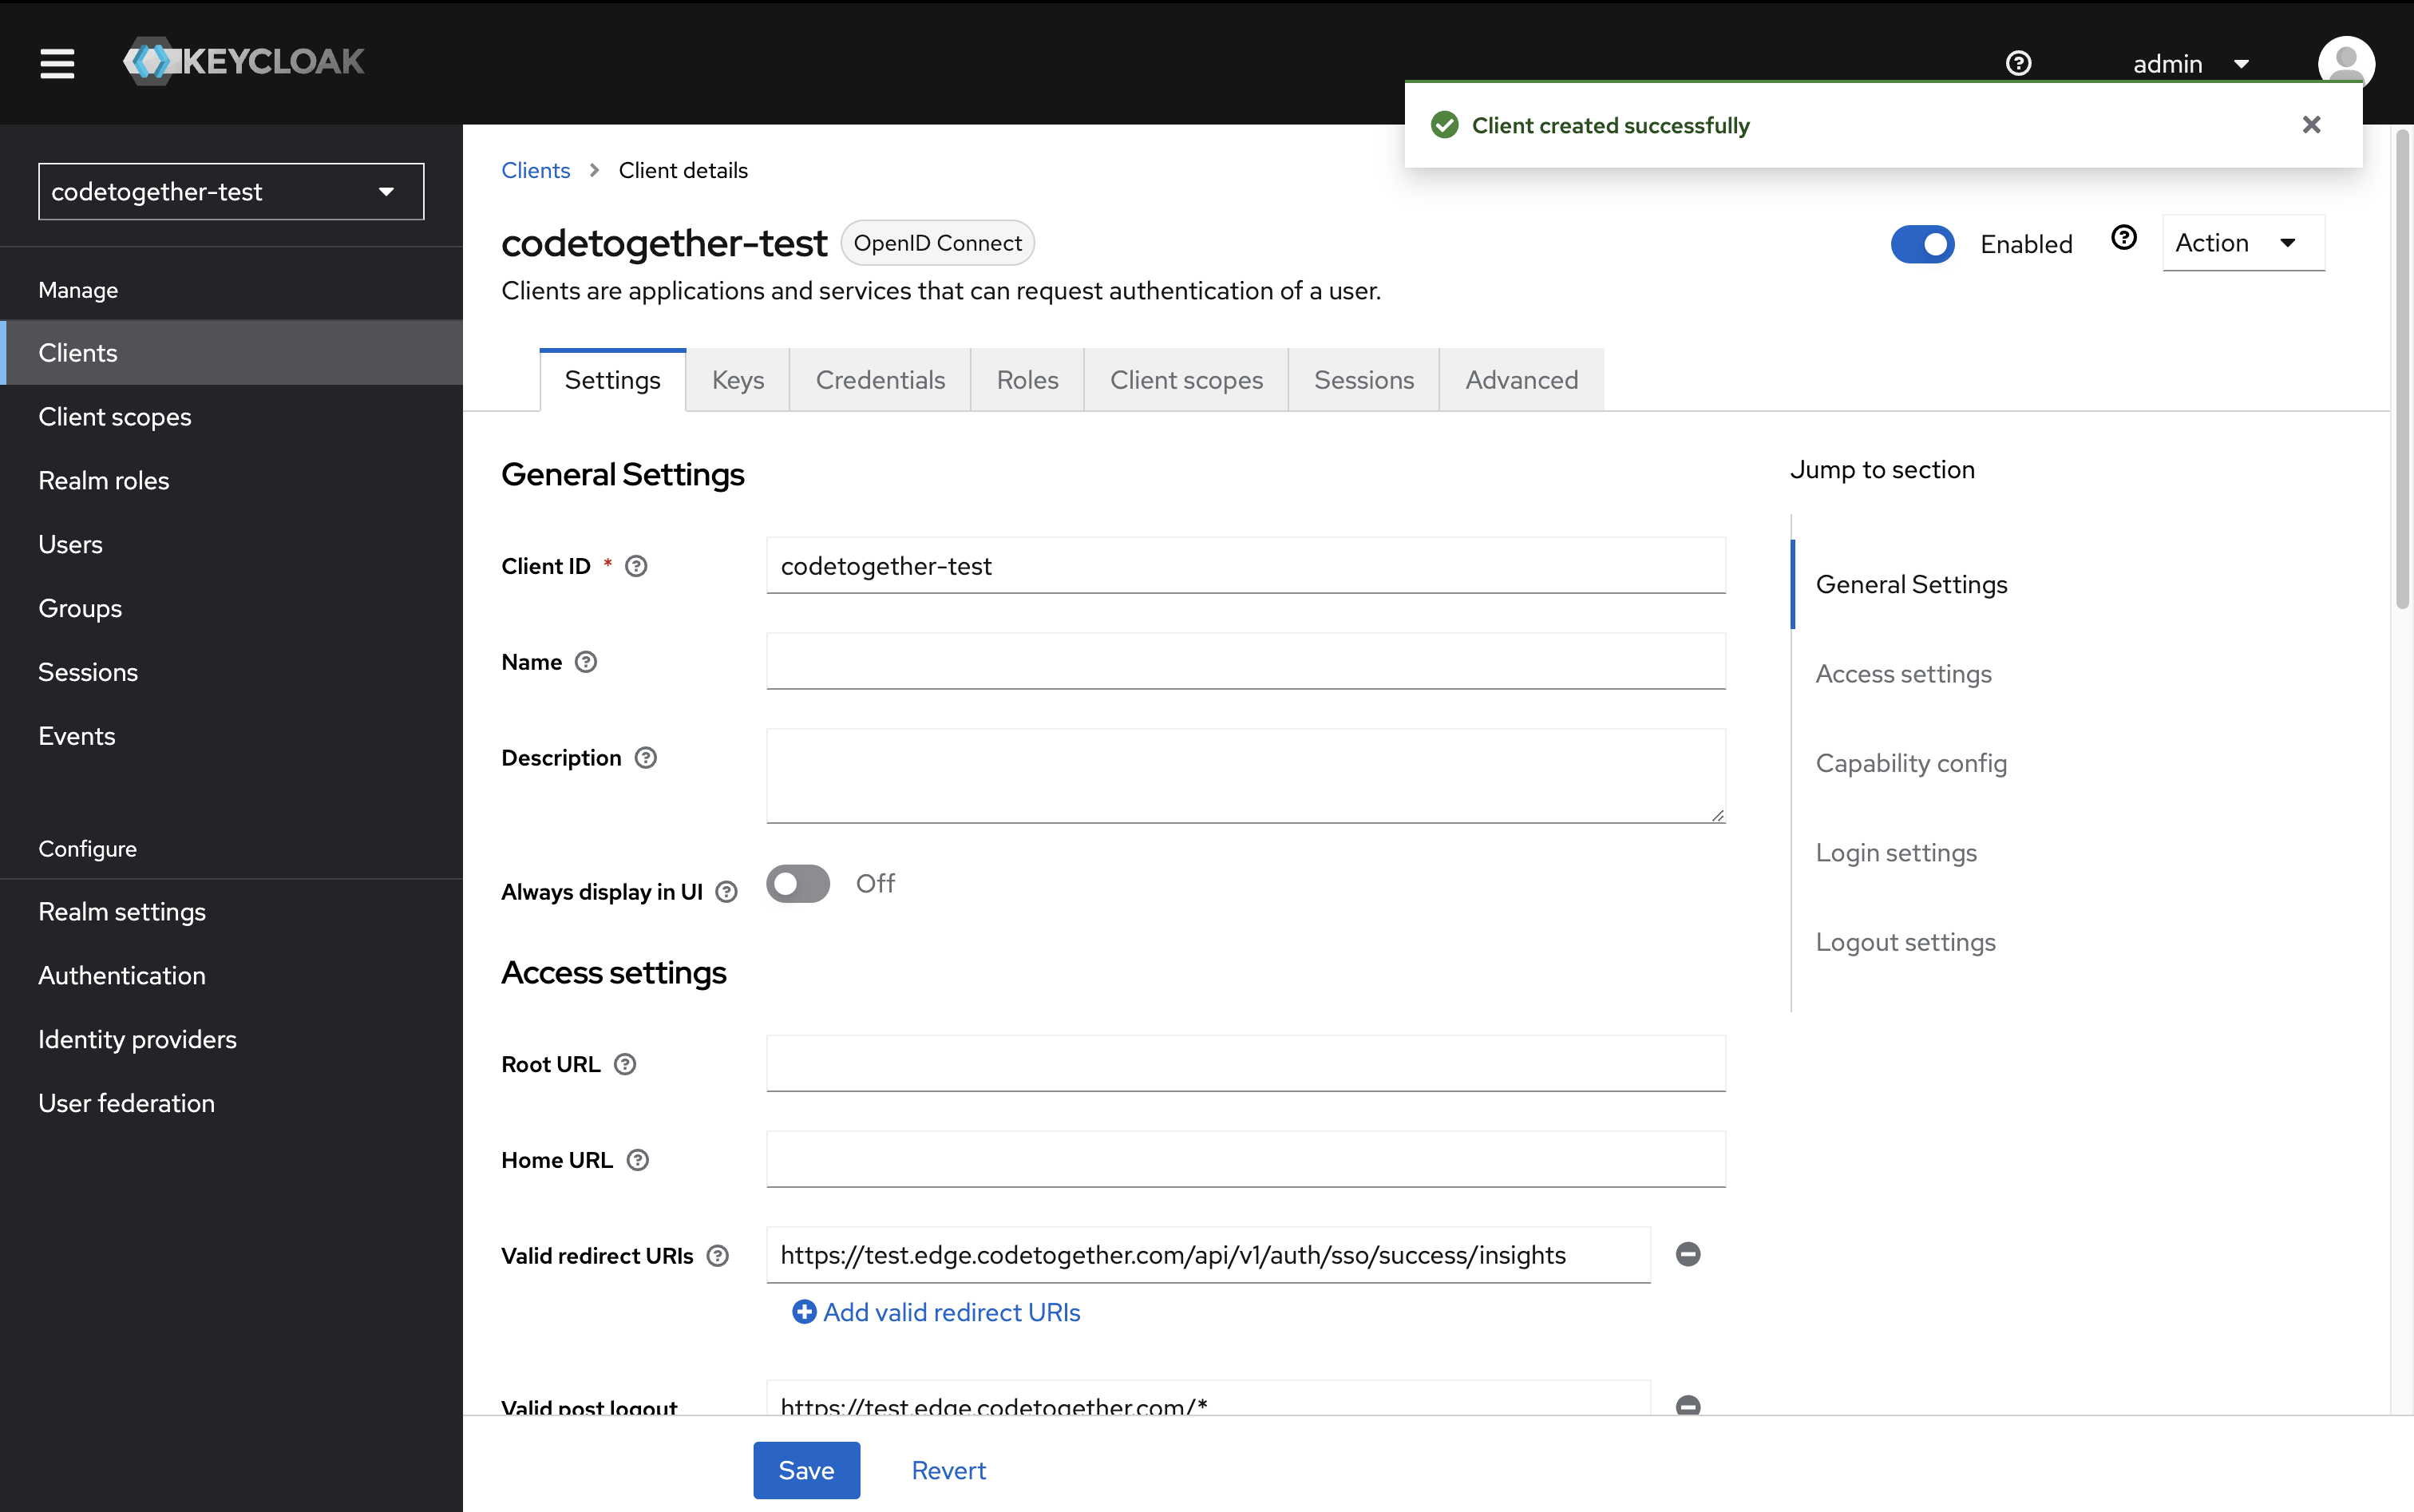
- In Login Settings, add the following:
Valid Redirect URIs Enter the URI that users will be redirected to after a successful login.
Example:
https://test.edge.codetogether.com/api/v1/auth/sso/success/insightsValid Post Logout Redirect URIs Enter the URI users will be redirected to after logging out. Wildcards are allowed.
Example:
https://test.edge.codetogether.com/*Web Origins Define which origins are allowed for CORS. This should match your application domain (without any path).
Example:
https://test.edge.codetogether.com
Make sure these values match what you’ve configured in your cthq.properties file.

- Click Save.
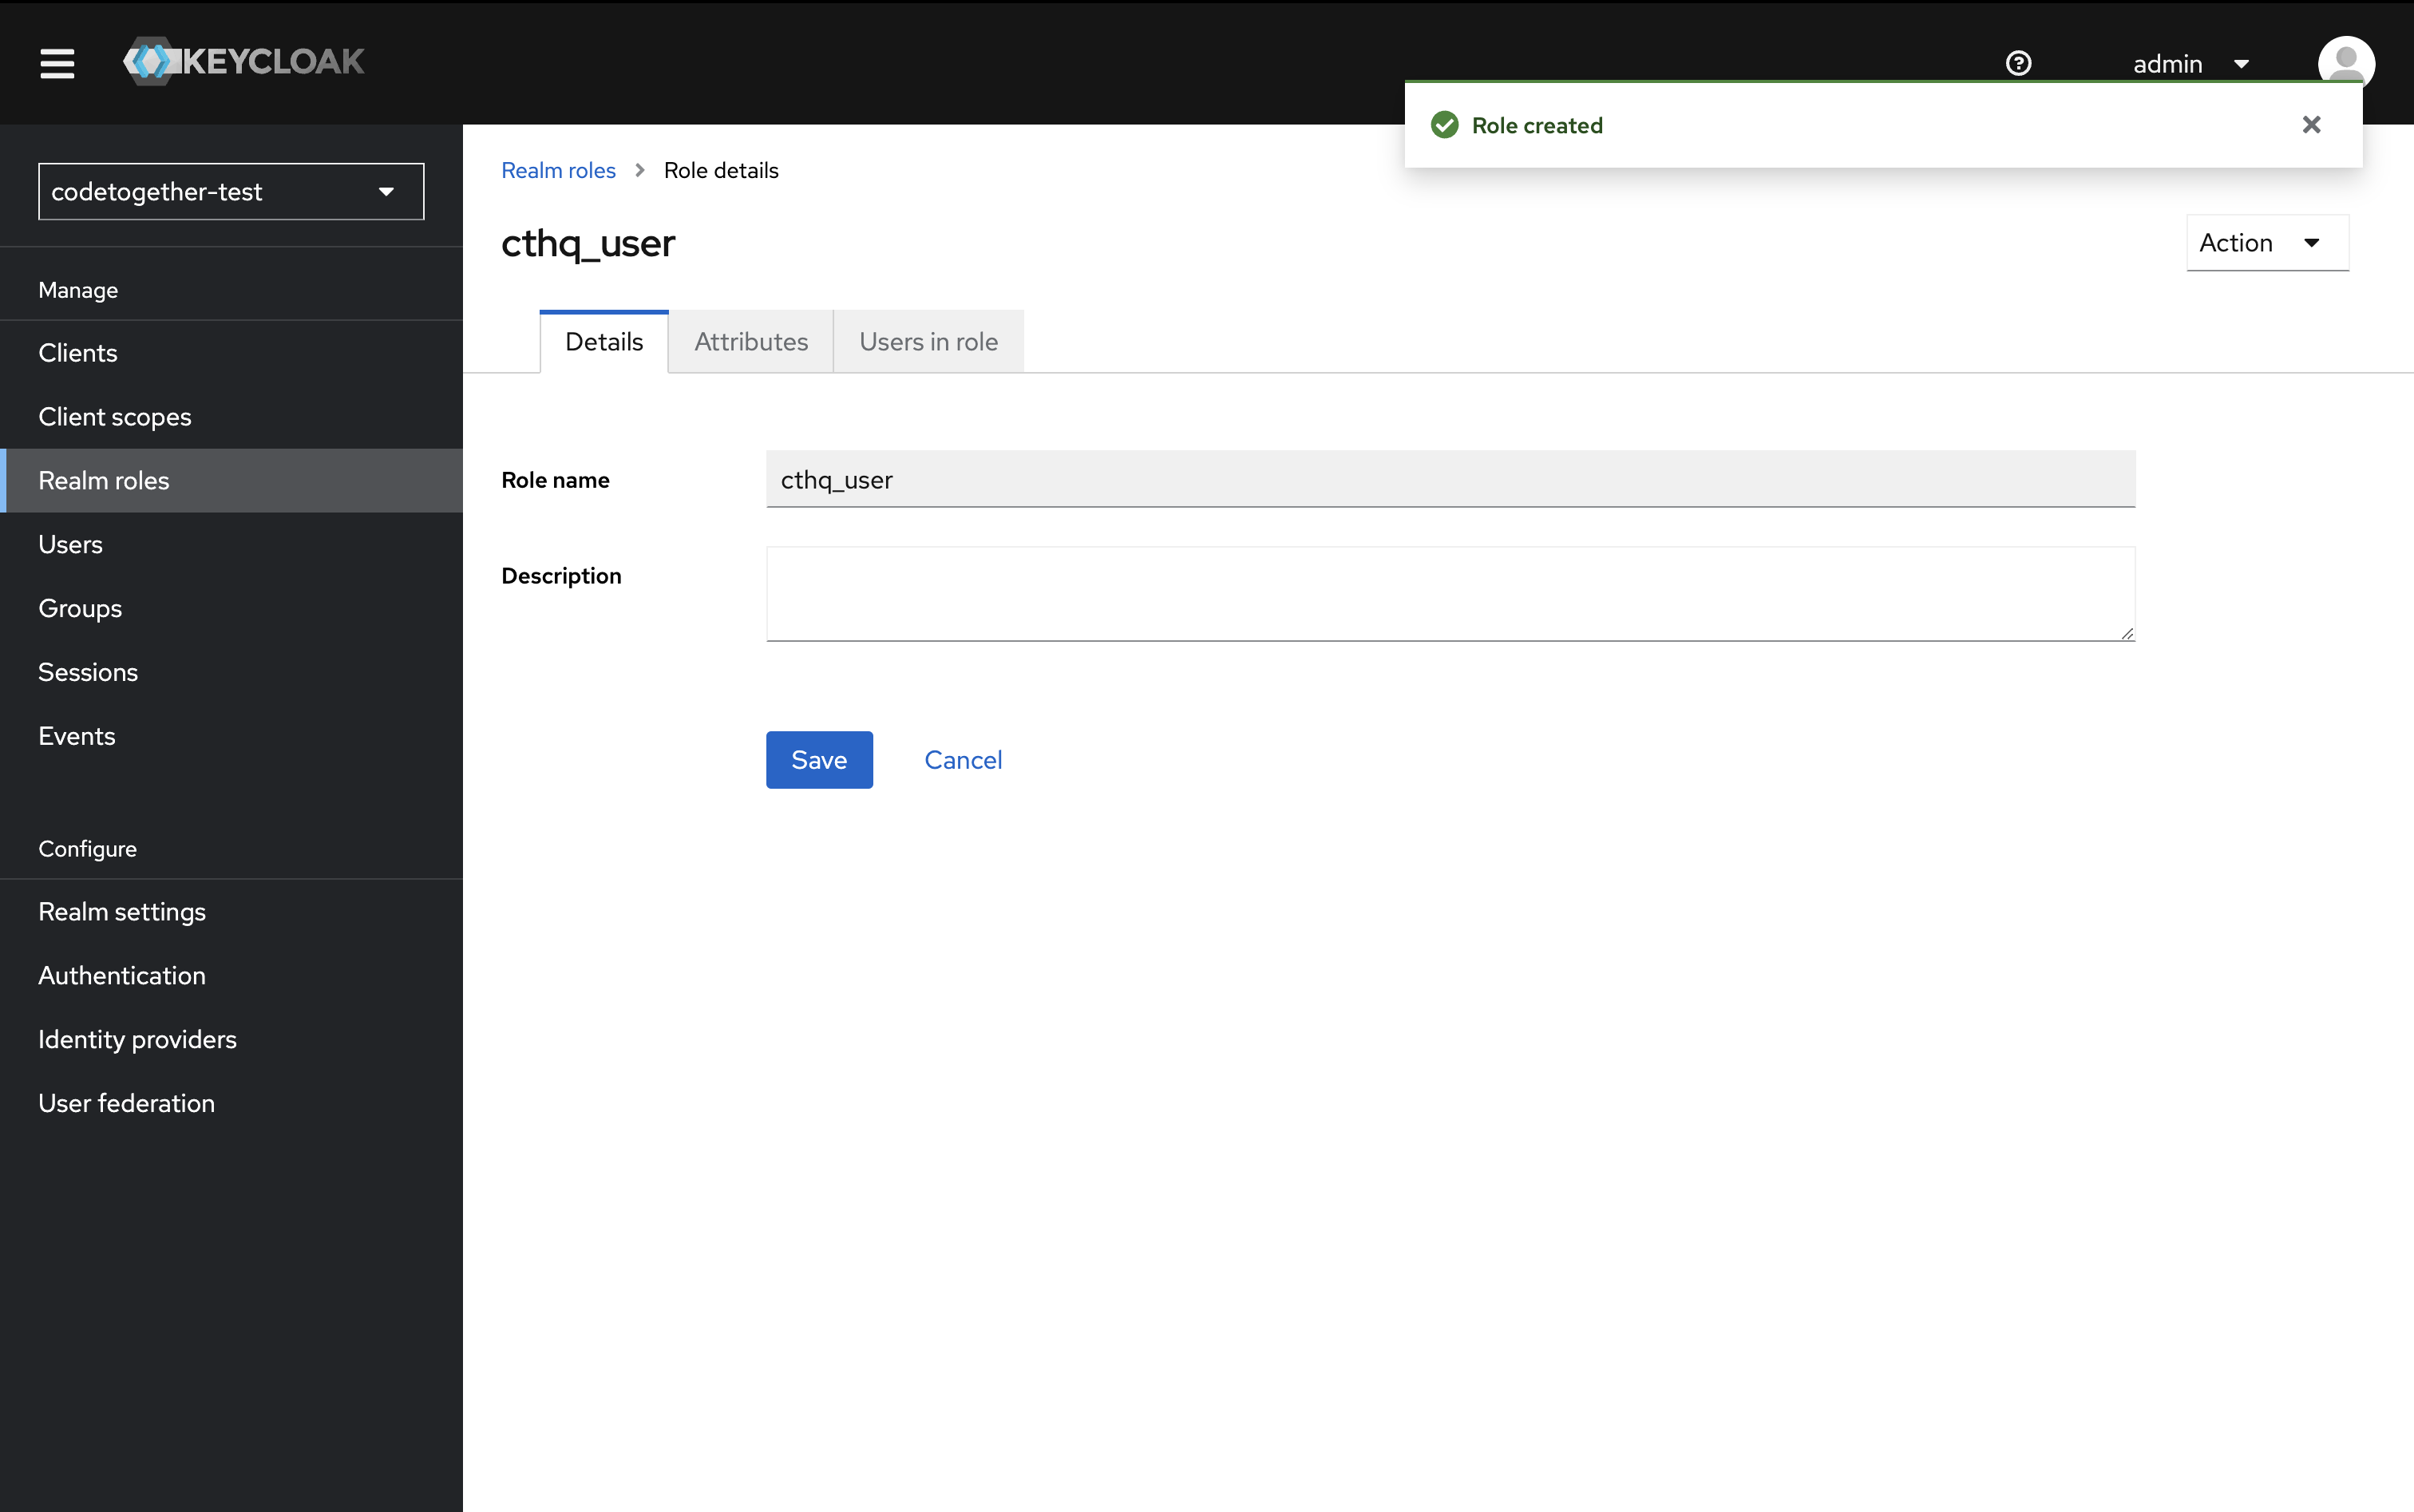
Create a Role
- In the left-hand panel, click Realm roles, then click Create role.
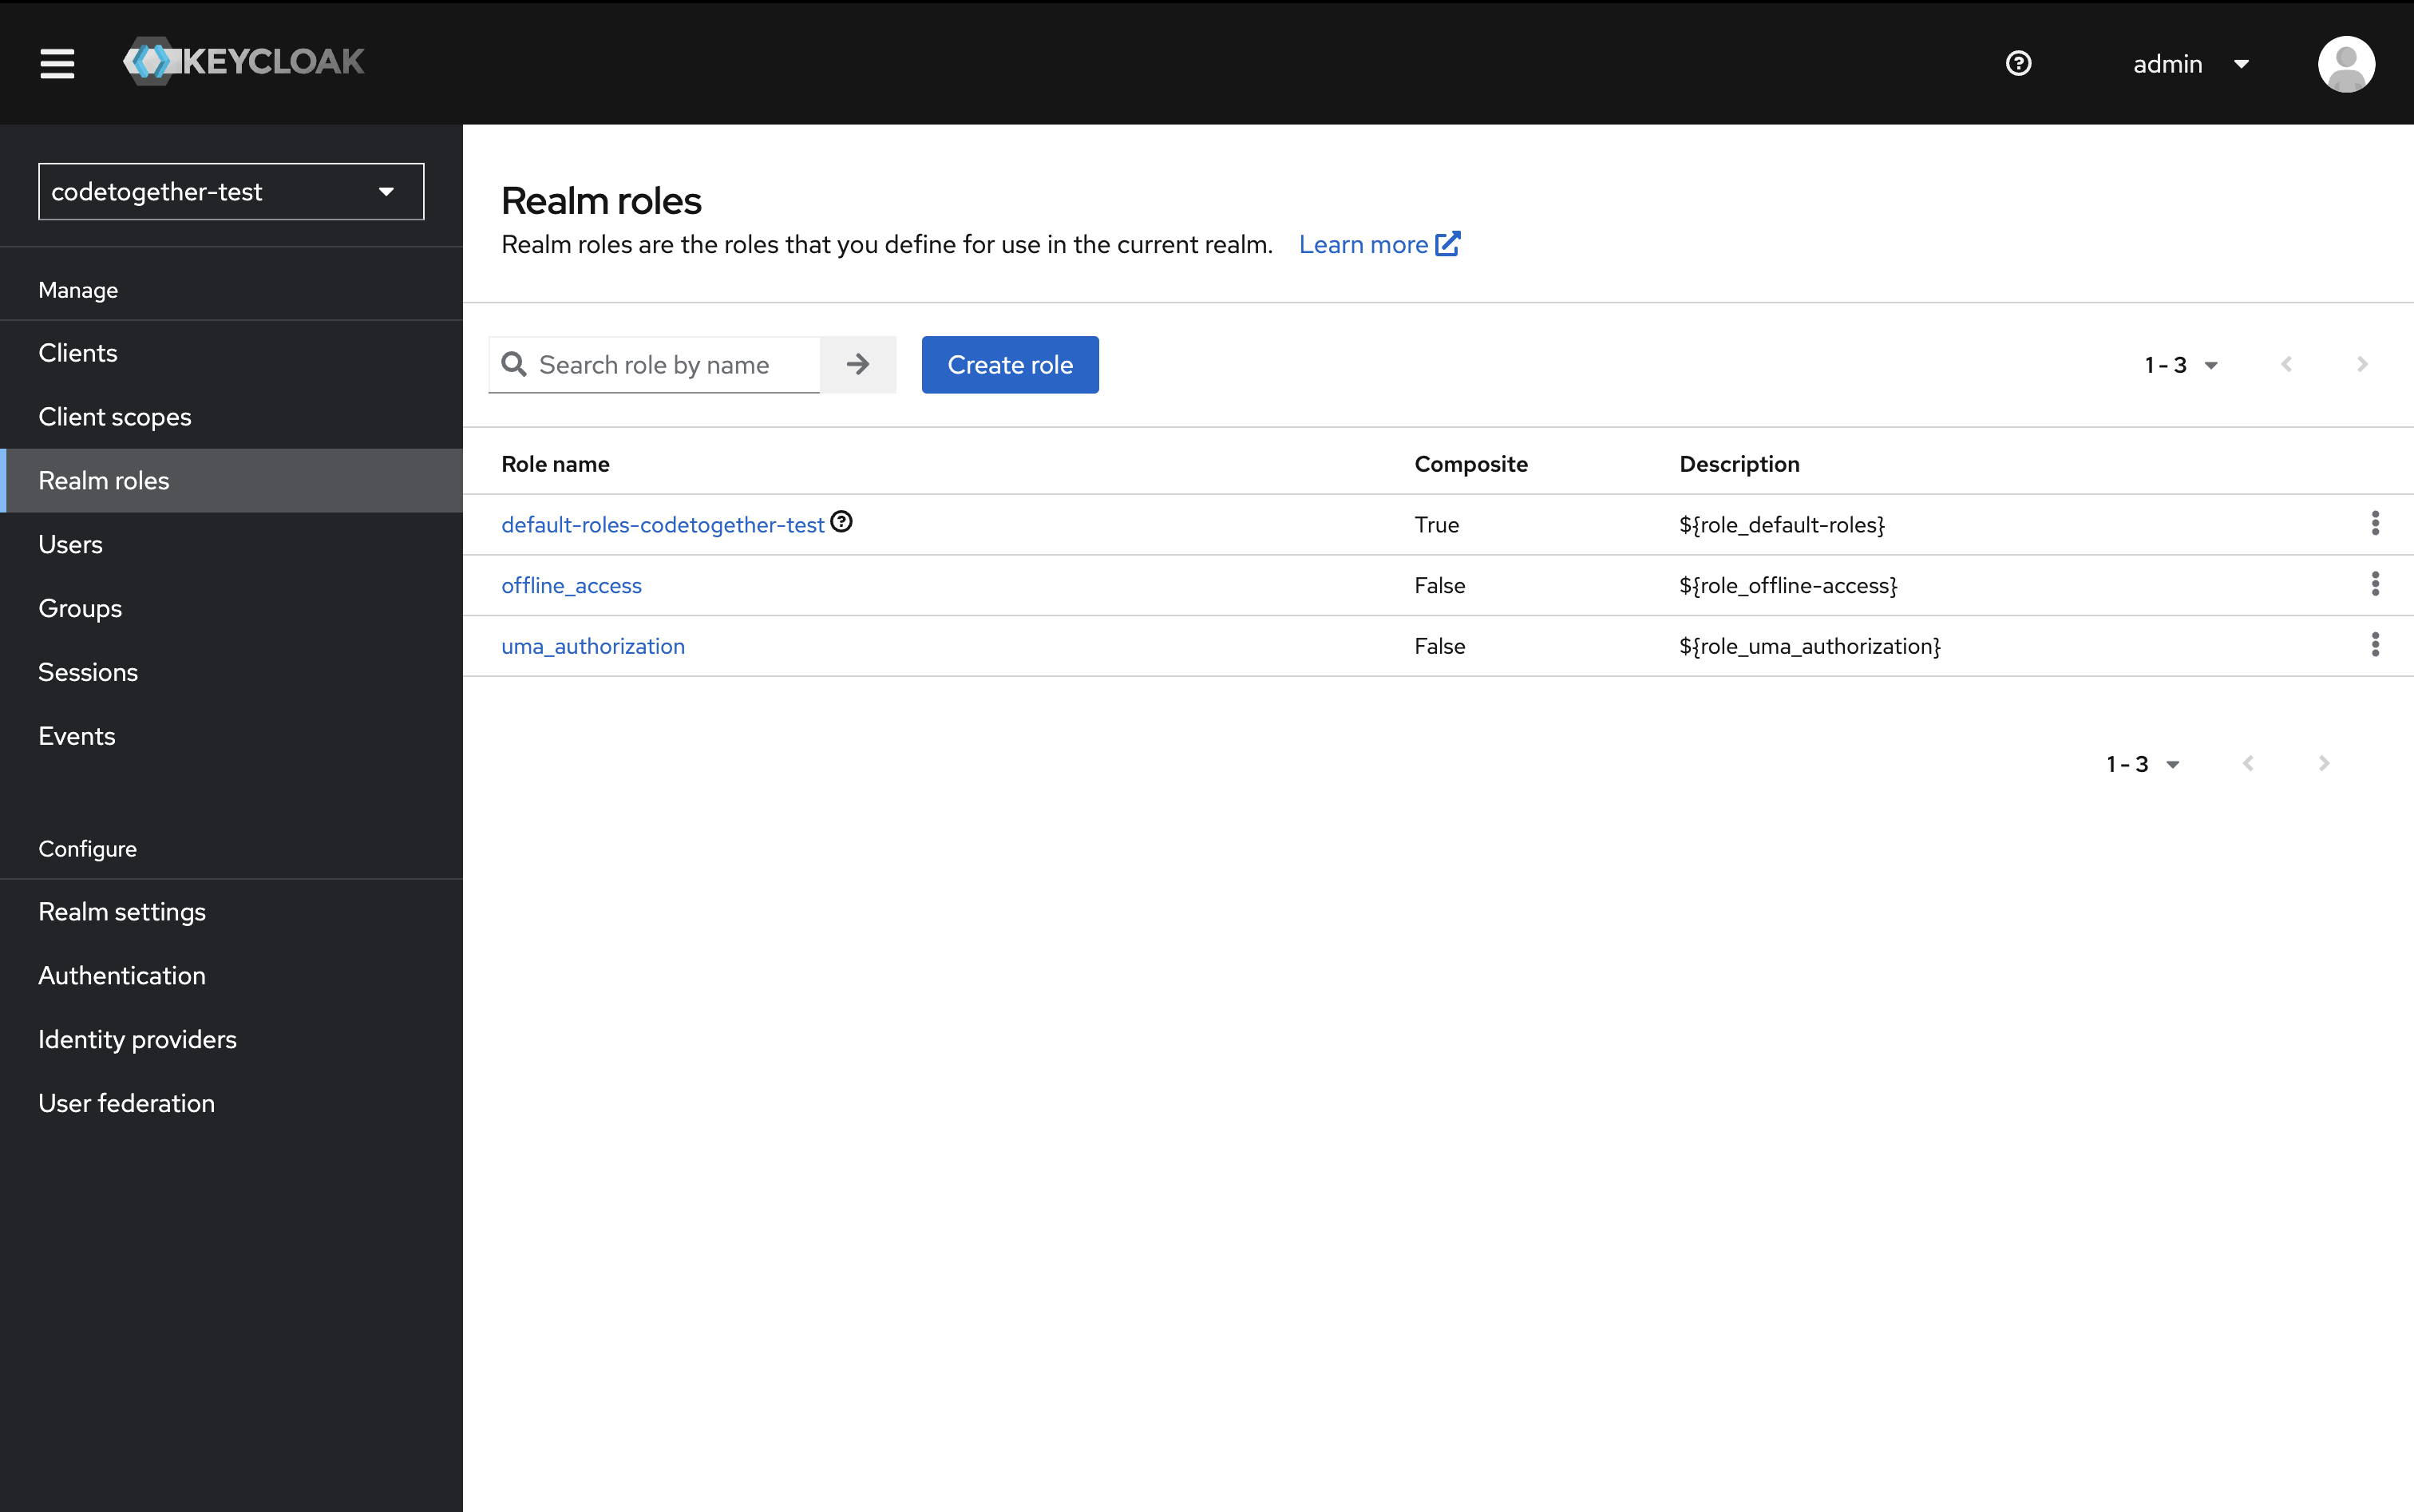
- Specify the role name:
cthq_user.
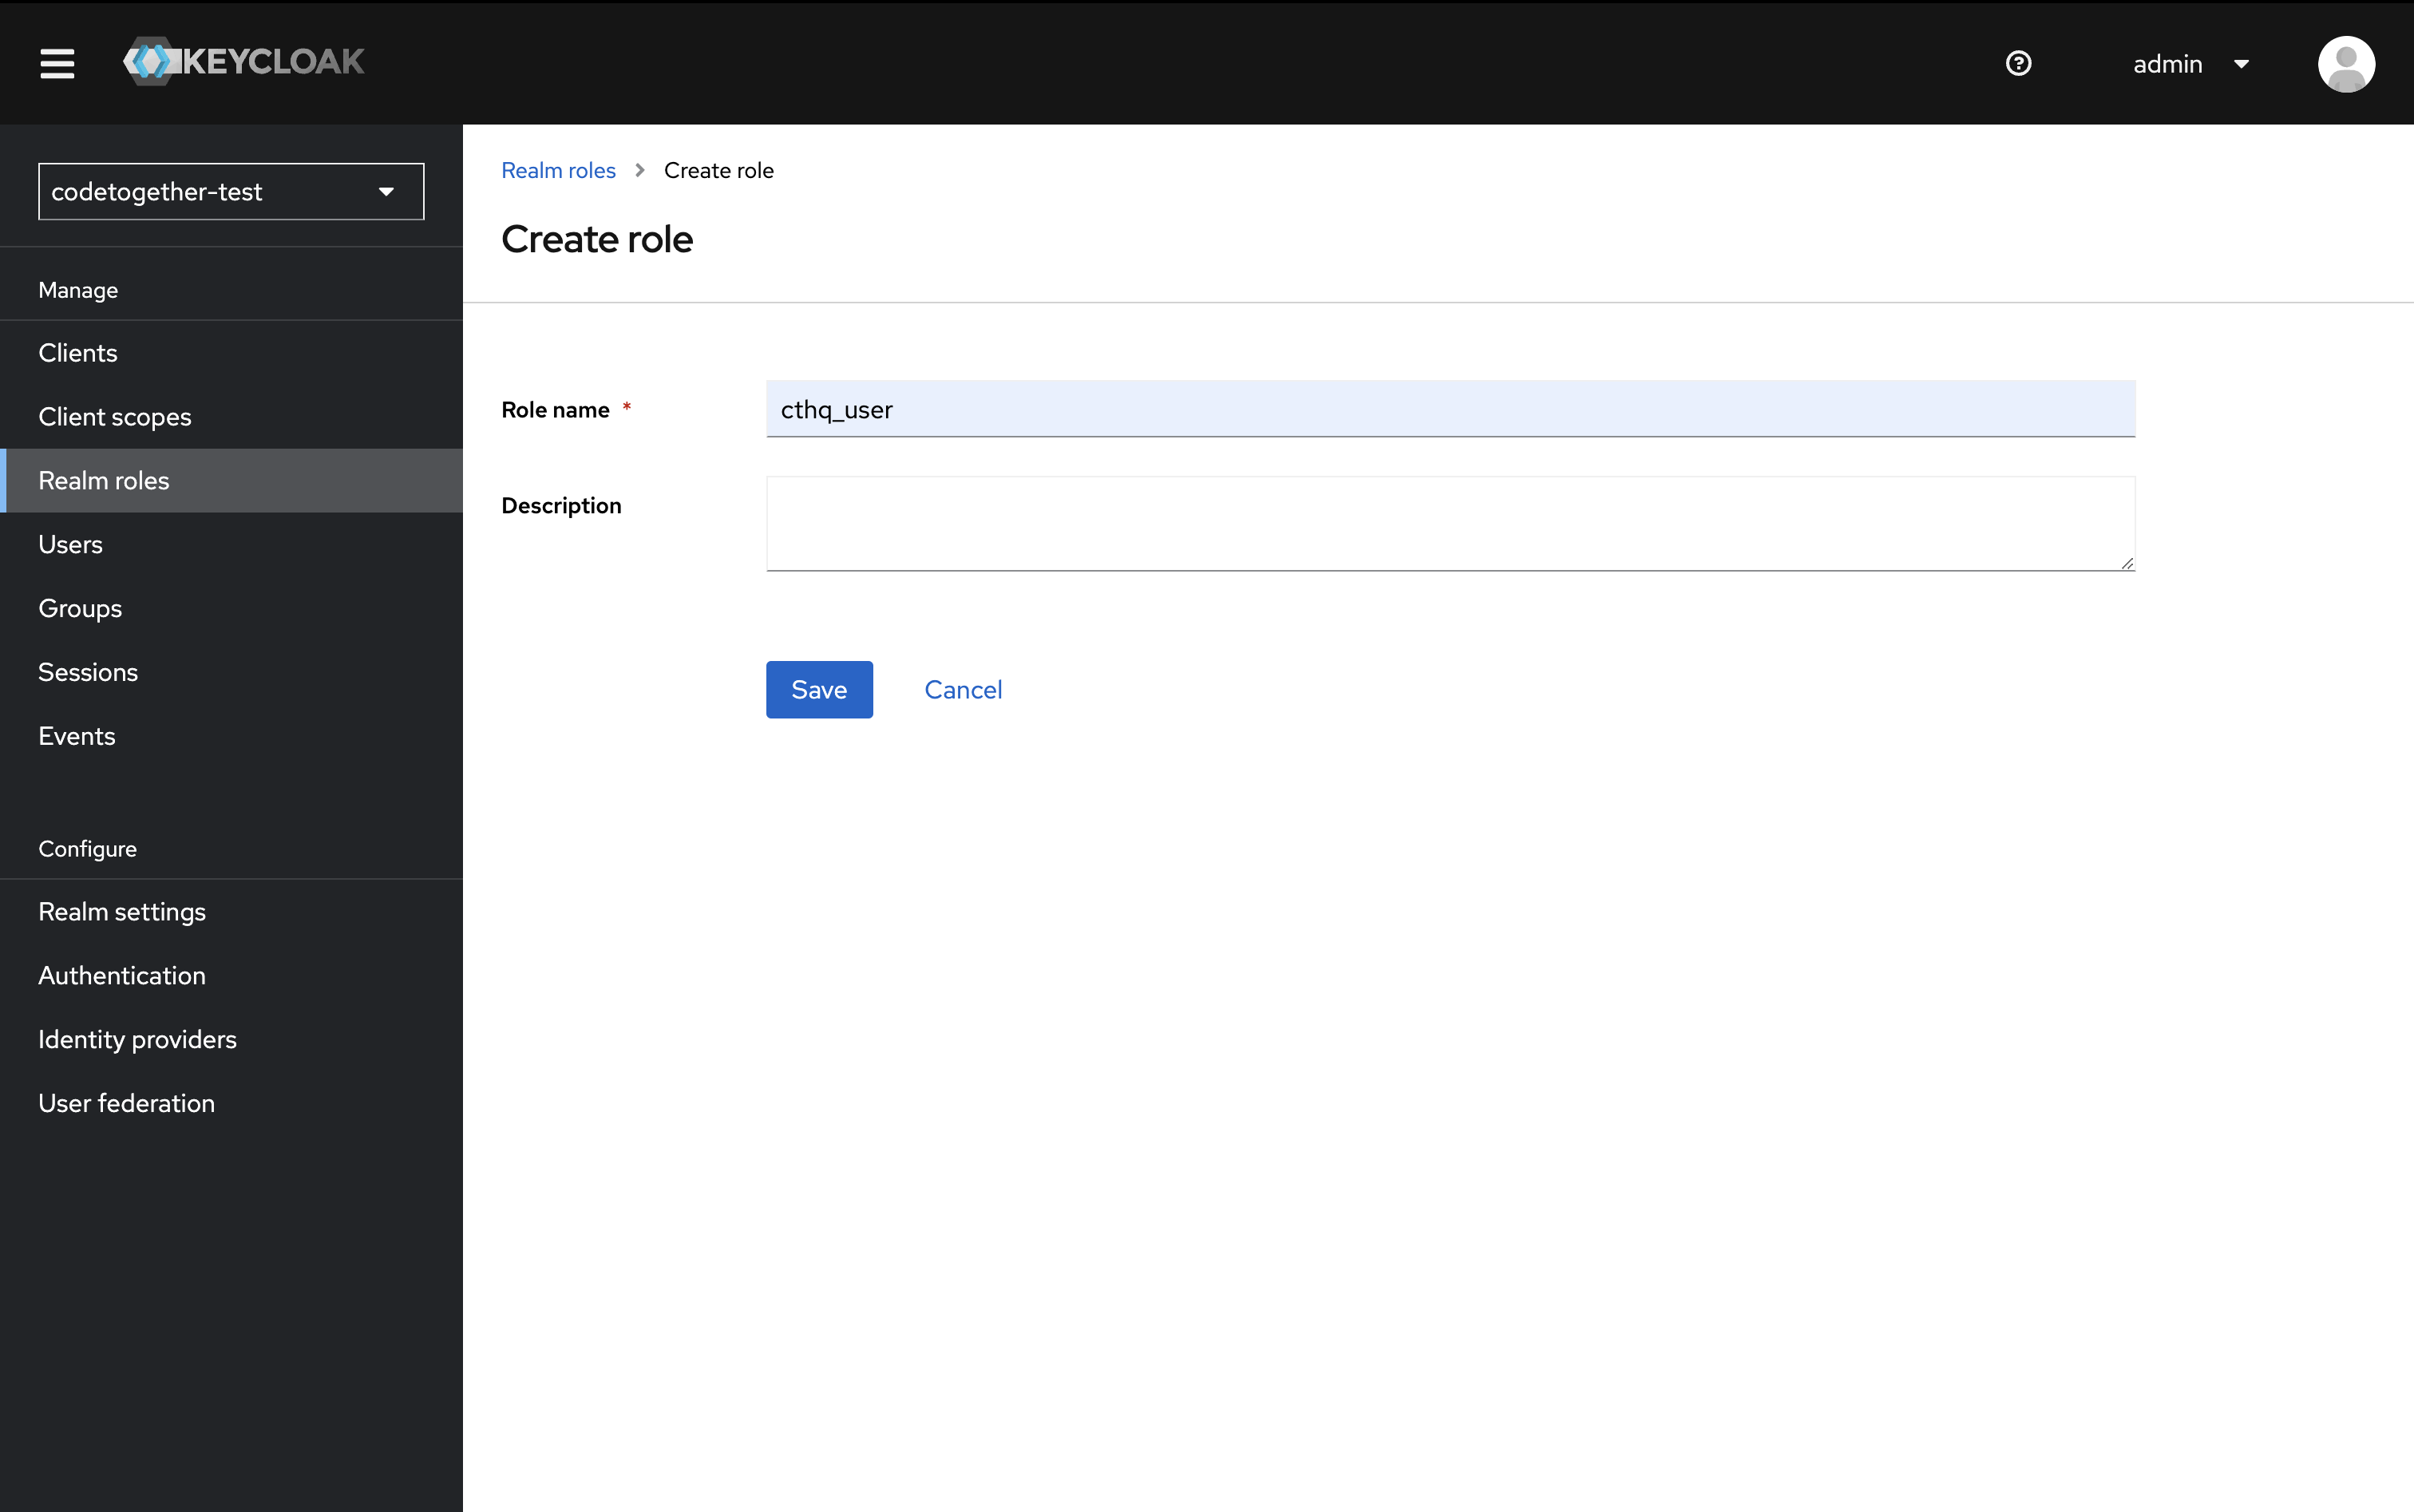
- Click Save.
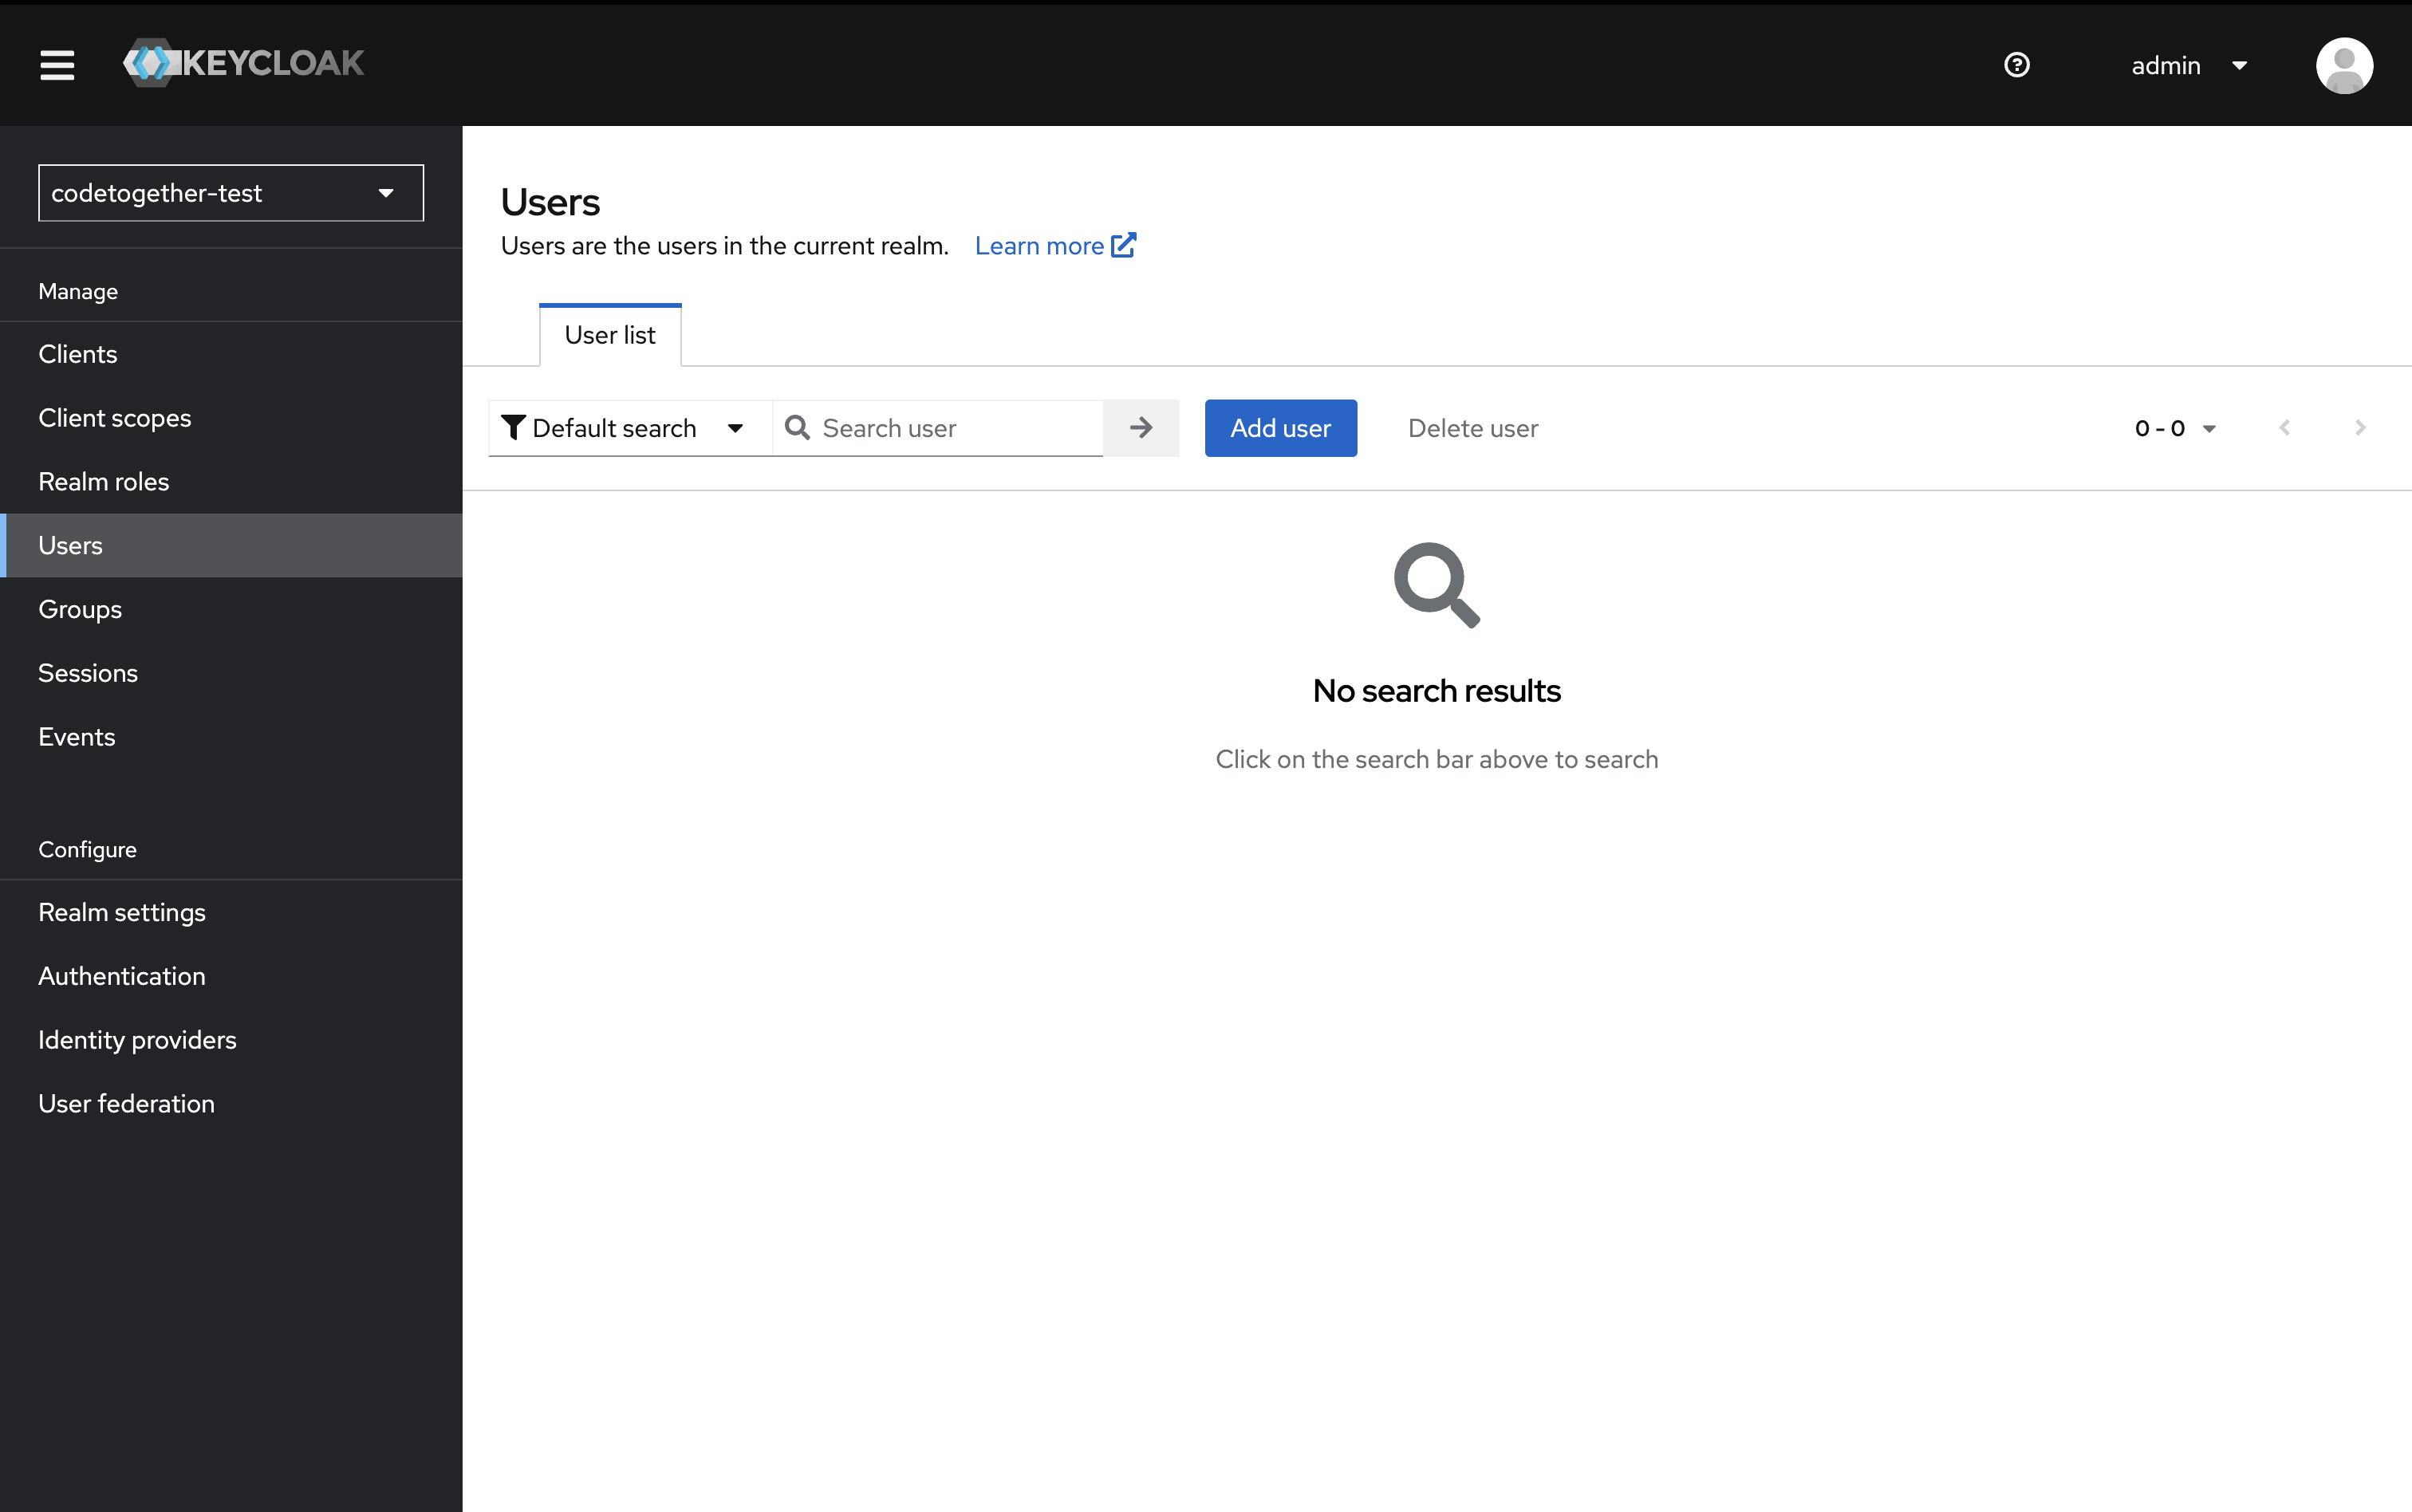
Create a User
This setup does not include email verification because an email server has not been configured. As a result, each user must have a password manually set.
The final step is to create a user account for each CodeTogether HQ user:
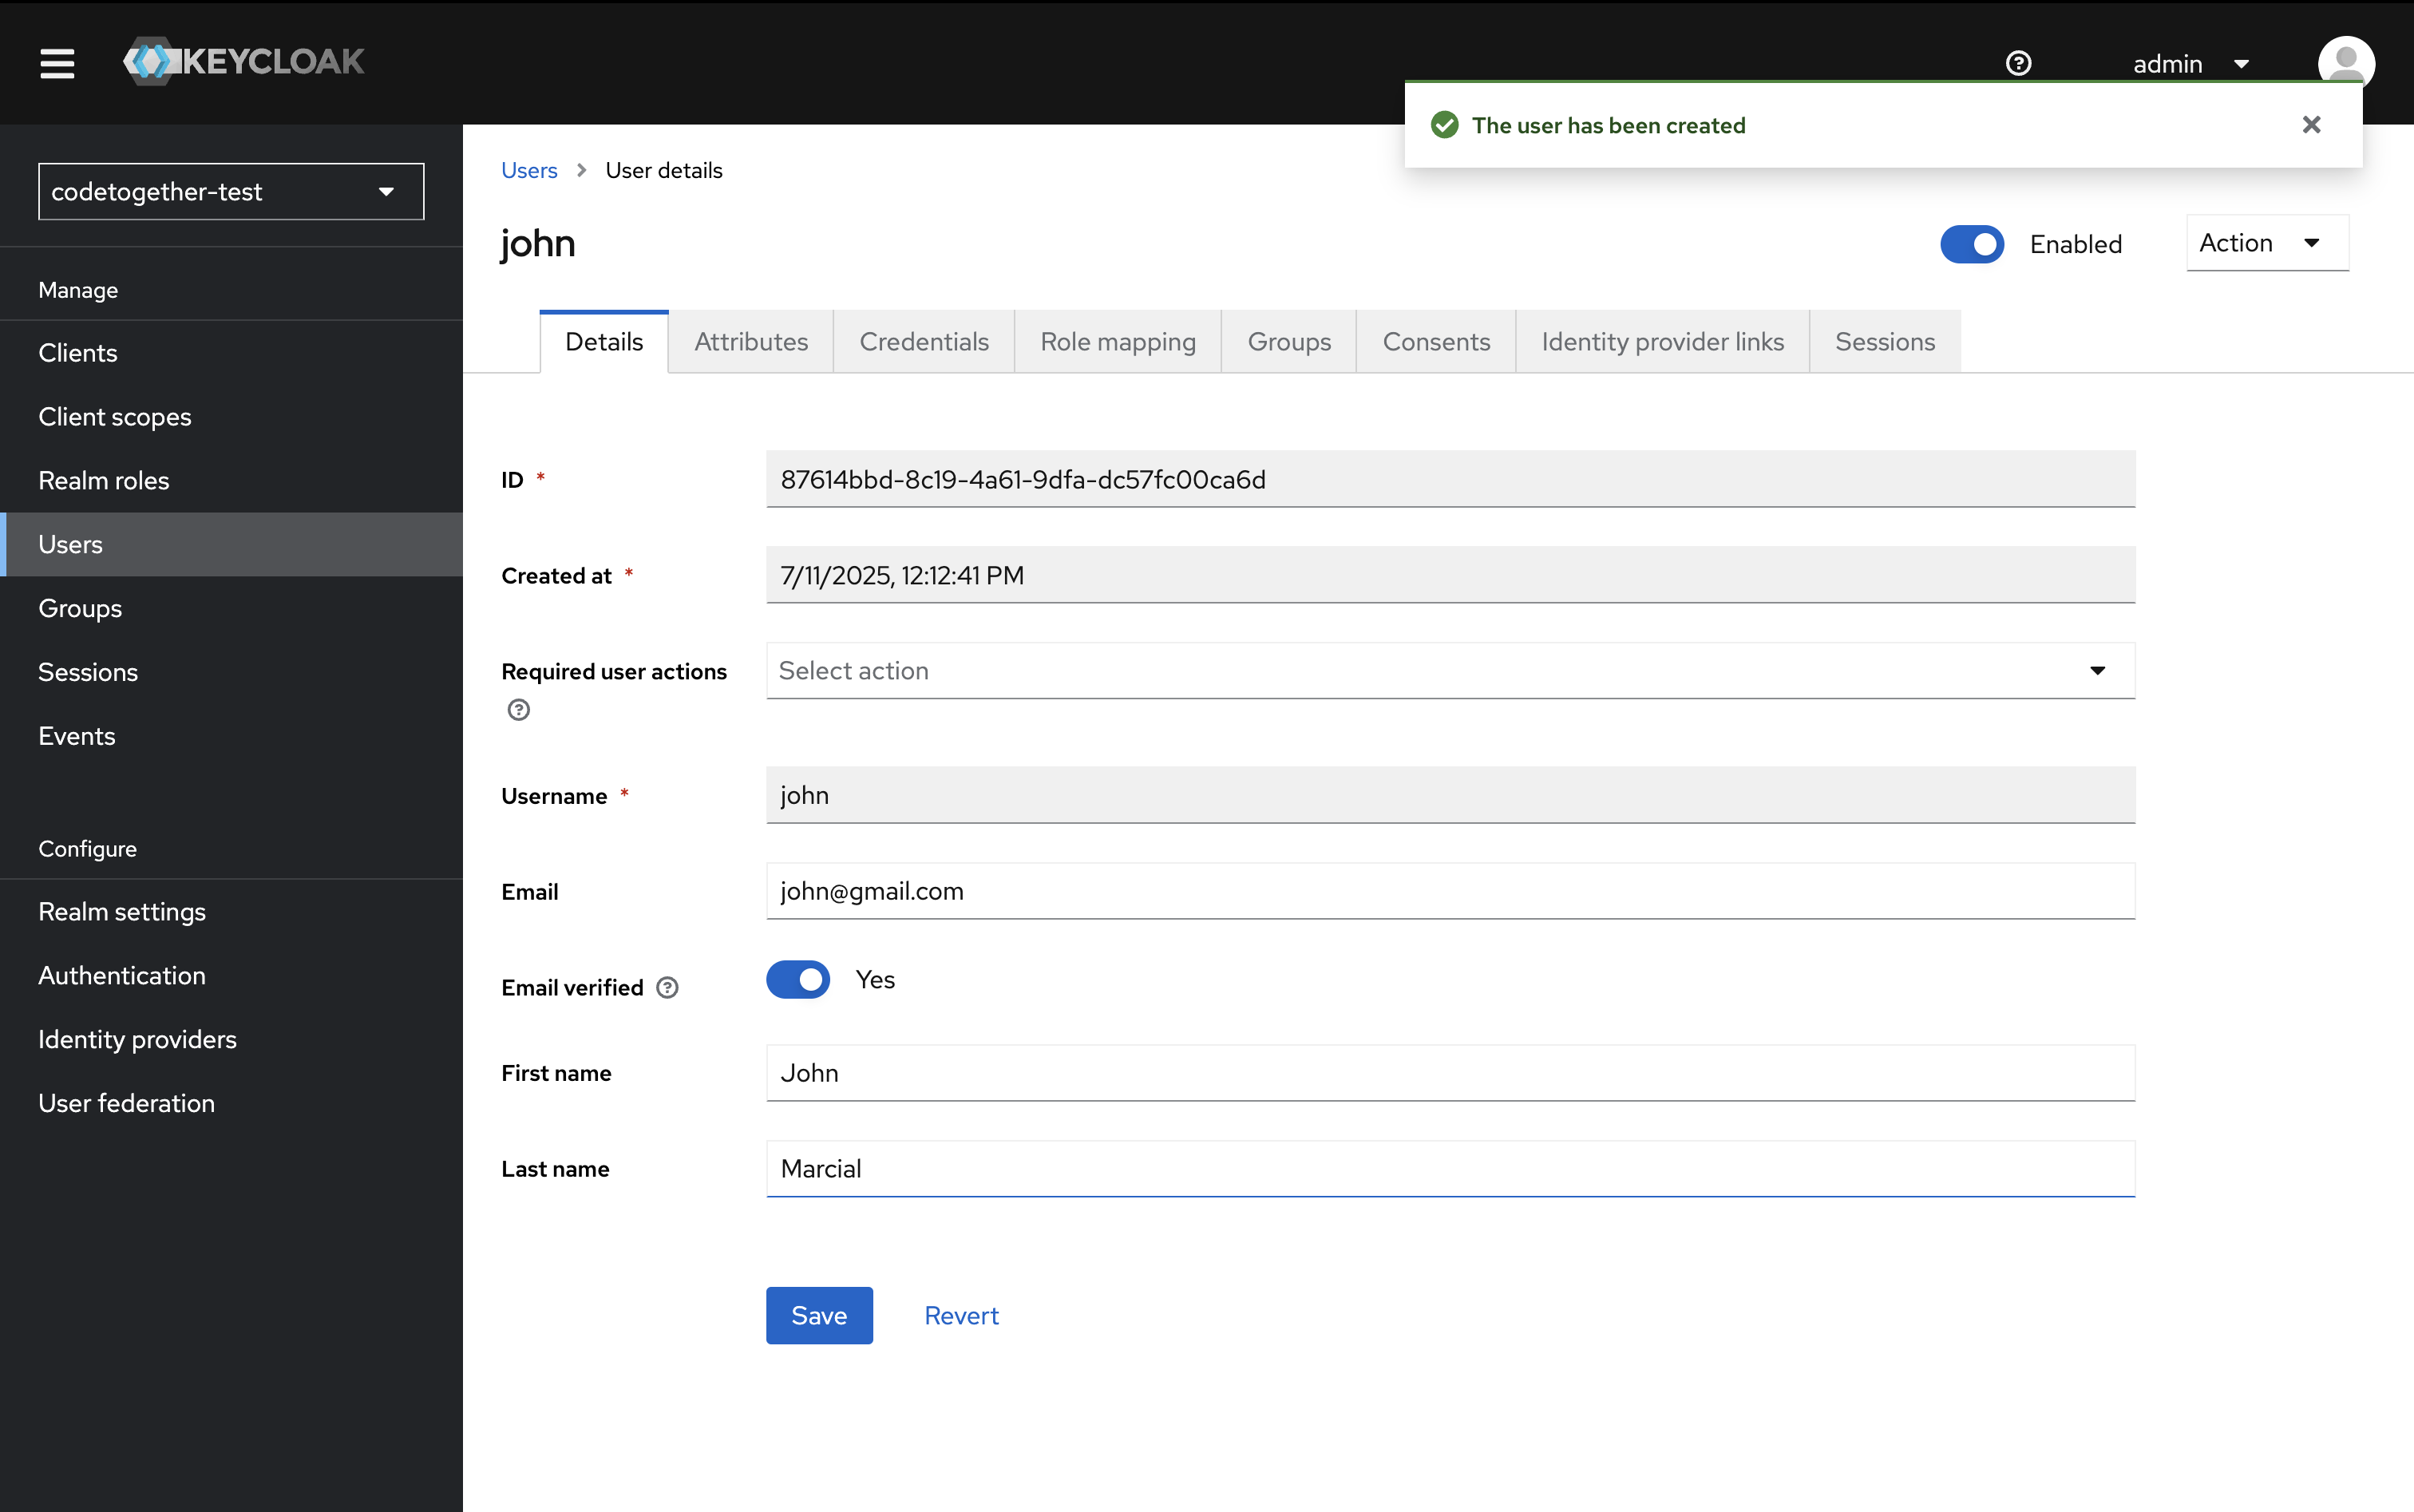
- In the left-hand panel, click Users, then click Add user.
- Fill in the required fields:
- Username
- Set Email verified to On
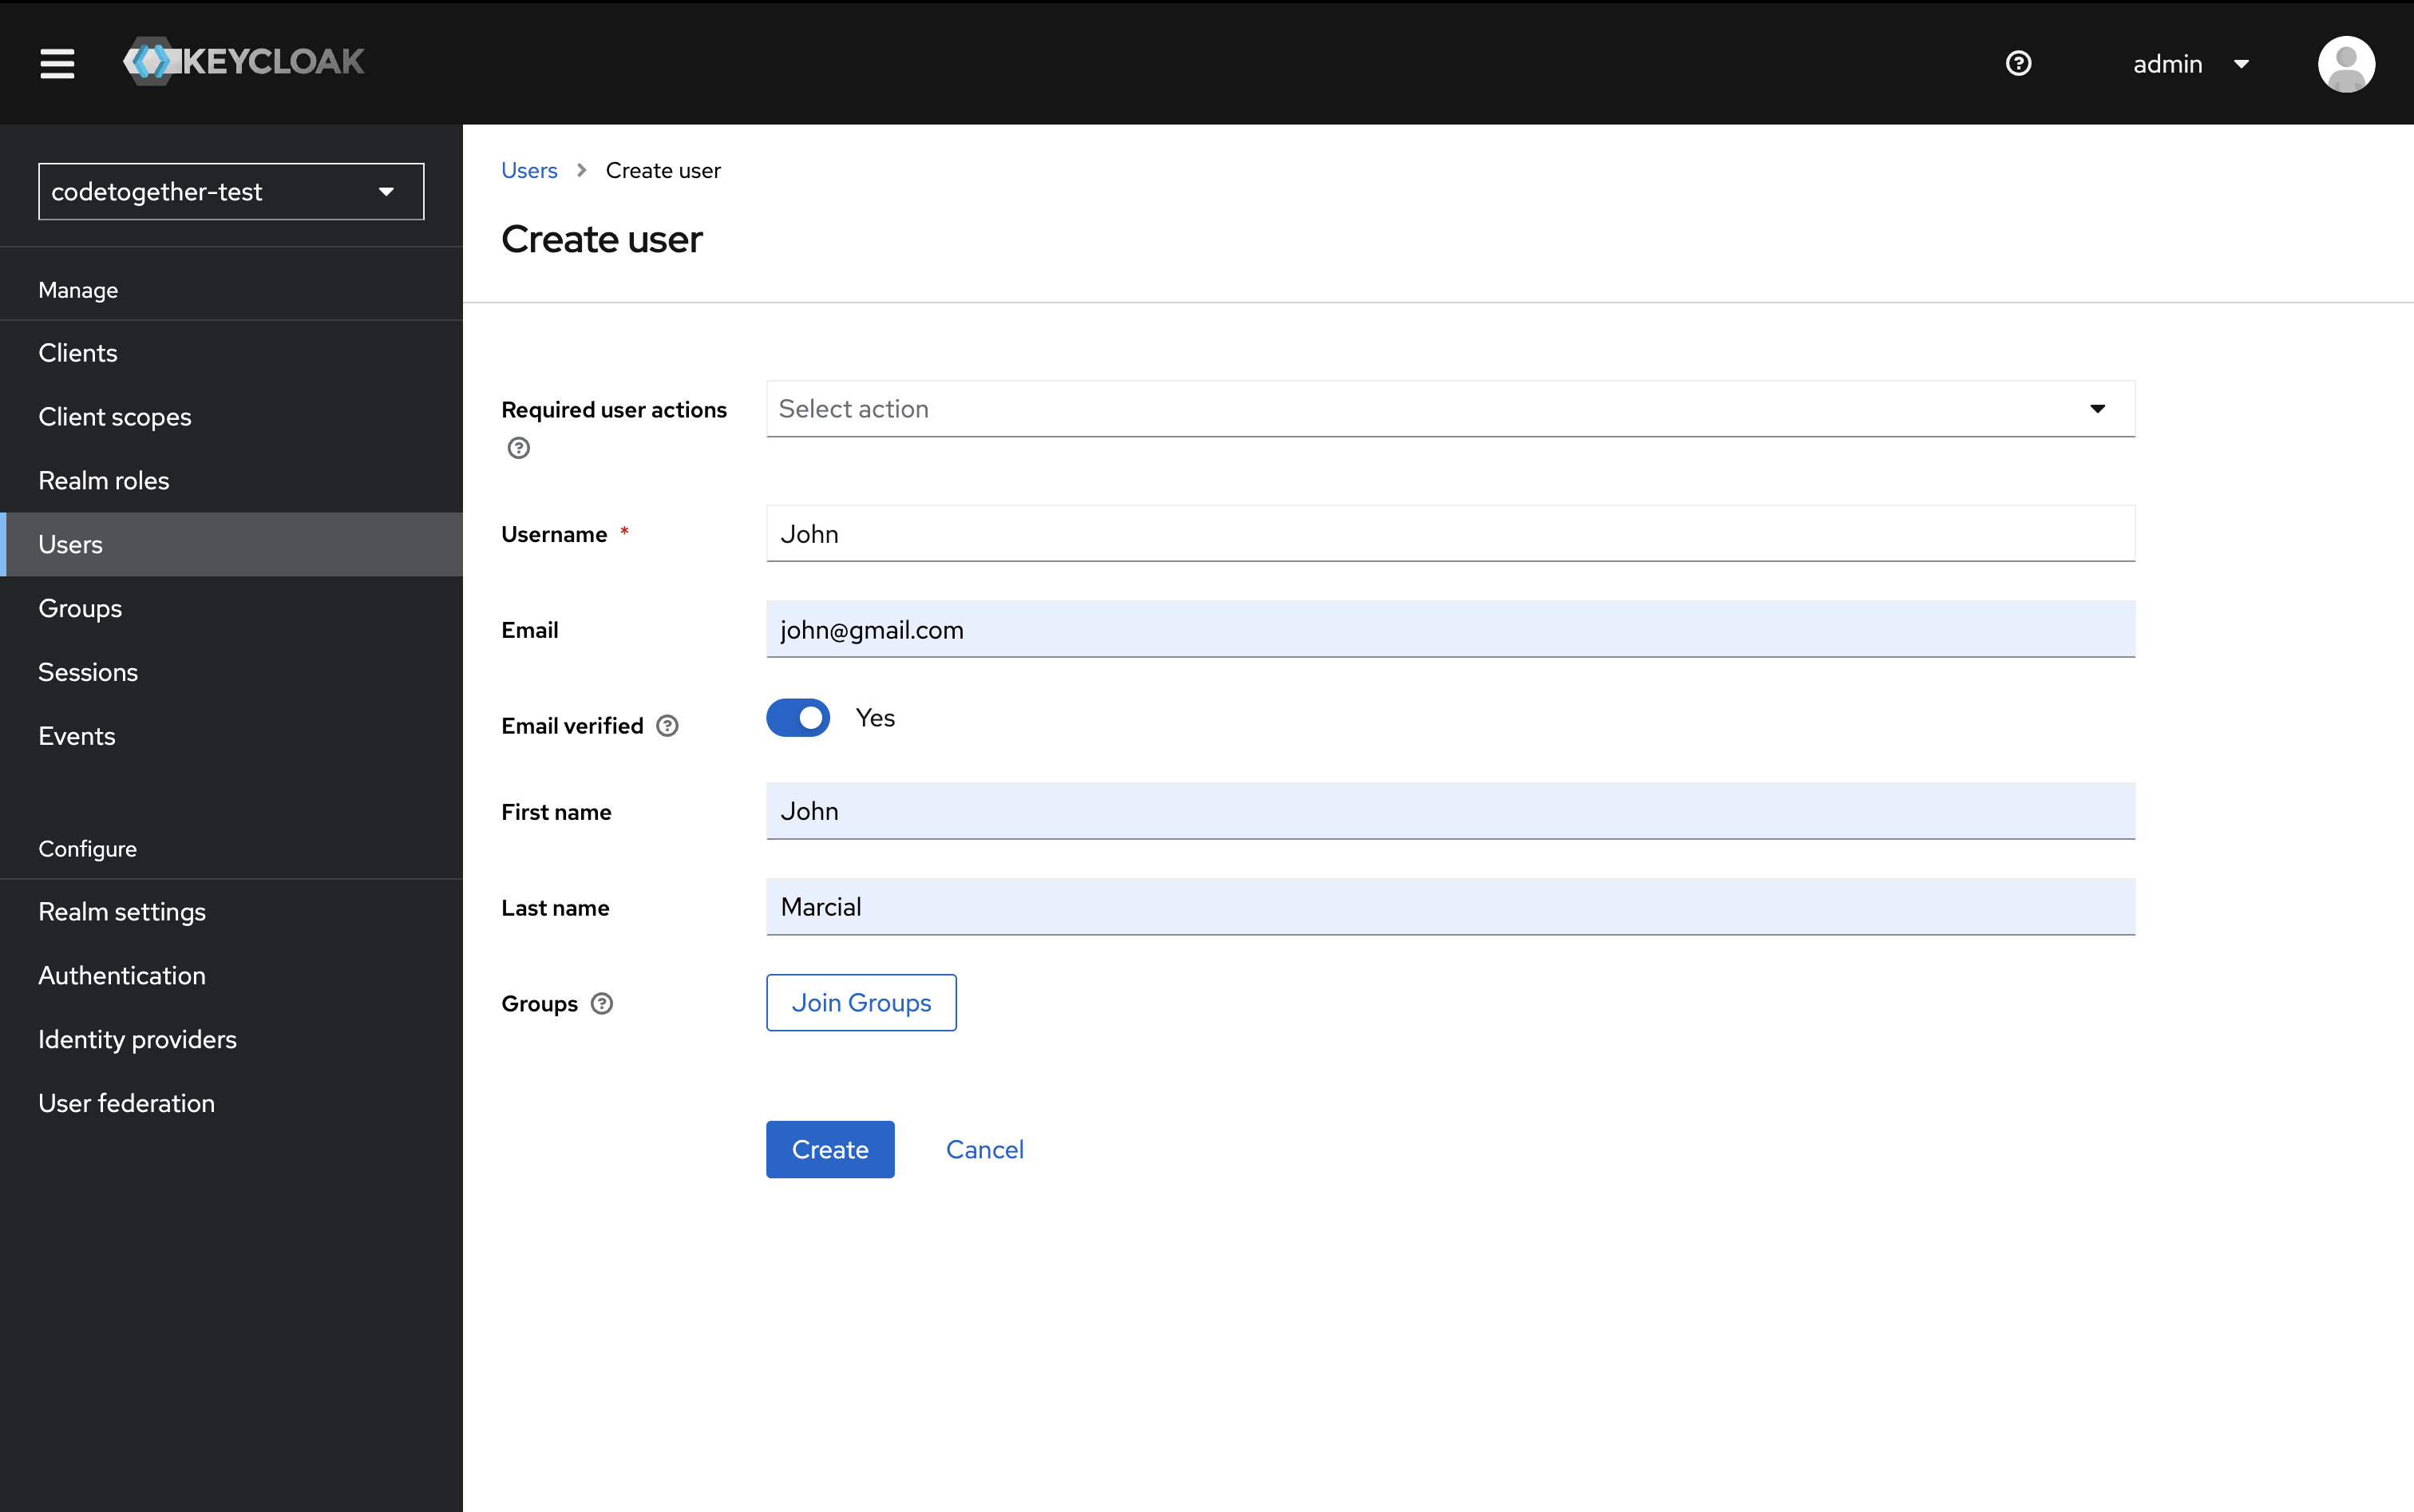
Then click Create.
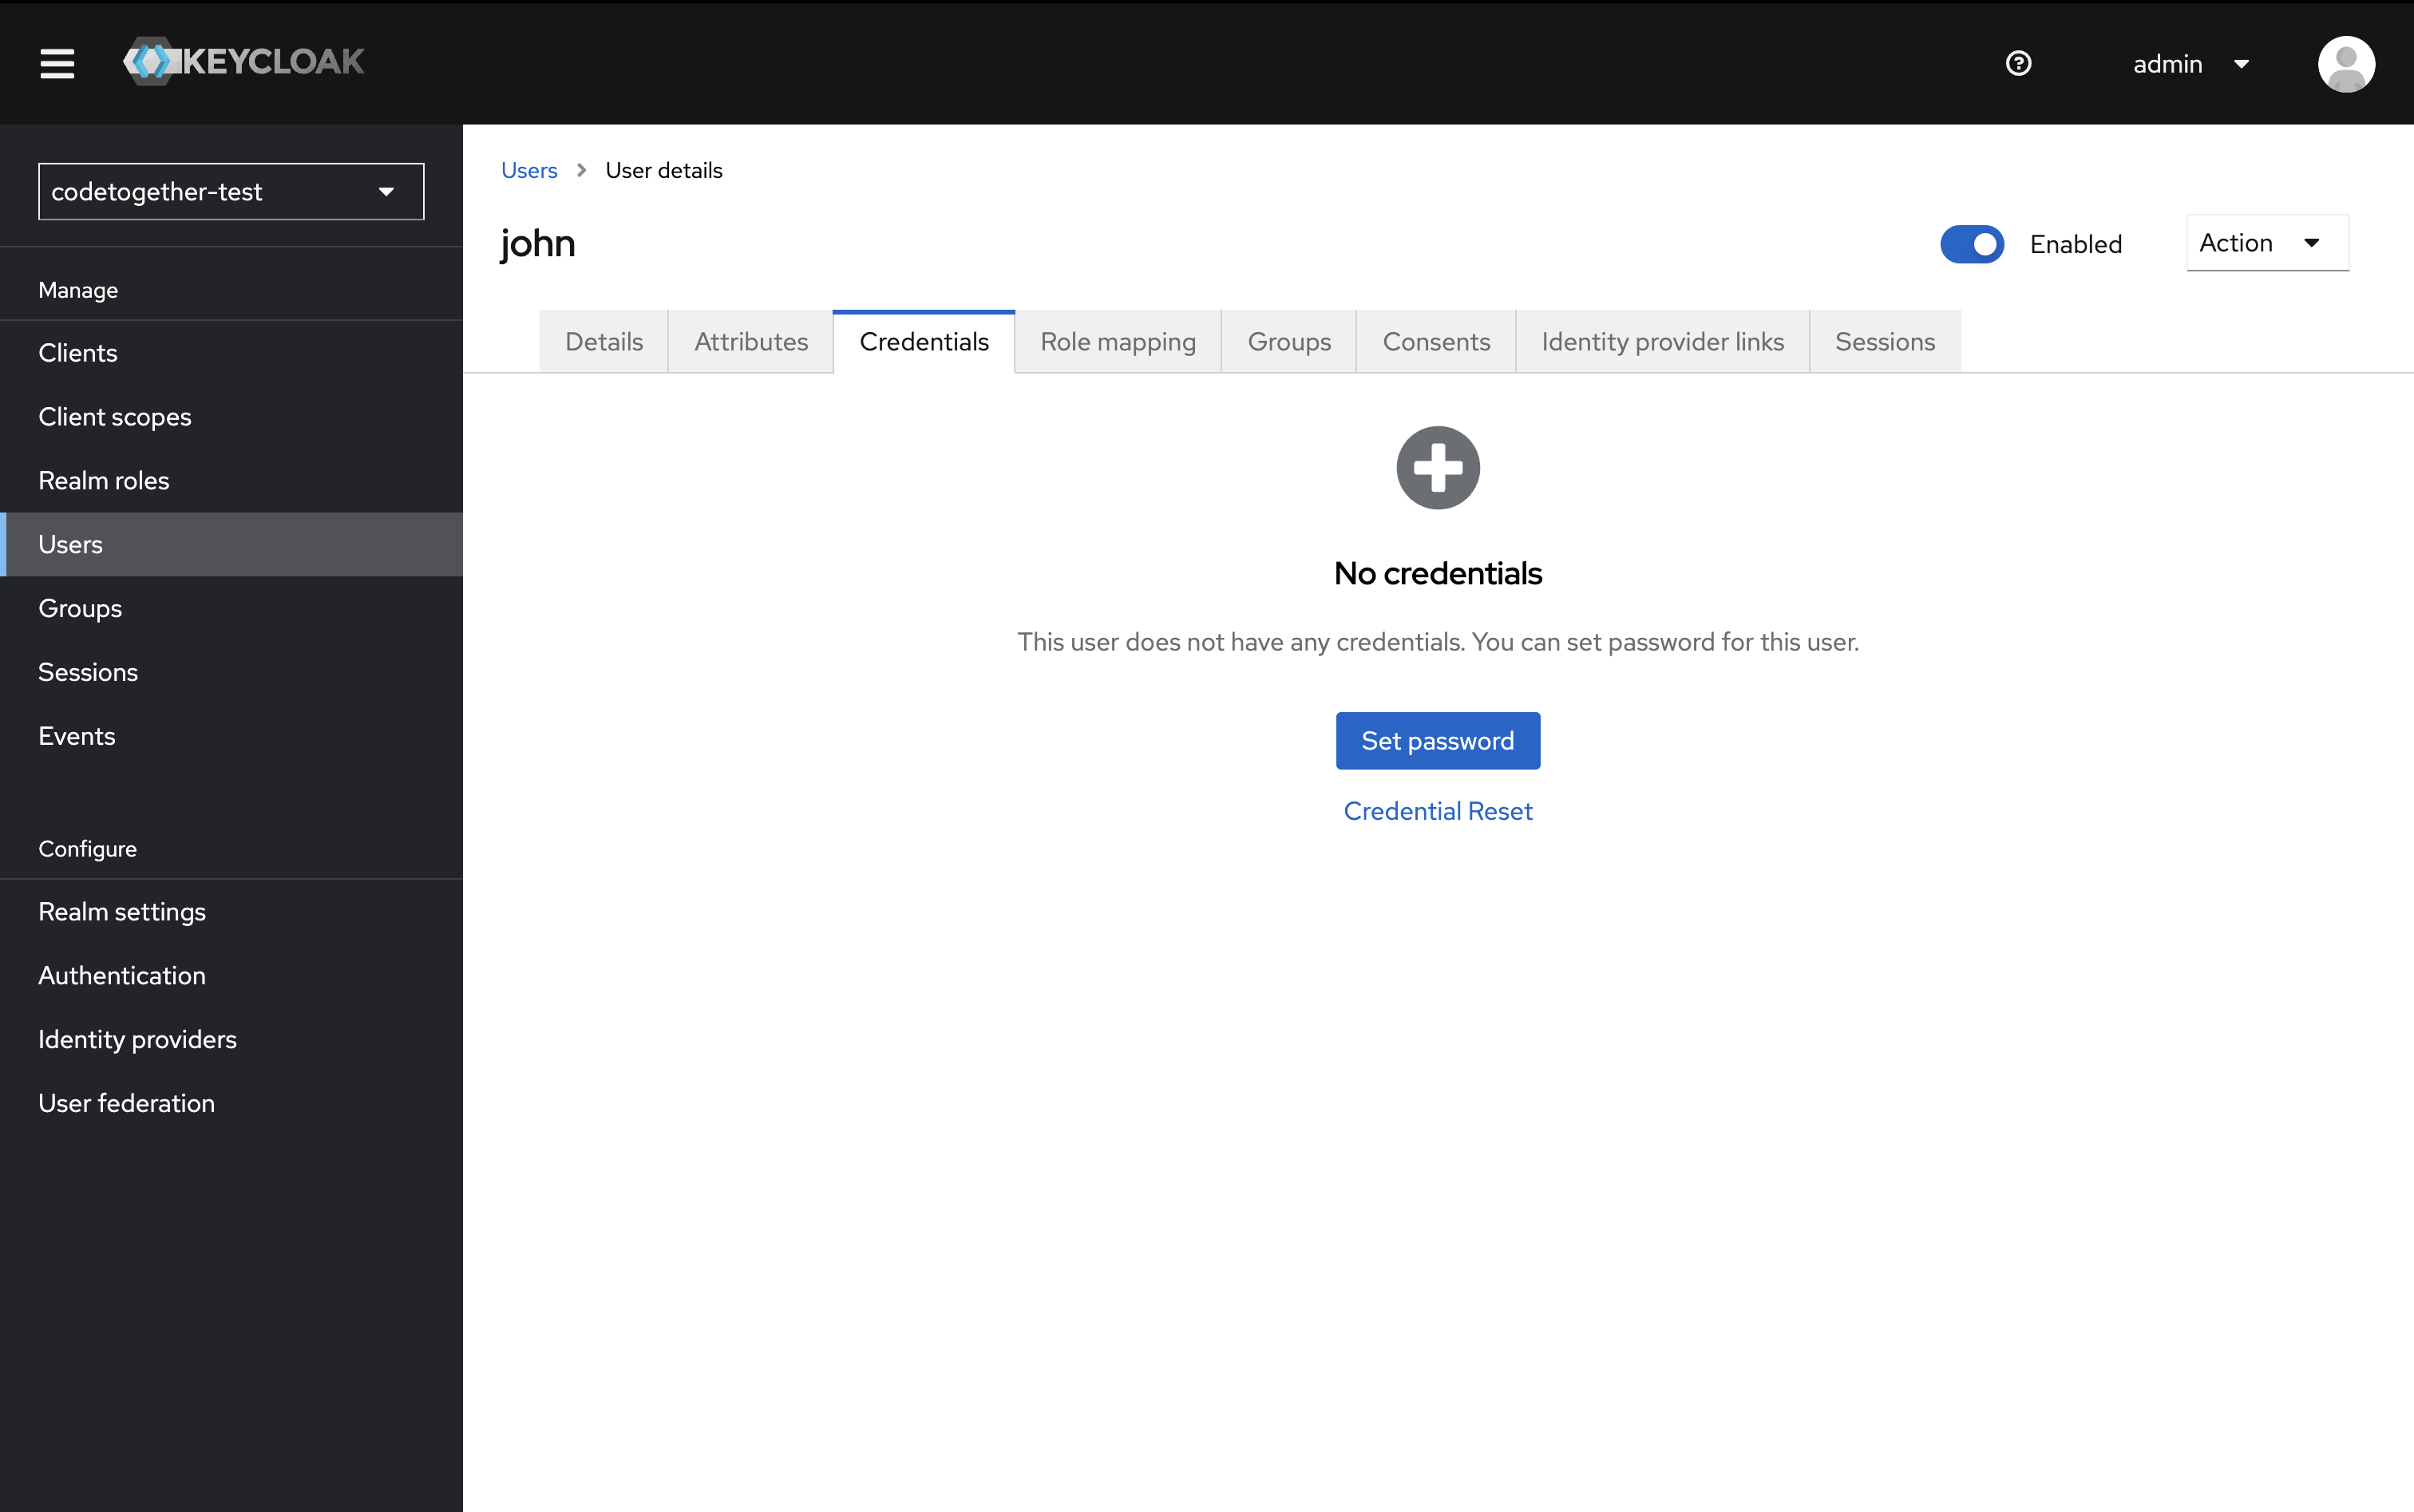
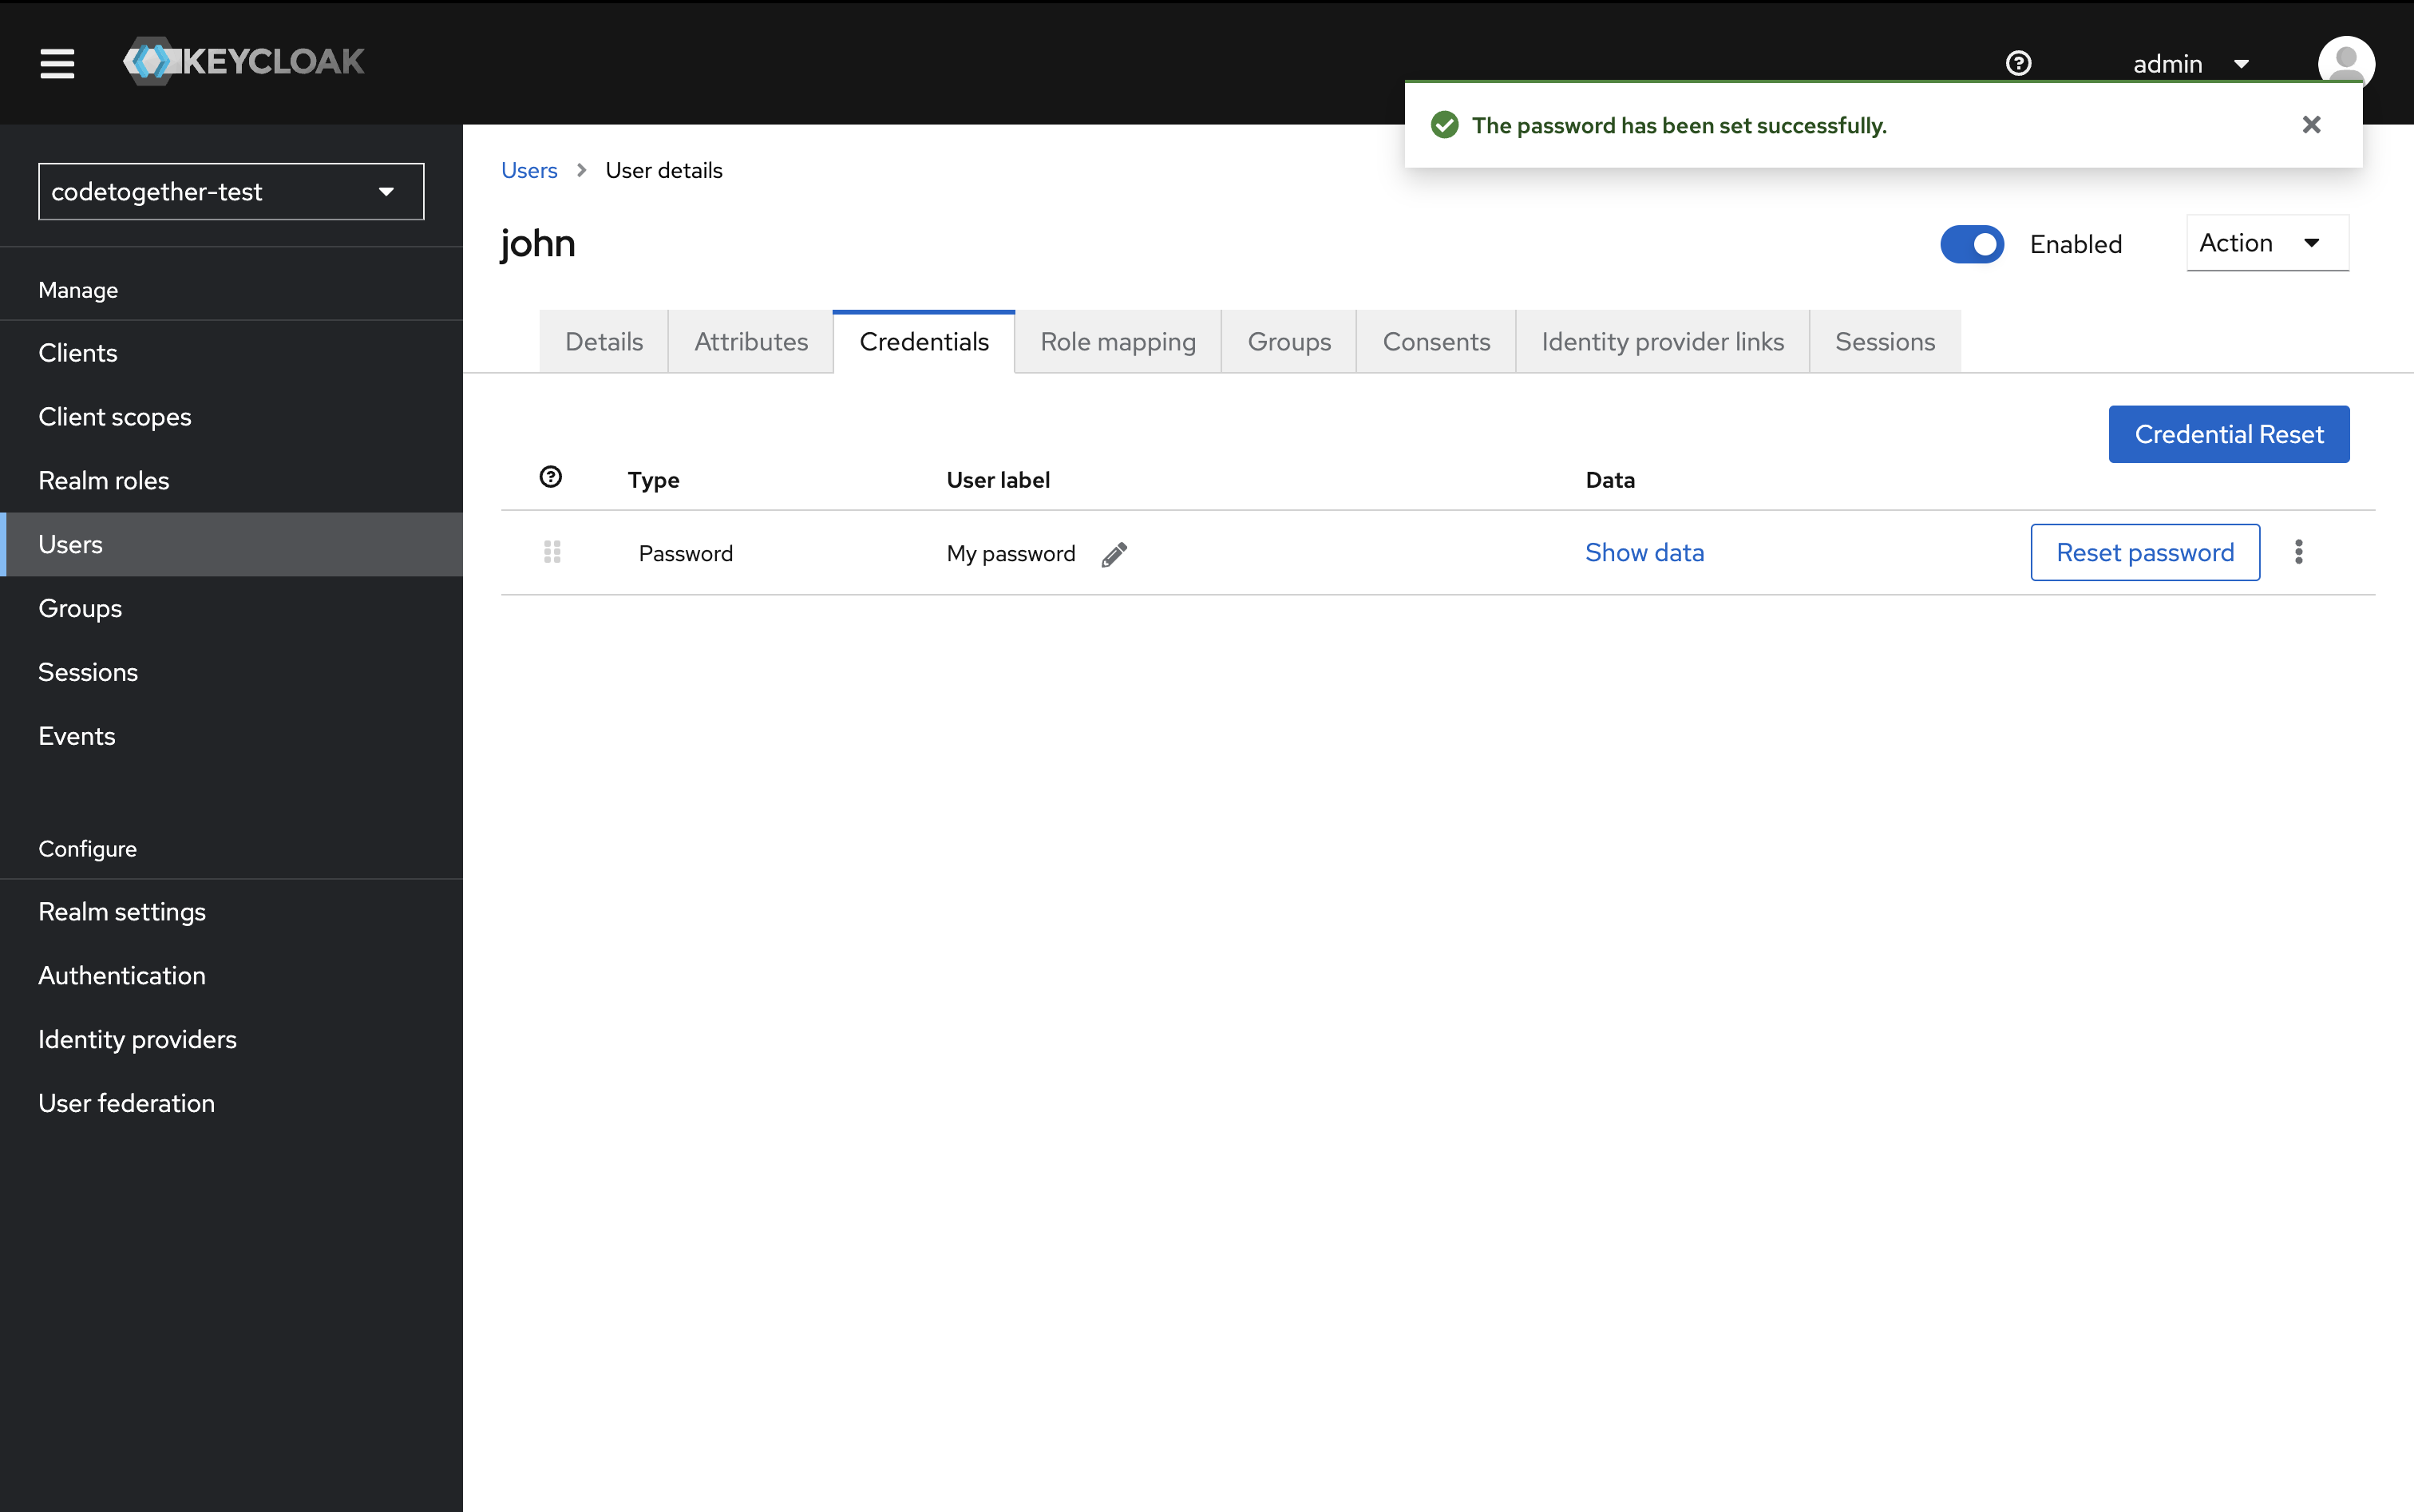
- Switch to the Credentials tab and click Set password.
- Enter the desired password. Set Temporary to Off.
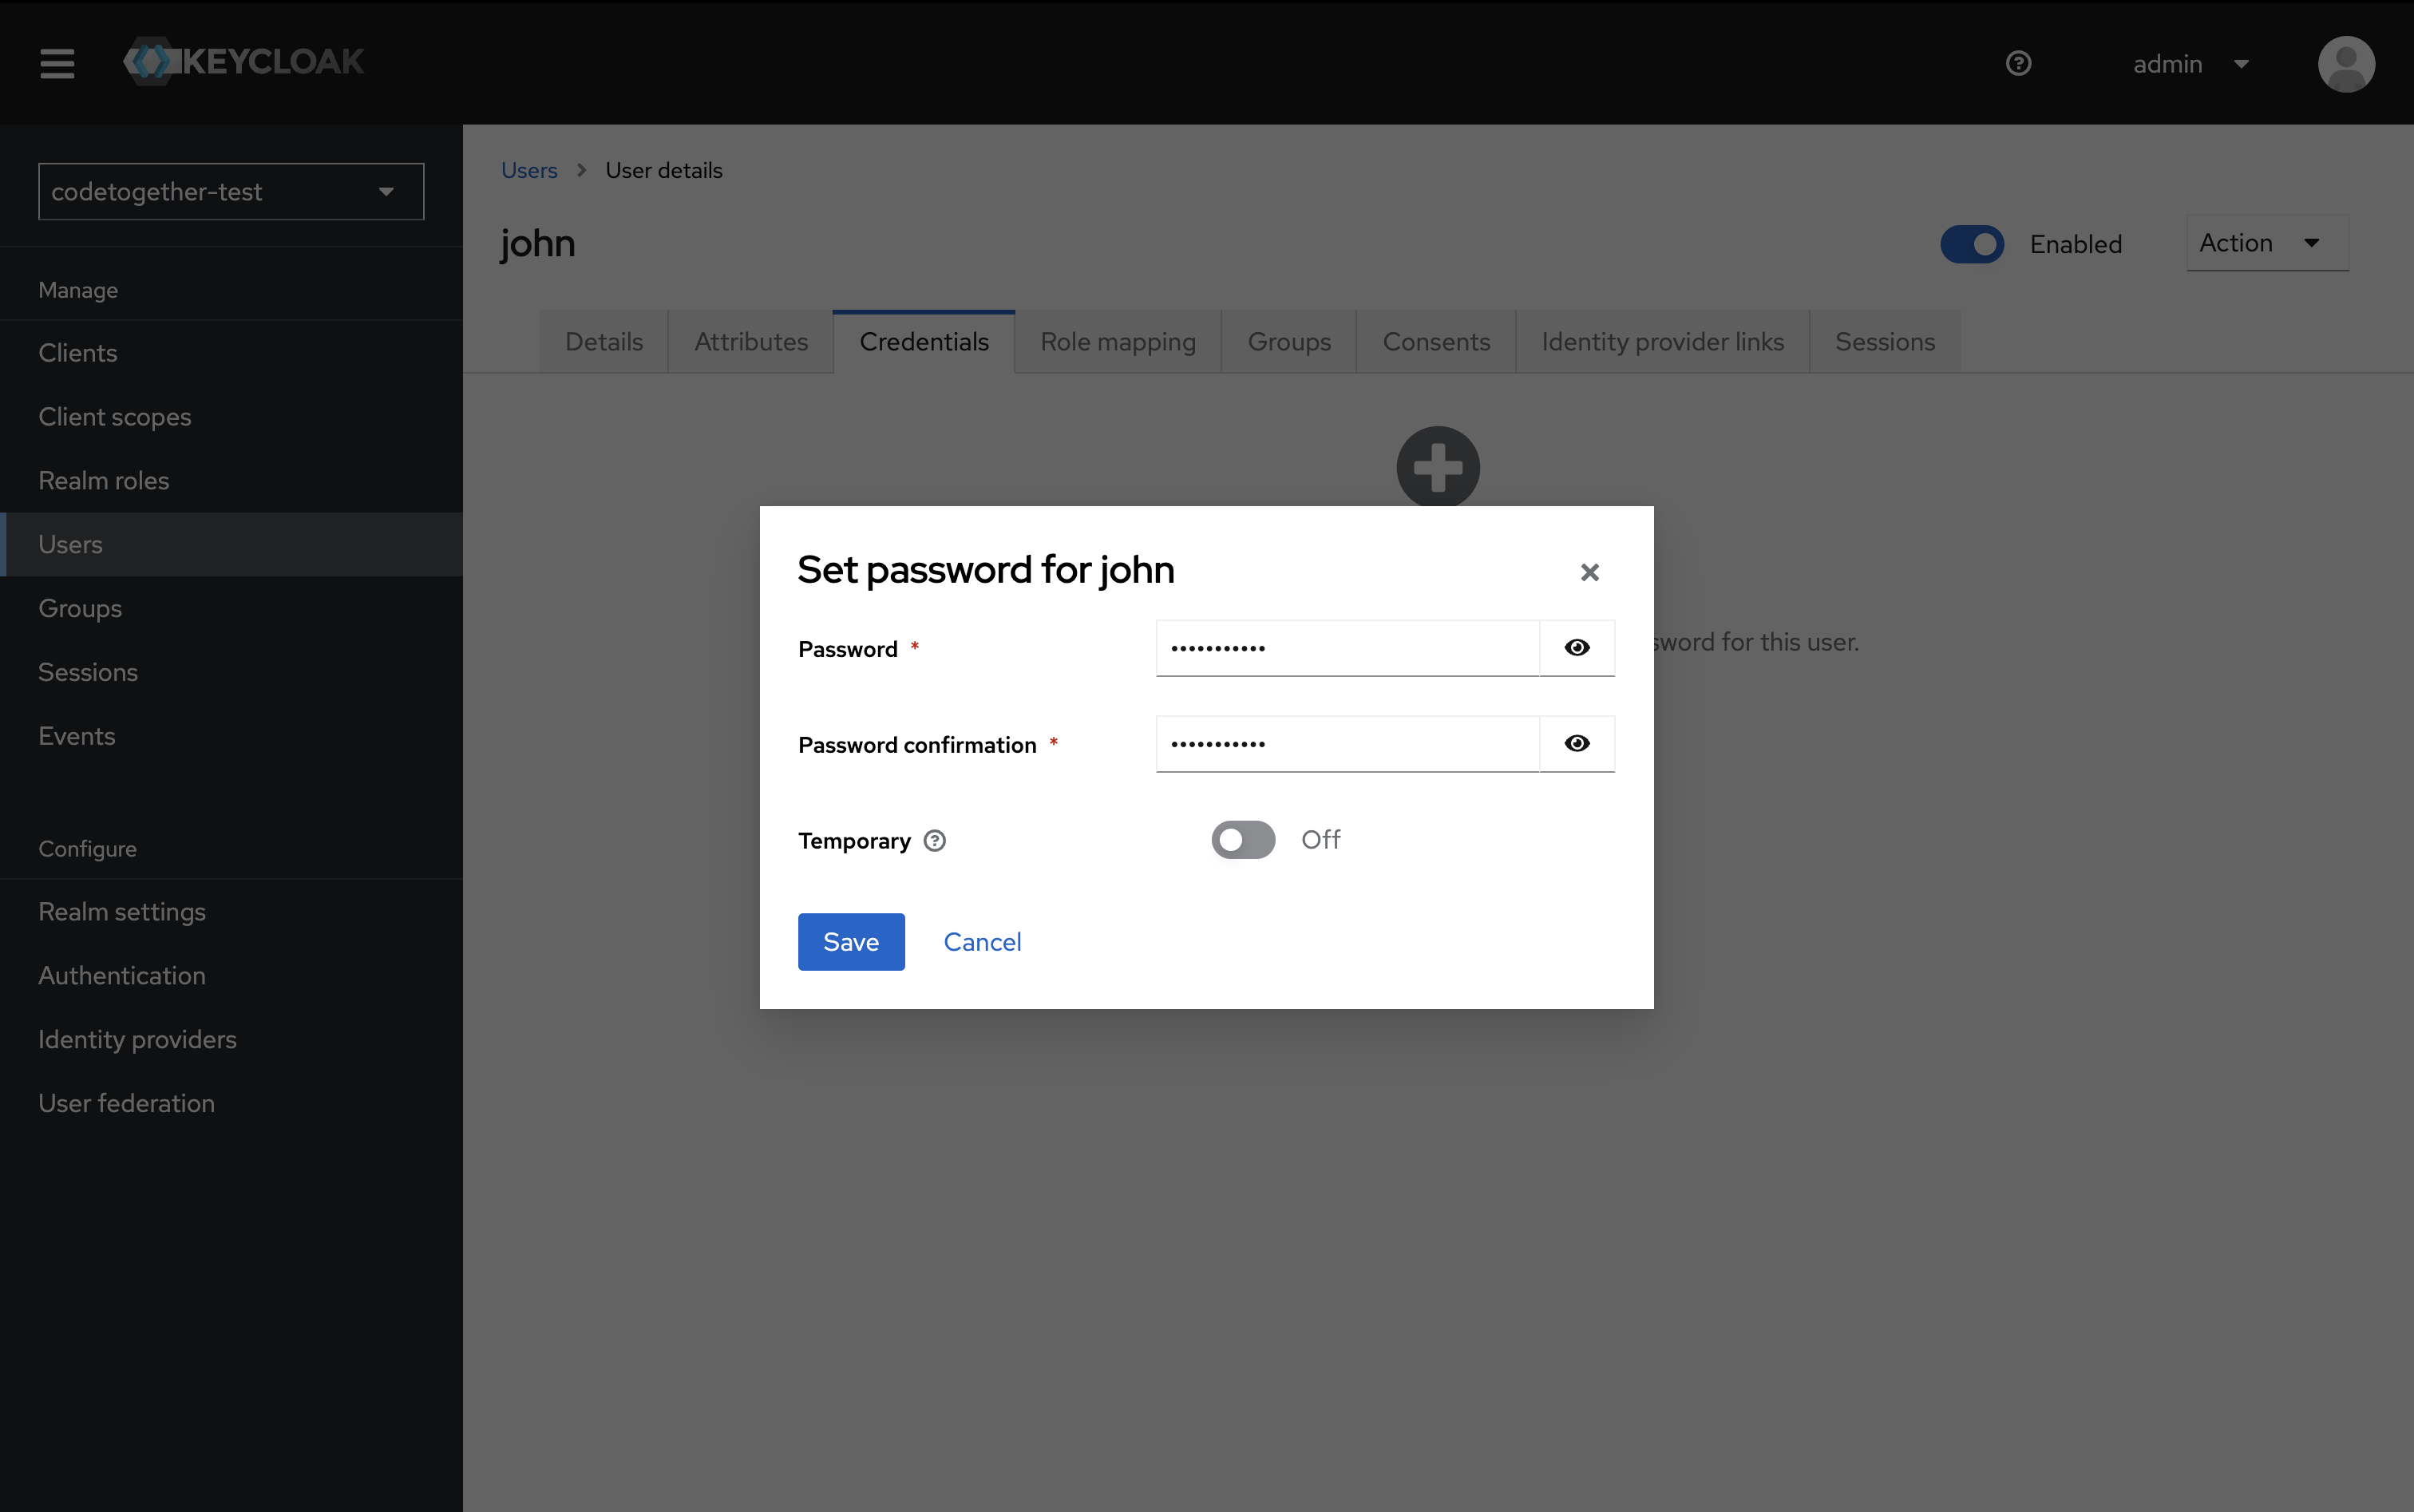
Then click Save.
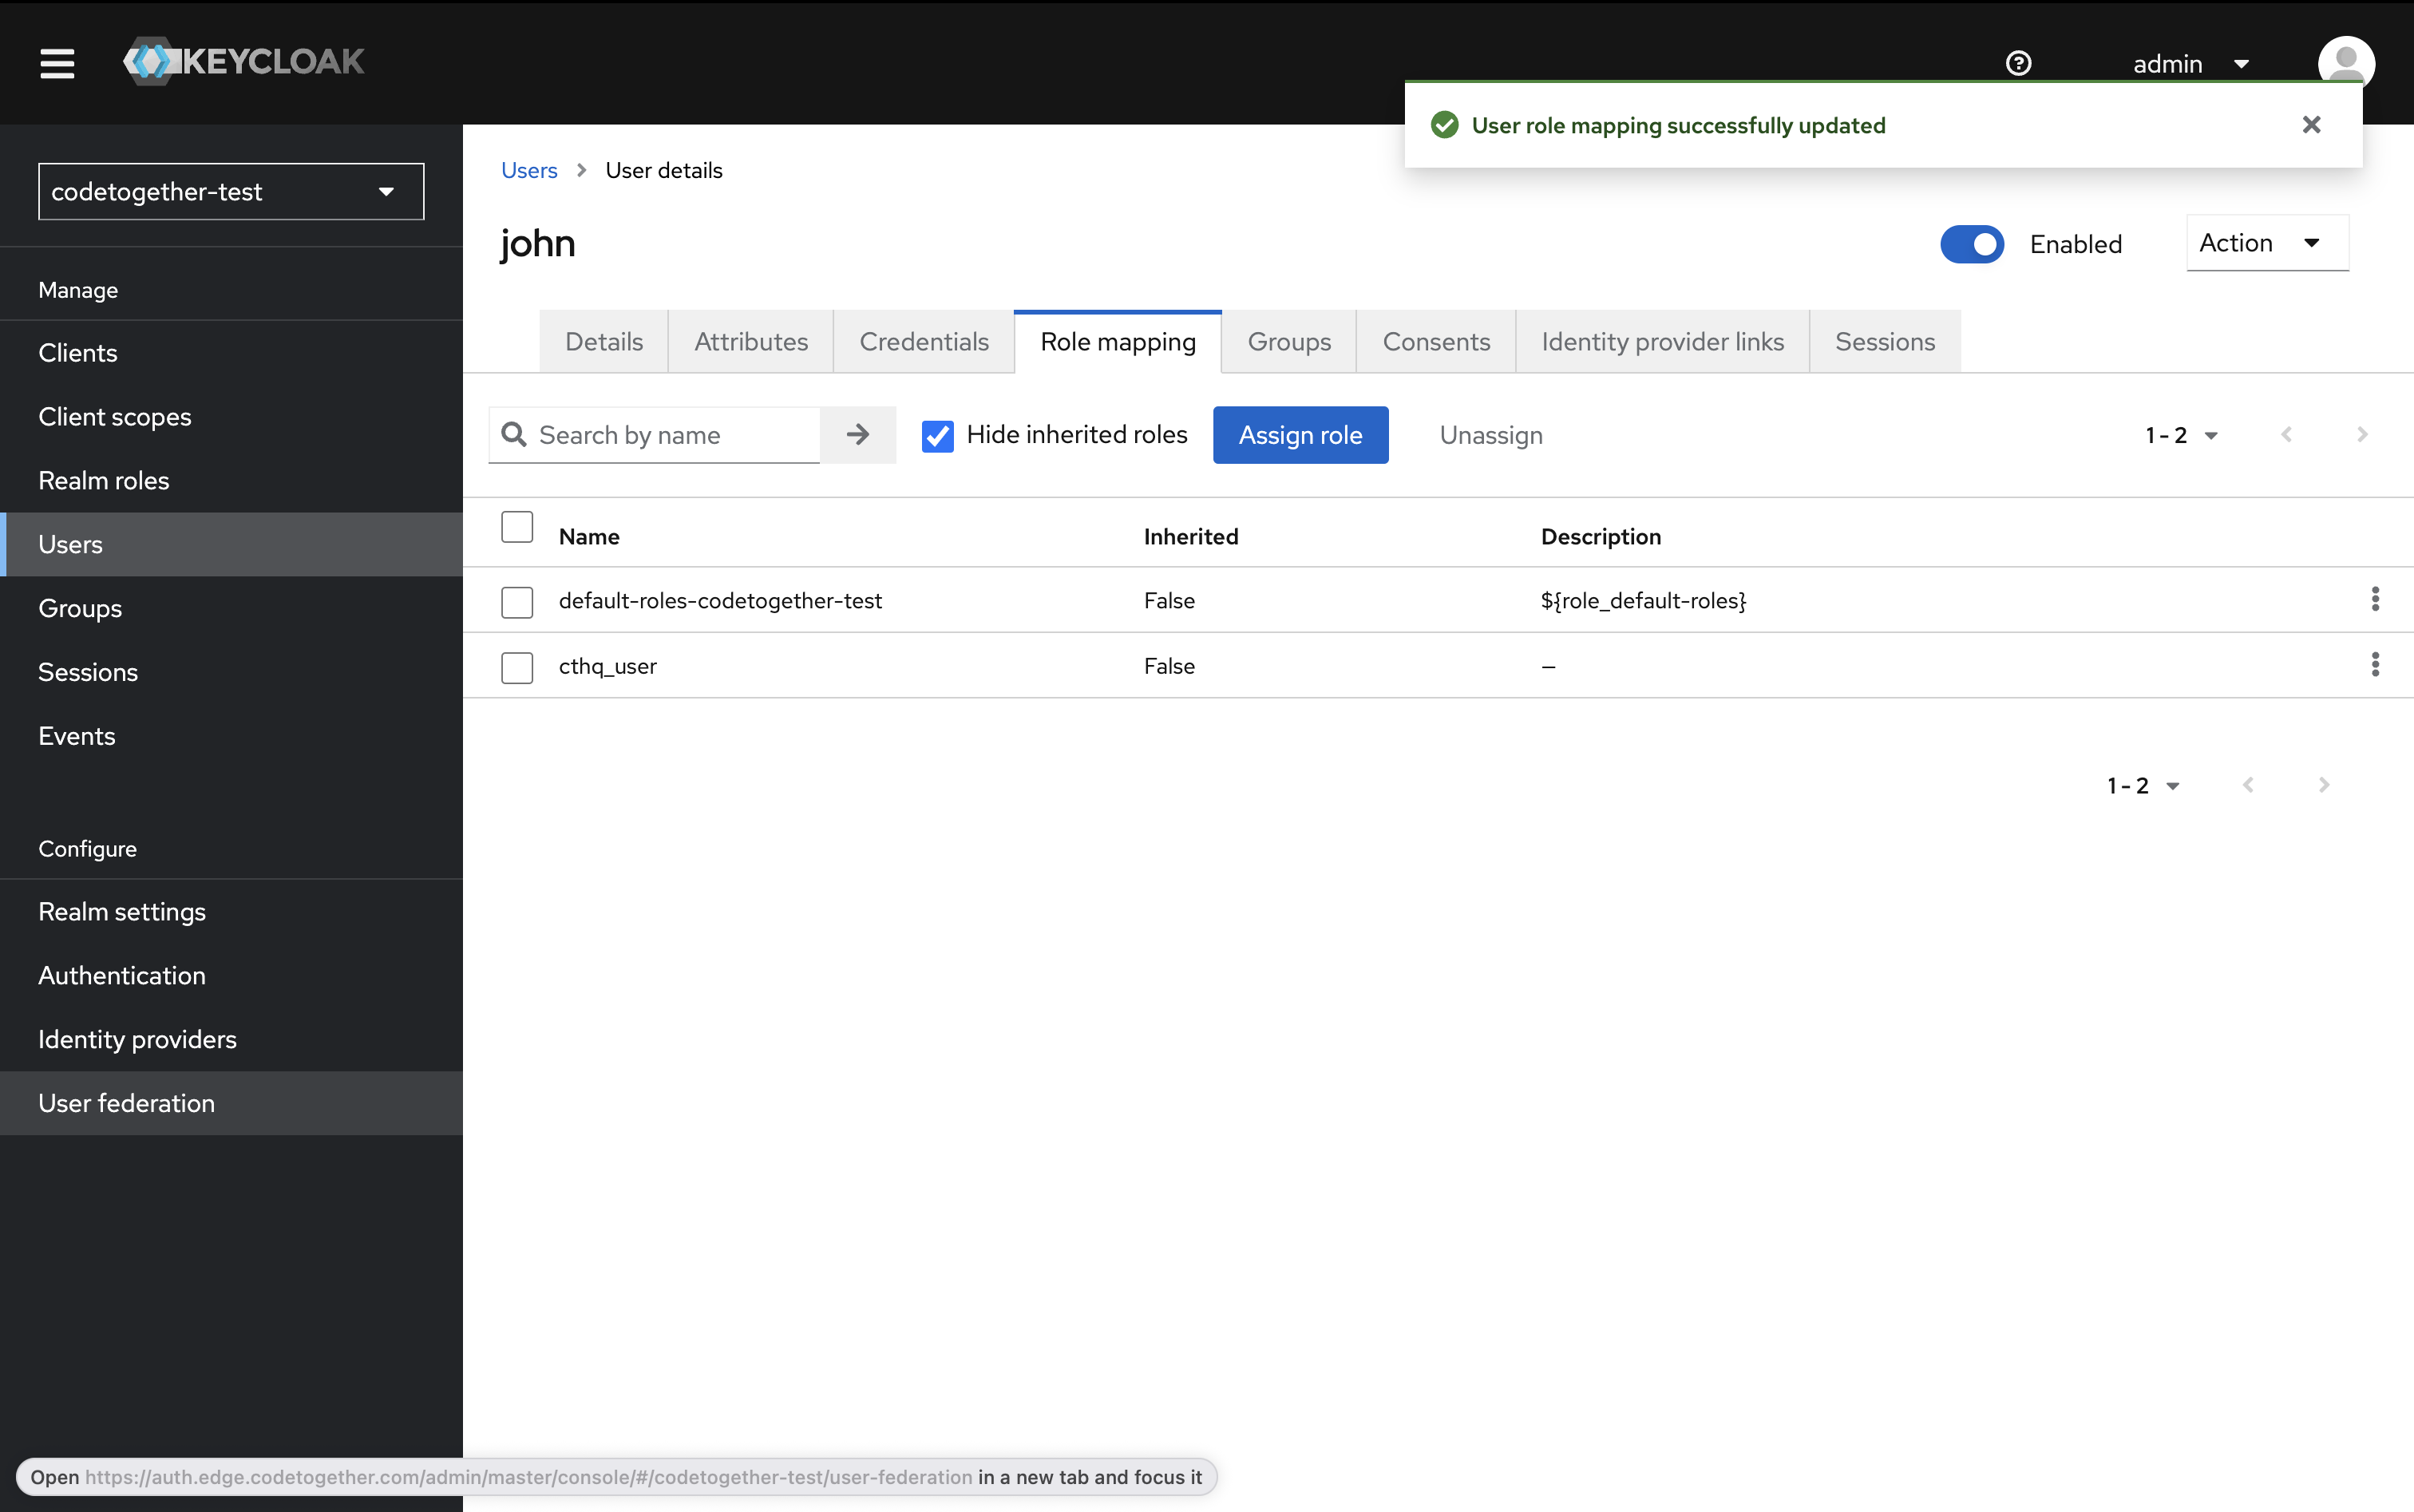
- Switch to the Role Mappings tab.
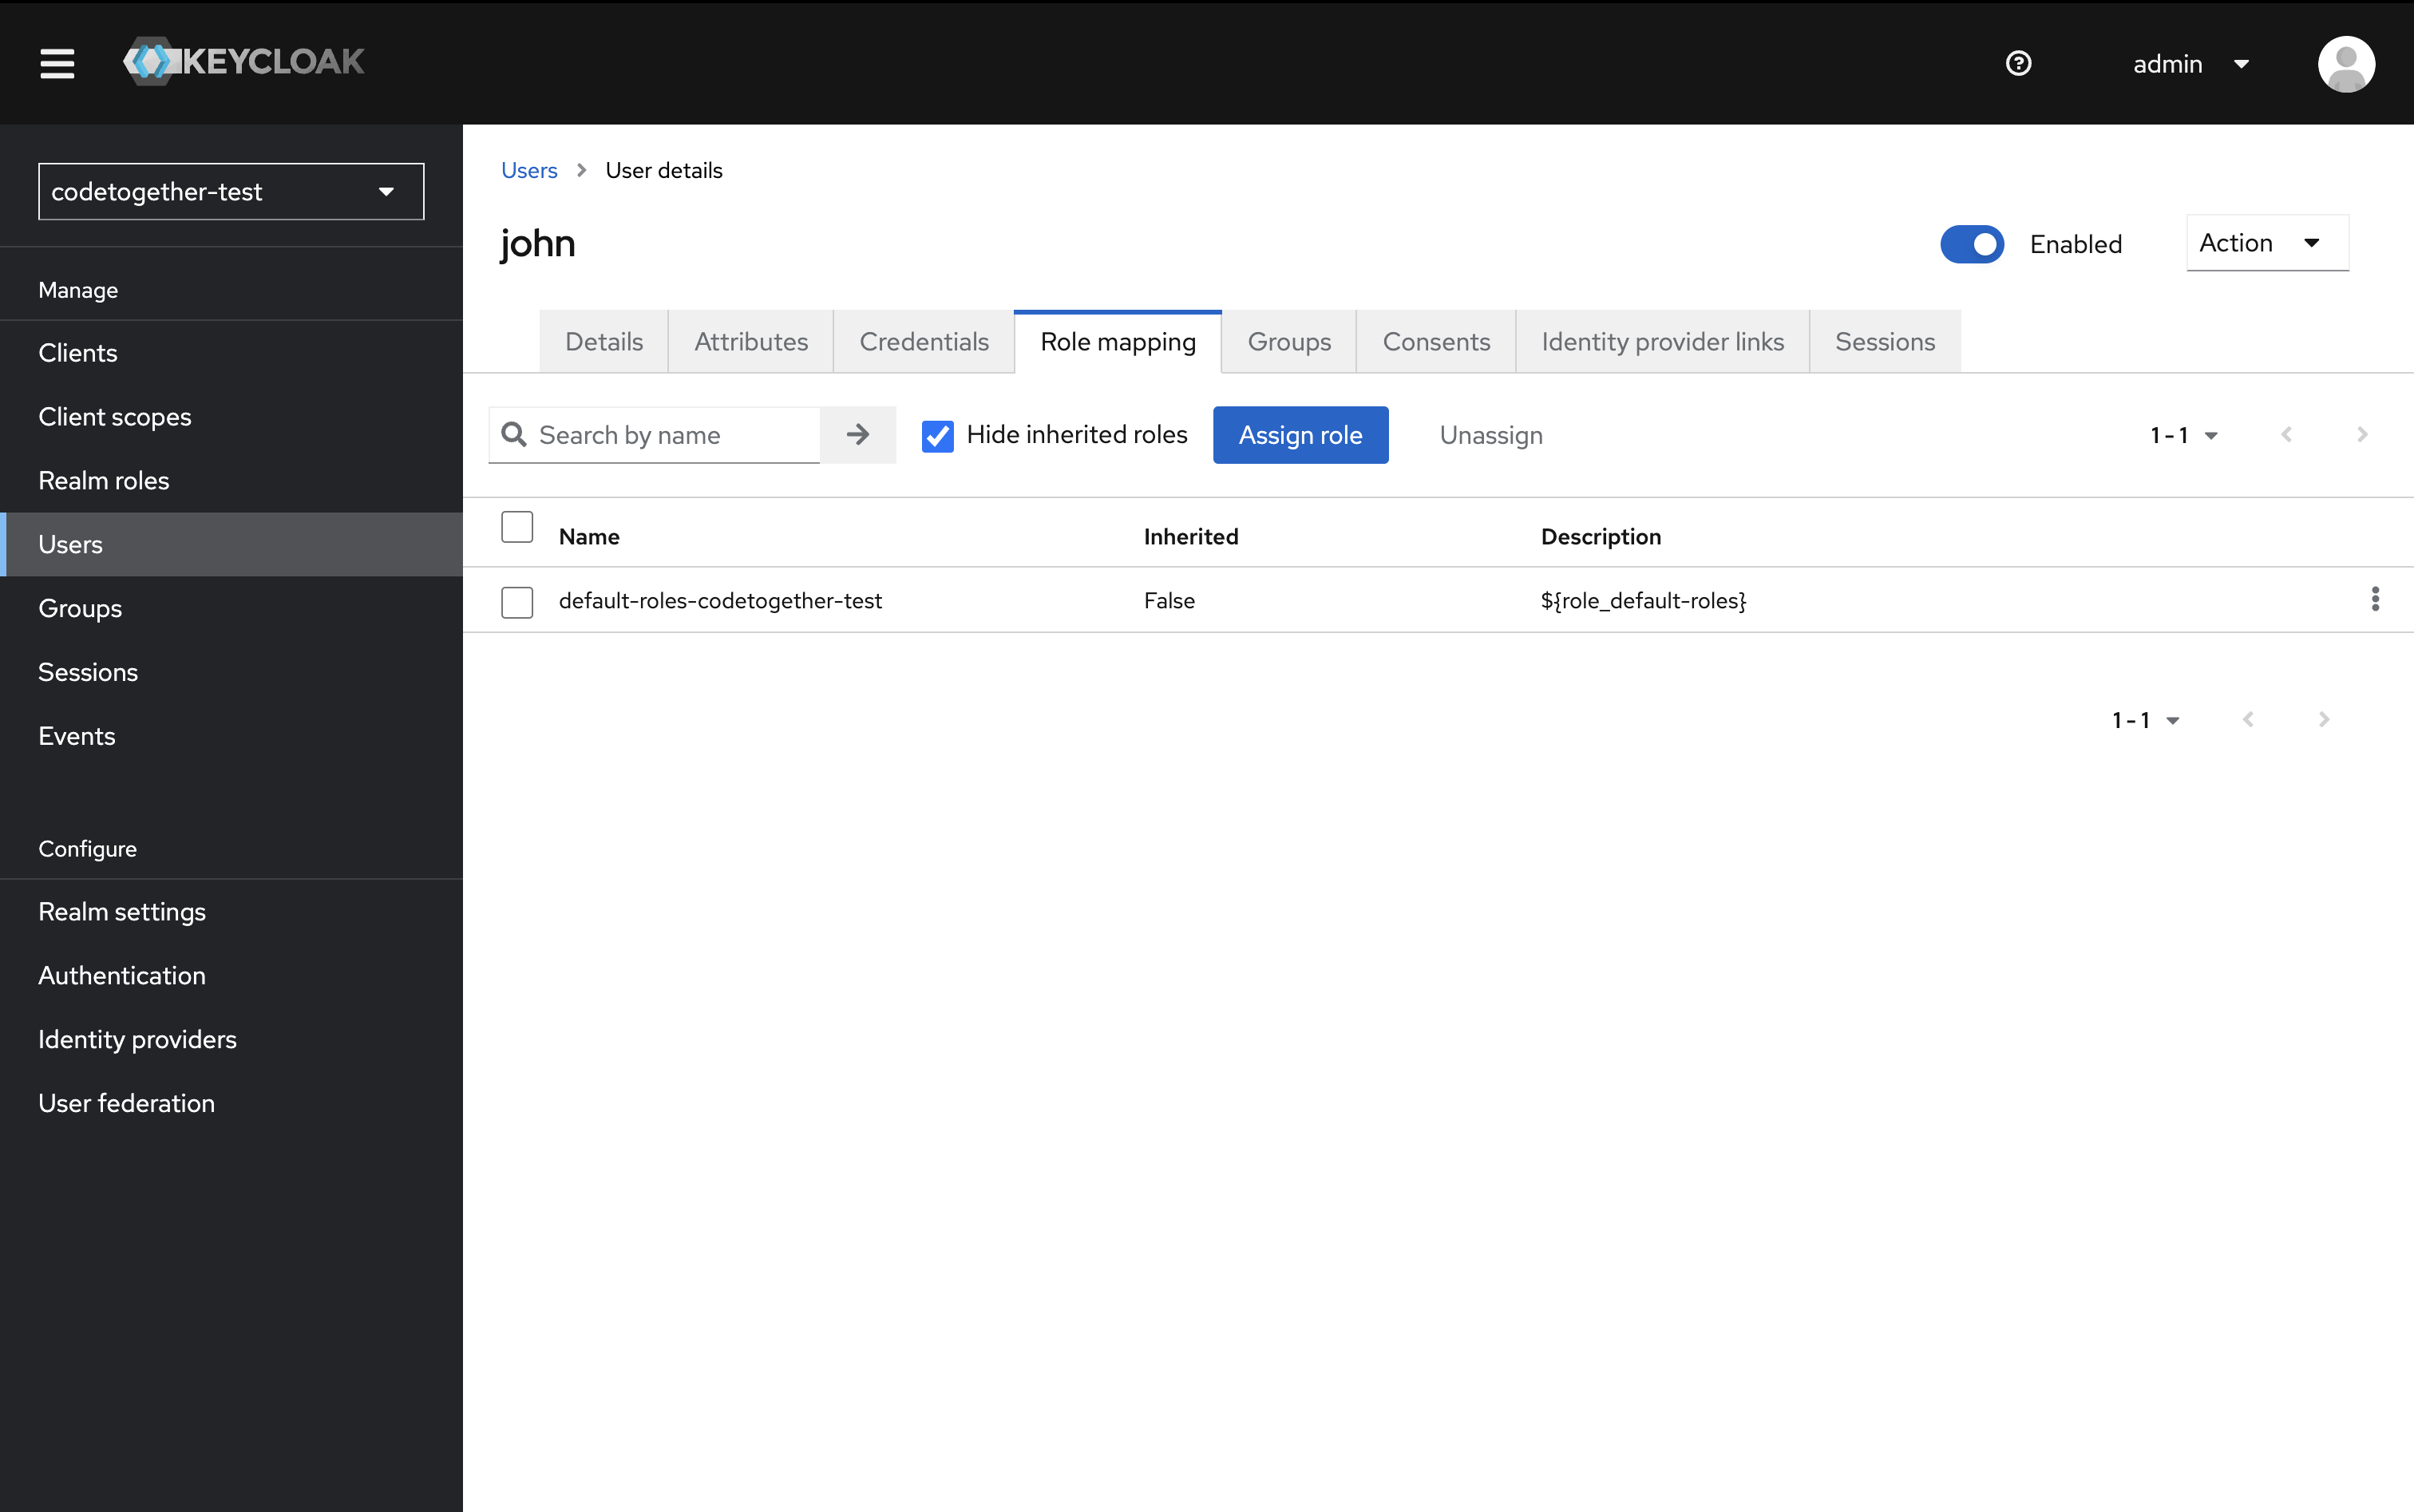
- Click Assign role, select the
cthq_userrole. Then click Assign.
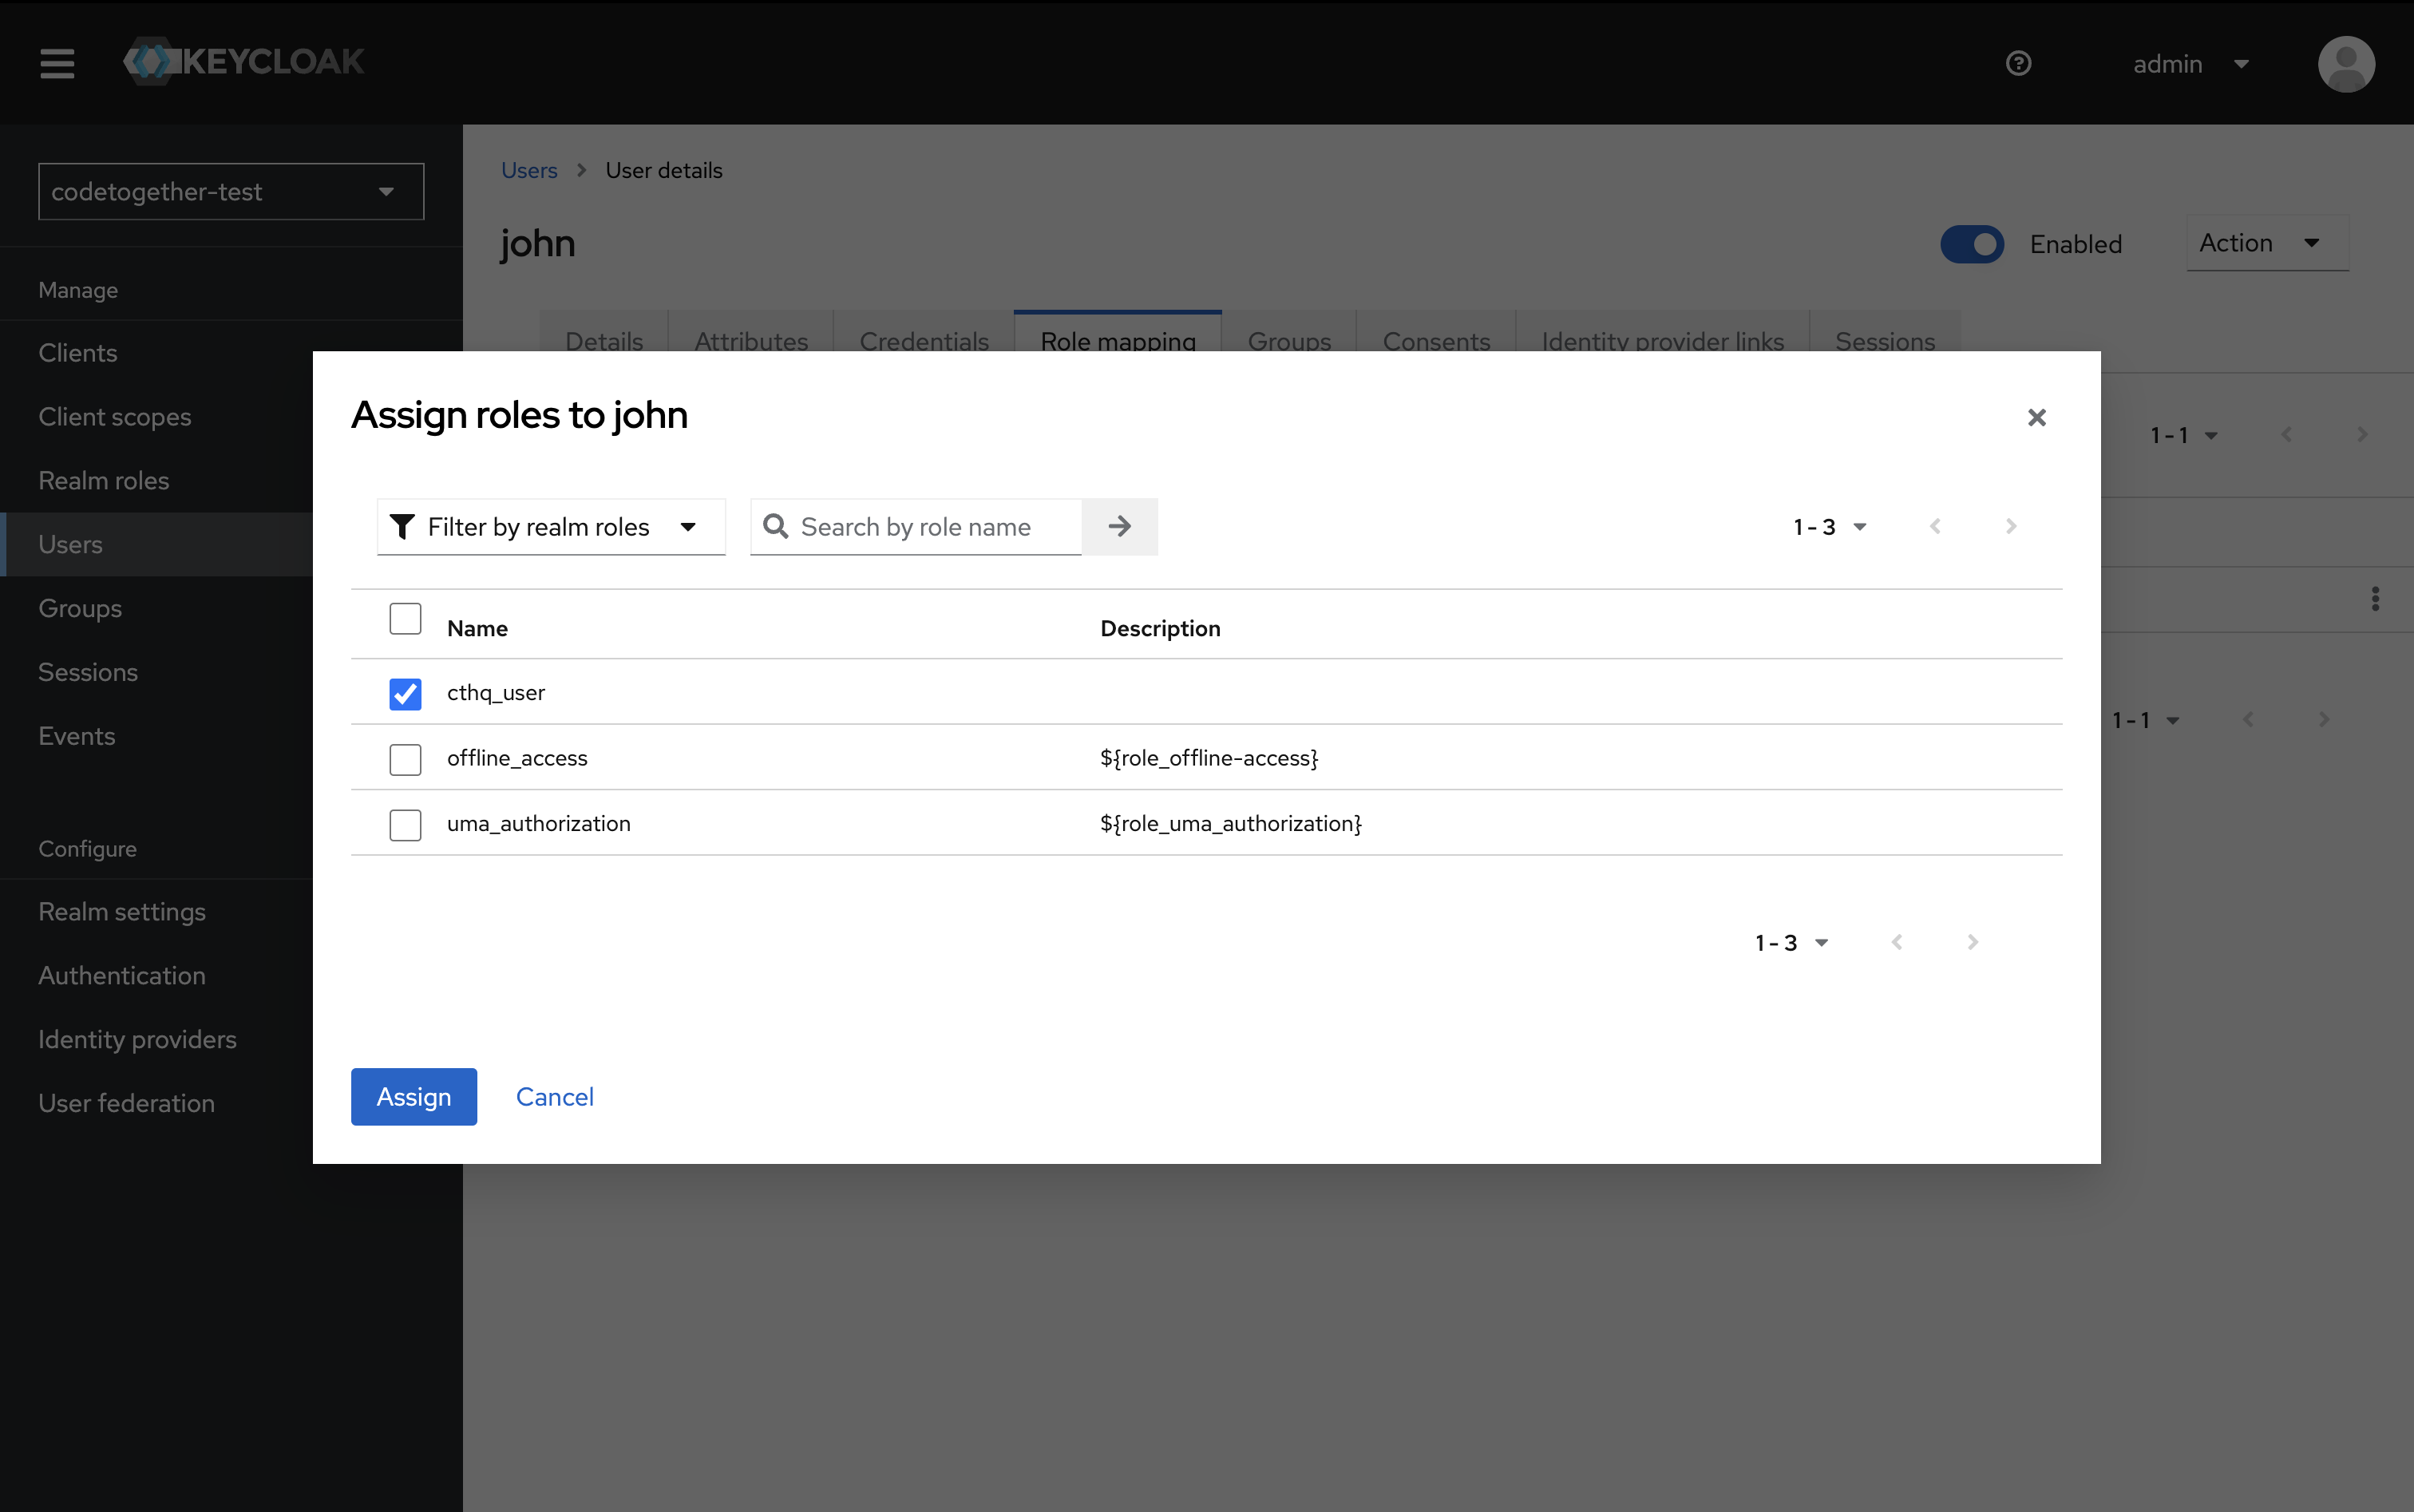
You should now see the assigned role under Assigned Roles.
Custom Java Truststore (Optional)
If your environment requires a custom CA certificate bundle (e.g. self-signed or internal CA), follow these steps to configure a custom Java trust store for CodeTogether Intel.
1. Generate the Java trust store
As an Example, we are using this to configure Keycloak, using a self-signed certificate.
openssl req -x509 -newkey rsa:2048 -keyout key.pem -out cert.pem -days 365 -nodes \
  -subj "/CN=<keycloak_url>"
For a detailed, external walk-through of creating a Java truststore, see: Java Truststore Walkthrough (Oracle Docs)
2. Prepare the cacerts file for the Kubernetes secret
Import into the default JVM cacerts store
2.1. Convert your PEM + key to PKCS#12:
openssl pkcs12 -export \
  -in cert.pem \
  -inkey key.pem \
  -name mycert \
  -out keycloak.p12 \
  -passout pass:changeit
Defaults to password changeit
2.2. Retrieve the cacerts file
To setup the trusted certificates file for the CodeTogether runtime, you can either use a pre-configured Java-style cacerts file or download the standard cacerts file that CodeTogether ships with. If unsure, download the standard CodeTogether file.
Download the distributed cacerts
 ${JAVA_HOME}/bin/keytool -importkeystore \
   -deststorepass changeit \
   -destkeystore  ${YOUR_DOWNLOAD_PATH}/cacerts \
   -srckeystore keycloak.p12 \
   -srcstoretype PKCS12 \
   -srcstorepass changeit \
   -alias mycert
2.3. Create the Kubernetes secret with the cacerts file
If you are using the default Java cacerts file — including the one provided by CodeTogether — the default password is changeit.
In this case, use the password-protected version of the Kubernetes secret command below.
kubectl create secret generic custom-java-cacerts \
  --from-file=cacerts=${YOUR_DOWNLOAD_PATH}/cacerts \
  --from-literal=trustStorePassword='changeit' \
  --namespace=default
3. Deployment Options
A. Helm
A.1. Update values.yaml
java:
  customCacerts:
    enabled: true
    cacertsSecretName: custom-java-cacerts
A.2. Deploy or upgrade
helm upgrade --install codetogether-intel codetogether/codetogether-intel \
  -n default \
  -f values.yaml
B. Docker Compose
B.1. Mount the truststore and set JVM options
In your compose.yaml, add:
services:
  codetogether-intel:
    volumes:
      - ${YOUR_DOWNLOAD_PATH}/cacerts:/etc/ssl/certs/java/cacerts:ro
    environment:
      - JAVA_OPTS=-Djavax.net.ssl.trustStore=/etc/ssl/certs/java/cacerts -Djavax.net.ssl.trustStorePassword=changeit
B.2. Start Containers
Now that the truststore is configured and your reverse proxy is ready for HTTPS, start the containers:
docker-compose up --pull always --wait
Additional Notes
- Ensure that the hq.sso.redirect.uri matches the redirect URI configured in your SSO provider.
- The hq.sso.jwt.set.uri is used to retrieve the JSON Web Key Set (JWKS) for validating tokens.
- For providers like Keycloak, the hq.sso.client.issuer.url may be required instead of individual endpoint URLs.
- If your deployment is single-tenant, the hq.sso.tenants property is not necessary.
- For detailed instructions on configuring specific SSO providers, refer to the respective provider's documentation. If you need assistance tailoring the configuration to your specific SSO provider, please contact your CodeTogether technical support representative for expert guidance.