Working in a Live Collaboration Session
This guide is designed to help you make the most of your live collaboration sessions, whether you’re joining from an IDE or a browser. You'll learn how the session adapts to your environment, explore the dynamic virtual cursor options for group coding or working independently, and discover essential features like navigating the host’s workspace, leveraging language smarts from the host IDE, and using powerful tools like Peek Definition, Call Hierarchy, and more. By the end of this guide, you’ll have a clear understanding of how to collaborate seamlessly and efficiently in real time using CodeTogether.
Your experience varies slightly depending on how you join the live collaboration session.
When joining from an IDE:
- You get the same look and feel of your IDE—including key bindings, workbench layout and general behavior.
- Language smarts come from the host IDE, regardless of the plugins/extensions you have installed or what your IDE is inherently capable of. Your experience as a participant differs from using the same IDE as a host. While you have access to the entire project shared by the host (minus files intentionally hidden from the session), the files and libraries are not downloaded to your system. Files are fetched on demand and only the files being actively edited are local to your system. This should help you understand which features in the host IDE you can expect to work.
- You can use the Project/Resource views and the Problems views; however, no other views provide meaningful support for shared projects.
When joining from a browser:
- You can select your preferred IDE theme and key bindings for a more familiar experience in the browser.
- Language smarts come from the host IDE.
Because language smarts always come from the host, content assist suggestions, validation, quick fixes and navigation support are all delivered by the host IDE.
Virtual Cursors
CodeTogether supports coding alone, or with a group while sharing a virtual cursor. Based on settings used to start the session, a single session can have multiple groups and individuals coding or browsing independently of each other. There is also a presentation mode where only the host has a cursor.
When multiple developers are typing simultaneously in the same file, language features like content assist, validation, navigation, etc. will continue to work for each editor, but performance may be affected.
When starting a session, the host can choose the initial cursor behavior for those who join the session, or allow participants to choose their cursor when joining the session.
Coding Together with a Shared Cursor
When developers share a virtual cursor, they typically share the same editing context—the same cursor position, and the same selection, in the same file. The following modes allow you to code together:
- Dynamic Driver Mode—If the session was started in this mode, any member of the group sharing the virtual cursor can start driving by simply editing code, making selections, opening files, etc. Other members in the same group automatically follow the driver. No explicit actions are needed to switch drivers, though if multiple members of the group are active at the same time, CodeTogether intelligently assigns a driver using recency of activity and cooldown periods. The current driver can explicitly make another member a driver.
- Explicit Driver Mode (Strong-Style Pairing)—In this mode, the current driver must explicitly grant the driver role to another member of the group—while group members can edit and navigate to different files, they cannot change to the driver role unless the role is granted by the current driver.
Followers in a group sharing a virtual cursor can browse code and make edits without leaving the group or becoming a driver. CodeTogether uses an intelligent system to allow the member enough time (dynamically adjusted based on activity) to make their changes or browse code, and then brings them back to follow the driver when appropriate. In the dynamic driver mode, you may become the new driver if the current driver is idle.
Coding Alone with Your Own Cursor
Coding alone is similar to coding in a regular IDE. The developer alone decides which files to browse or edit. Other participants in the session are not disrupted, nor do they follow along as the developer opens new files and makes edits.
Force All to Follow
Hosts and guests have the ability to bring everyone to their location with the Force all to follow you action in the CodeTogether view. To prevent misuse in larger sessions, guests cannot use this option if the session includes more than three participants.
Changing Your Virtual Cursor Mode and Driver
In the Virtual Cursors section of the CodeTogether view, double-click (or click in VS Code or a browser) another group or individual coding alone to start sharing their virtual cursor, or select the Go to your own cursor node to start coding or browsing independently.
Additional options are available depending on the client you are using.
- VS Code
- Eclipse & IntelliJ
- Browser

In Eclipse and IntelliJ, an annotation in the bottom right of the editor shows your current status and includes actions to change your status.
Color Codes
Color codes are used in addition to the text to make your current state more clear. The color is used for both the editor border and to highlight the annotation.
- Grey—Following or waiting for others to join

- Light blue—Coding alone

- Green—Driving


- Yellow—Browsing or editing with another active driver who shares your virtual cursor

Available Actions
- Stop—Click this link when sharing a virtual cursor to get your own cursor.
- Follow—Click this link when coding on your own to begin sharing a virtual cursor with a current driver, or if browsing/editing on your own while sharing a cursor, this link immediately returns you to the active driver.
- Change Driver/Let Drive—Use these links when you are the current driver to grant the driver role to a different group member.
To remove the colored editor border and editor annotation, clear the Show collaboration status in editor checkbox from CodeTogether Preferences/Settings.
- Use the
Ctrl + K Chotkey to toggle between sharing a virtual cursor and having your own cursor. - In the collaboration status area of the menu bar, hyperlinks will allow you to follow others (share their virtual cursor), stop following (code alone), and change the driver.
Navigating in a Session
The following features are available when you join a session. When using an IDE client, use your normal IDE menus and shortcuts to access these capabilities.
Explorer View
Participants have access to all files in the host’s workspace. When joining from a browser, use the Explorer view (View > Explorer) to dive into the projects in the host’s workspace. Expand any folder, and click any resource to open it. In the browser and VS Code, you can use Quick Open (Ctrl/Cmd+P) to filter through and open any file in the workspace. For Eclipse, use the Open Resource action, and for IntelliJ, use Navigate > File.

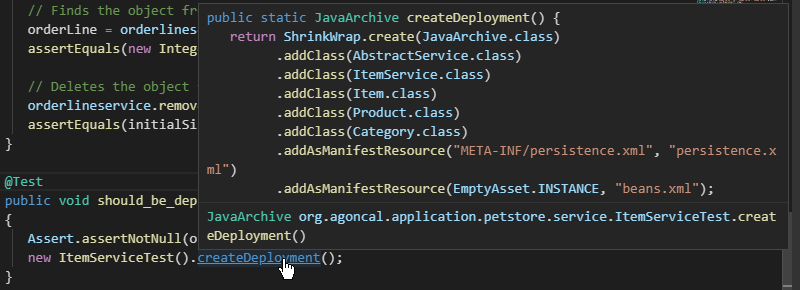
Peek/Go to Definition
Press Ctrl/Cmd while hovering over an element to view the definition of the element inline. You can click the hyperlink to navigate to the definition, whether in the same file or another. Alternatively, use the Go to Definition context menu item to navigate.
Peek References
From the context menu of an element, select Peek References to view all references to the element inline. You can examine each reference in detail without leaving your current editing context.
Call/Type Hierarchy
Use the Call Hierarchy context menu action to bring up the call hierarchy. Use the Supertype and Subtype Hierarchy context menu actions to bring up the corresponding hierarchy trees.

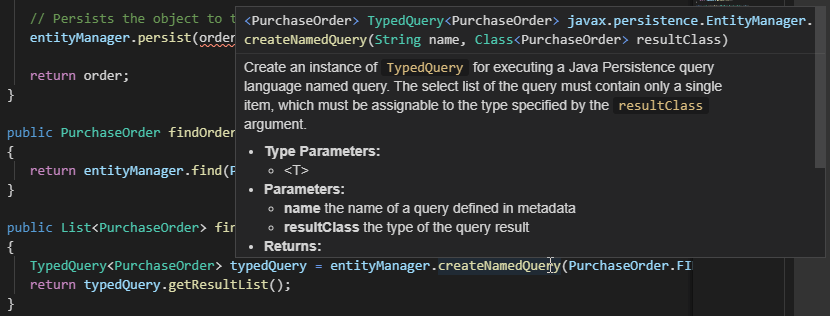
Documentation on Hover
Hover over an element to view corresponding documentation, if available.
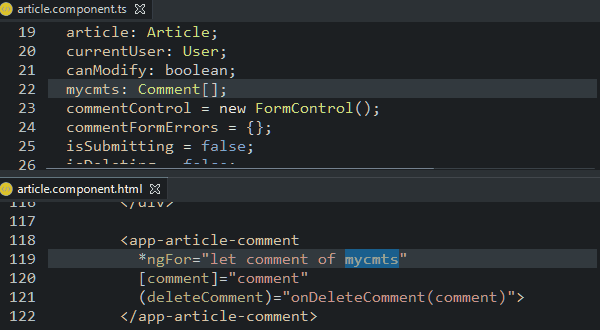
Outline/Go to Symbol
The Outline view (View > Outline) displays a structural outline of the file being currently edited. You can use the Outline view to navigate within the file. You can also use Go to Symbol (Ctrl/Cmd+Shift+O) to open up a filterable list of symbols to quickly navigate to a particular symbol in the file you’re currently editing.
Open Symbol
Use your IDE’s Open Symbol/Open Type actions or shortcuts to bring up the corresponding Open Symbol dialog. CodeTogether allows you to find remote types across the entire shared workspace. If you are using a browser, use the Open Workspace Symbol command, or bring up the command palette and type in a # to start the symbol search. Depending on the host IDE, Open Symbol could allow you to filter beyond top level types; for example, into fields and methods.
File Content Search
Your IDE's file search capabilities can be used to search for text within file contents of the shared workspace. Regular expressions are supported and you can navigate directly to the matched section from the search results.

In Eclipse, use Search > File and the Remote File Search tab. In the browser, use the Search view (View > Search).
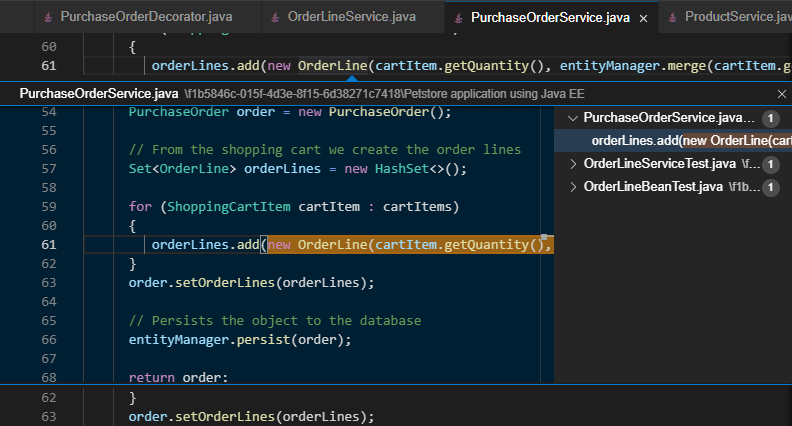
Selection and Cursor Annotations
If you are following the Host or another participant, their selections and cursor locations as they type are displayed as a labeled annotation.
Code Folding
When you hover the column to the left of your code, a down arrow indicates the start of a section that can be collapsed. Click the down arrow to hide the block of code. The first line in the block of code remains visible with a right arrow. Click the right arrow to expand the block of code.

Editing in a Session
In addition to basic editing capabilities like undo, redo, and clipboard access, the following code features are available.
Content Assist
Press the appropriate key binding (typically Ctrl+Space) to invoke content assist. On accepting a proposal, you can press Tab to jump from one parameter stop to the next as you key in the parameters to a constructor or method.
Quick Fixes
When the cursor is within an error squiggly, a quick fix bulb appears if one or more fixes are available. Click the bulb and choose the desired fix action to make the recommended changes to your code.
Rename Refactoring
Use your IDE’s rename refactoring shortcut or menu actions to initiate this refactoring action. As long as the host supports it, this results in the element being correctly renamed across the workspace.
Validation
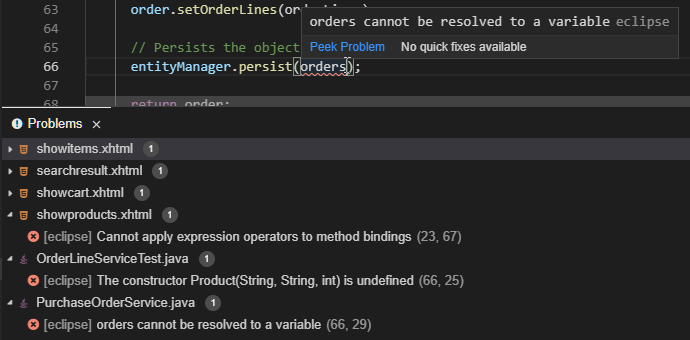
Errors from the host workspace appear in all participant sessions. This includes errors from files that are not currently open or being edited, as long as the host has validated those files. Errors typically appear and disappear as you type, as validation takes place on the host and the markers are transferred over to the participants. To see a list of all errors, you can open the Problems view (View > Problems) from where you can easily navigate to the referenced files.
Java Class Creation
Create a new file with a java extension within a Java source folder, and CodeTogether creates a minimally scaffolded Java class, ready for further code.
Formatting
You can format the entire file by using the Format Document context menu action. If code is selected, only the selected code is formatted.
Advanced Features
CodeTogether includes a number of features that help you get the most of your collaborative coding session.
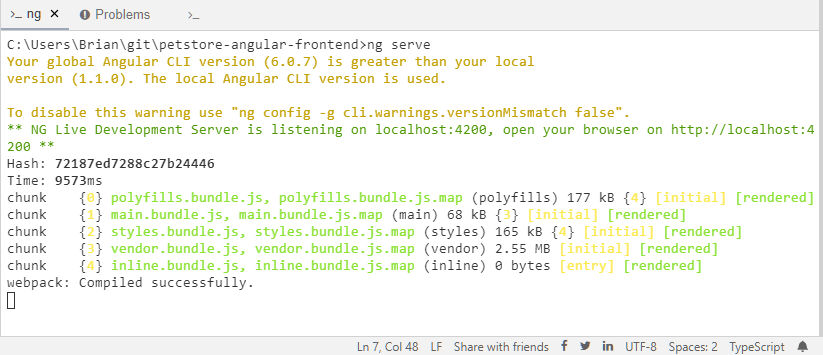
Shared Console
Console output on the host is visible to all participants. To see the output as soon as it is emitted on the host, access the appropriate view: the Console view in Eclipse, the Run tool window in IntelliJ or the Output view in VS Code or a browser.

Shared Terminal
Hosts have the option to share terminals with guests in a live collaboration session. Guests are able to observe commands the host is executing in the Terminal view with the corresponding output. The host controls access to terminals, with the option to grant write access.
By default, all terminals opened on the host are automatically shared with guests in the session. To stop sharing a terminal, the host can use the Unshare Terminal/Stop Sharing button from the terminal in the CodeTogether view.
To open a terminal, select it from the list, or click the Open Terminal/Focus Terminal button from the terminal in the CodeTogether view. Participants only see terminal activity that occurs after they join the session.
To request write access to the terminal, use the Request Write Access button from the terminal in the CodeTogether view or begin typing in the terminal.
note When guests interact with a terminal, the terminal is automatically focused in the host IDE to allow the host to track activity. You can turn this feature off in CodeTogether Preferences/Settings.
Shared terminal in a browser example:
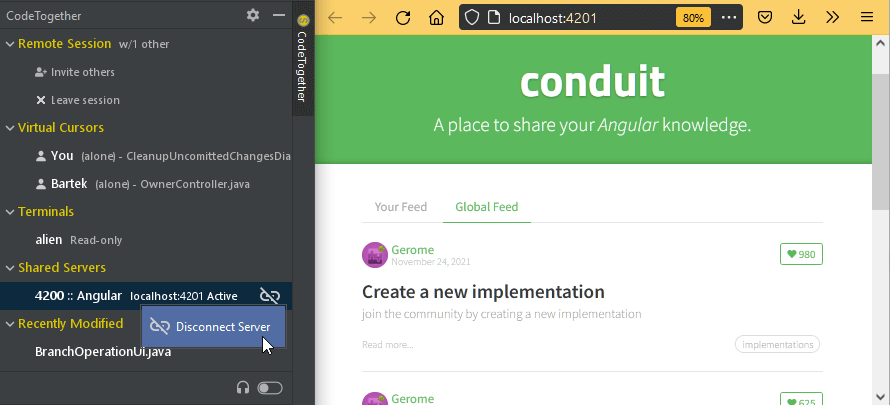
Shared Server
CodeTogether automatically detects servers running on the host system and displays them under Shared Servers in the CodeTogether view. This includes servers running independently, outside of the IDE.
To manually add a server, use the Add Manual Port/Add Server button or context menu action for a server listed in the CodeTogether view. The host can start or stop sharing servers at any time during a session. If a previously shared server is stopped, it is removed from the CodeTogether view, and becomes inaccessible.
On the guest side, servers shared by the host appear under Shared Servers in the CodeTogether view. Guests can connect to a server by selecting it or by using the Connect Server button or context menu action. CodeTogether attempts to make the server available on the same port as the host. If the port is unavailable locally, CodeTogether selects the next available port and updates the server's local address.
To disconnect from a server and free the local port, guests can select the server or use the Disconnect Server button or context menu action.
Use this capability to share more than just web applications. Share a database server, a remote debug session, web sockets, etc.
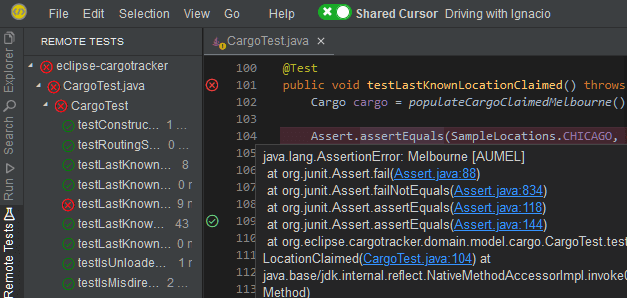
Run Launches and Unit Tests
Guests can remotely run tests and analyze the results. They can even write tests, allowing test-driven development (TDD) in a remote environment. JUnit, TestNG, PHPUnit and pytest are all supported. Guests can also execute run configurations from the host IDE, remotely launching applications with the ability to stop and monitor the invocations. By default, all guests can run remote launches and unit tests. You can limit access to this feature when you start the session.
See Running Tests and Launches for details.