Keycloak Initial Setup (Optional)
If you don't have an SSO configuration in place, use Keycloak SSO instead. The following steps outline how to proceed.
To be able to start using Keycloak as your SSO provider, you need to perform the following steps:
- Create a realm.
- Create a client.
- Create a role.
- Create at least one user.
1. Create a Realm
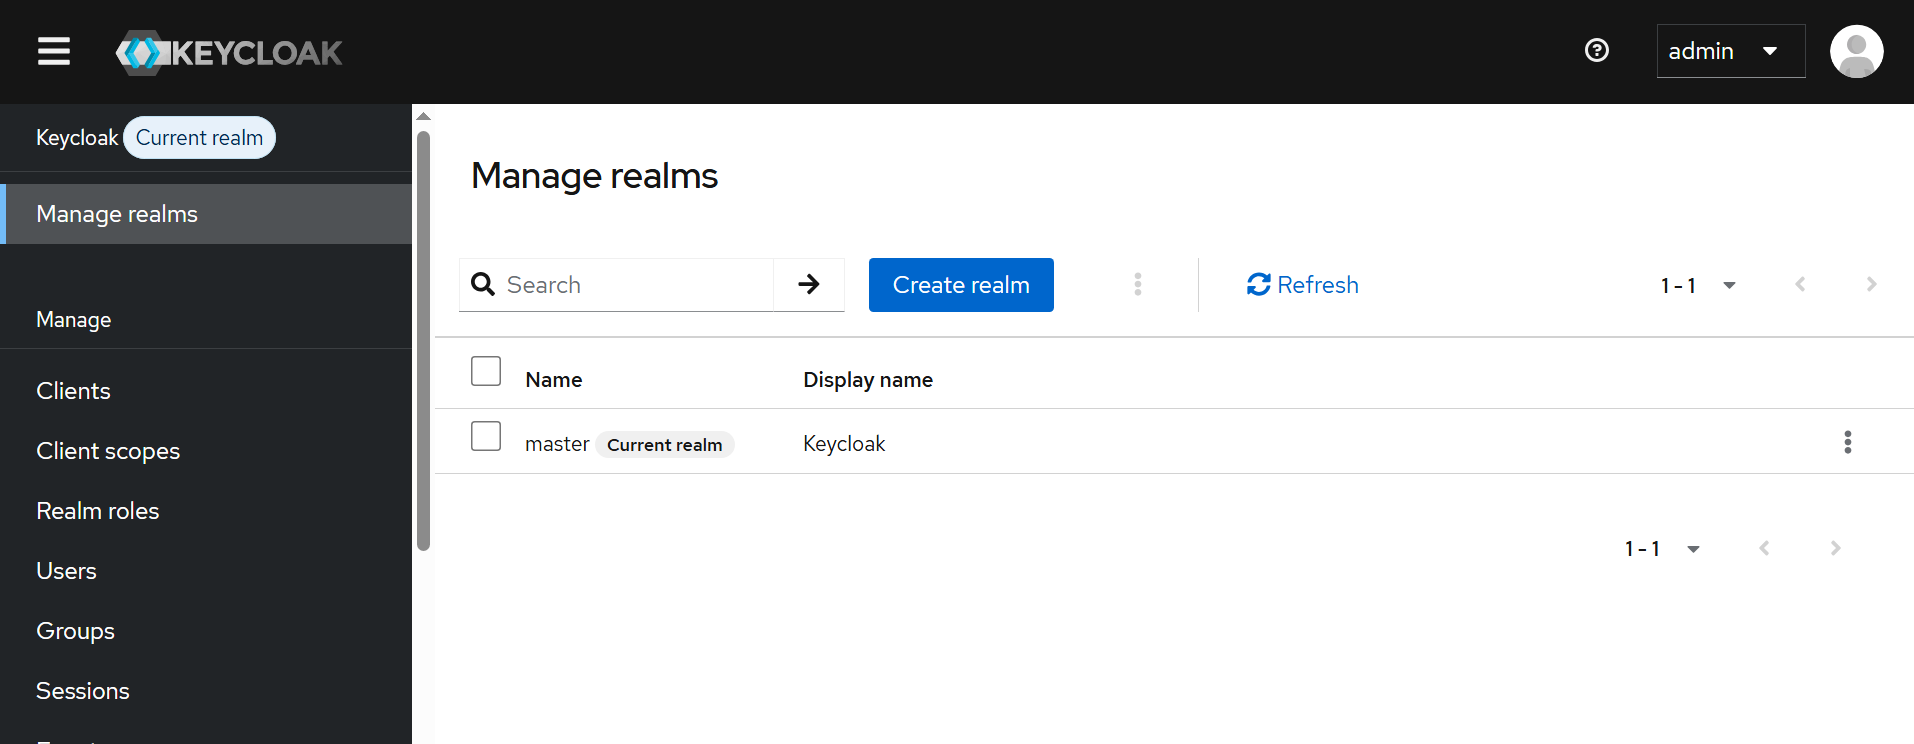
1.1. Click on the Manage reals tab, and then click Create realm button.
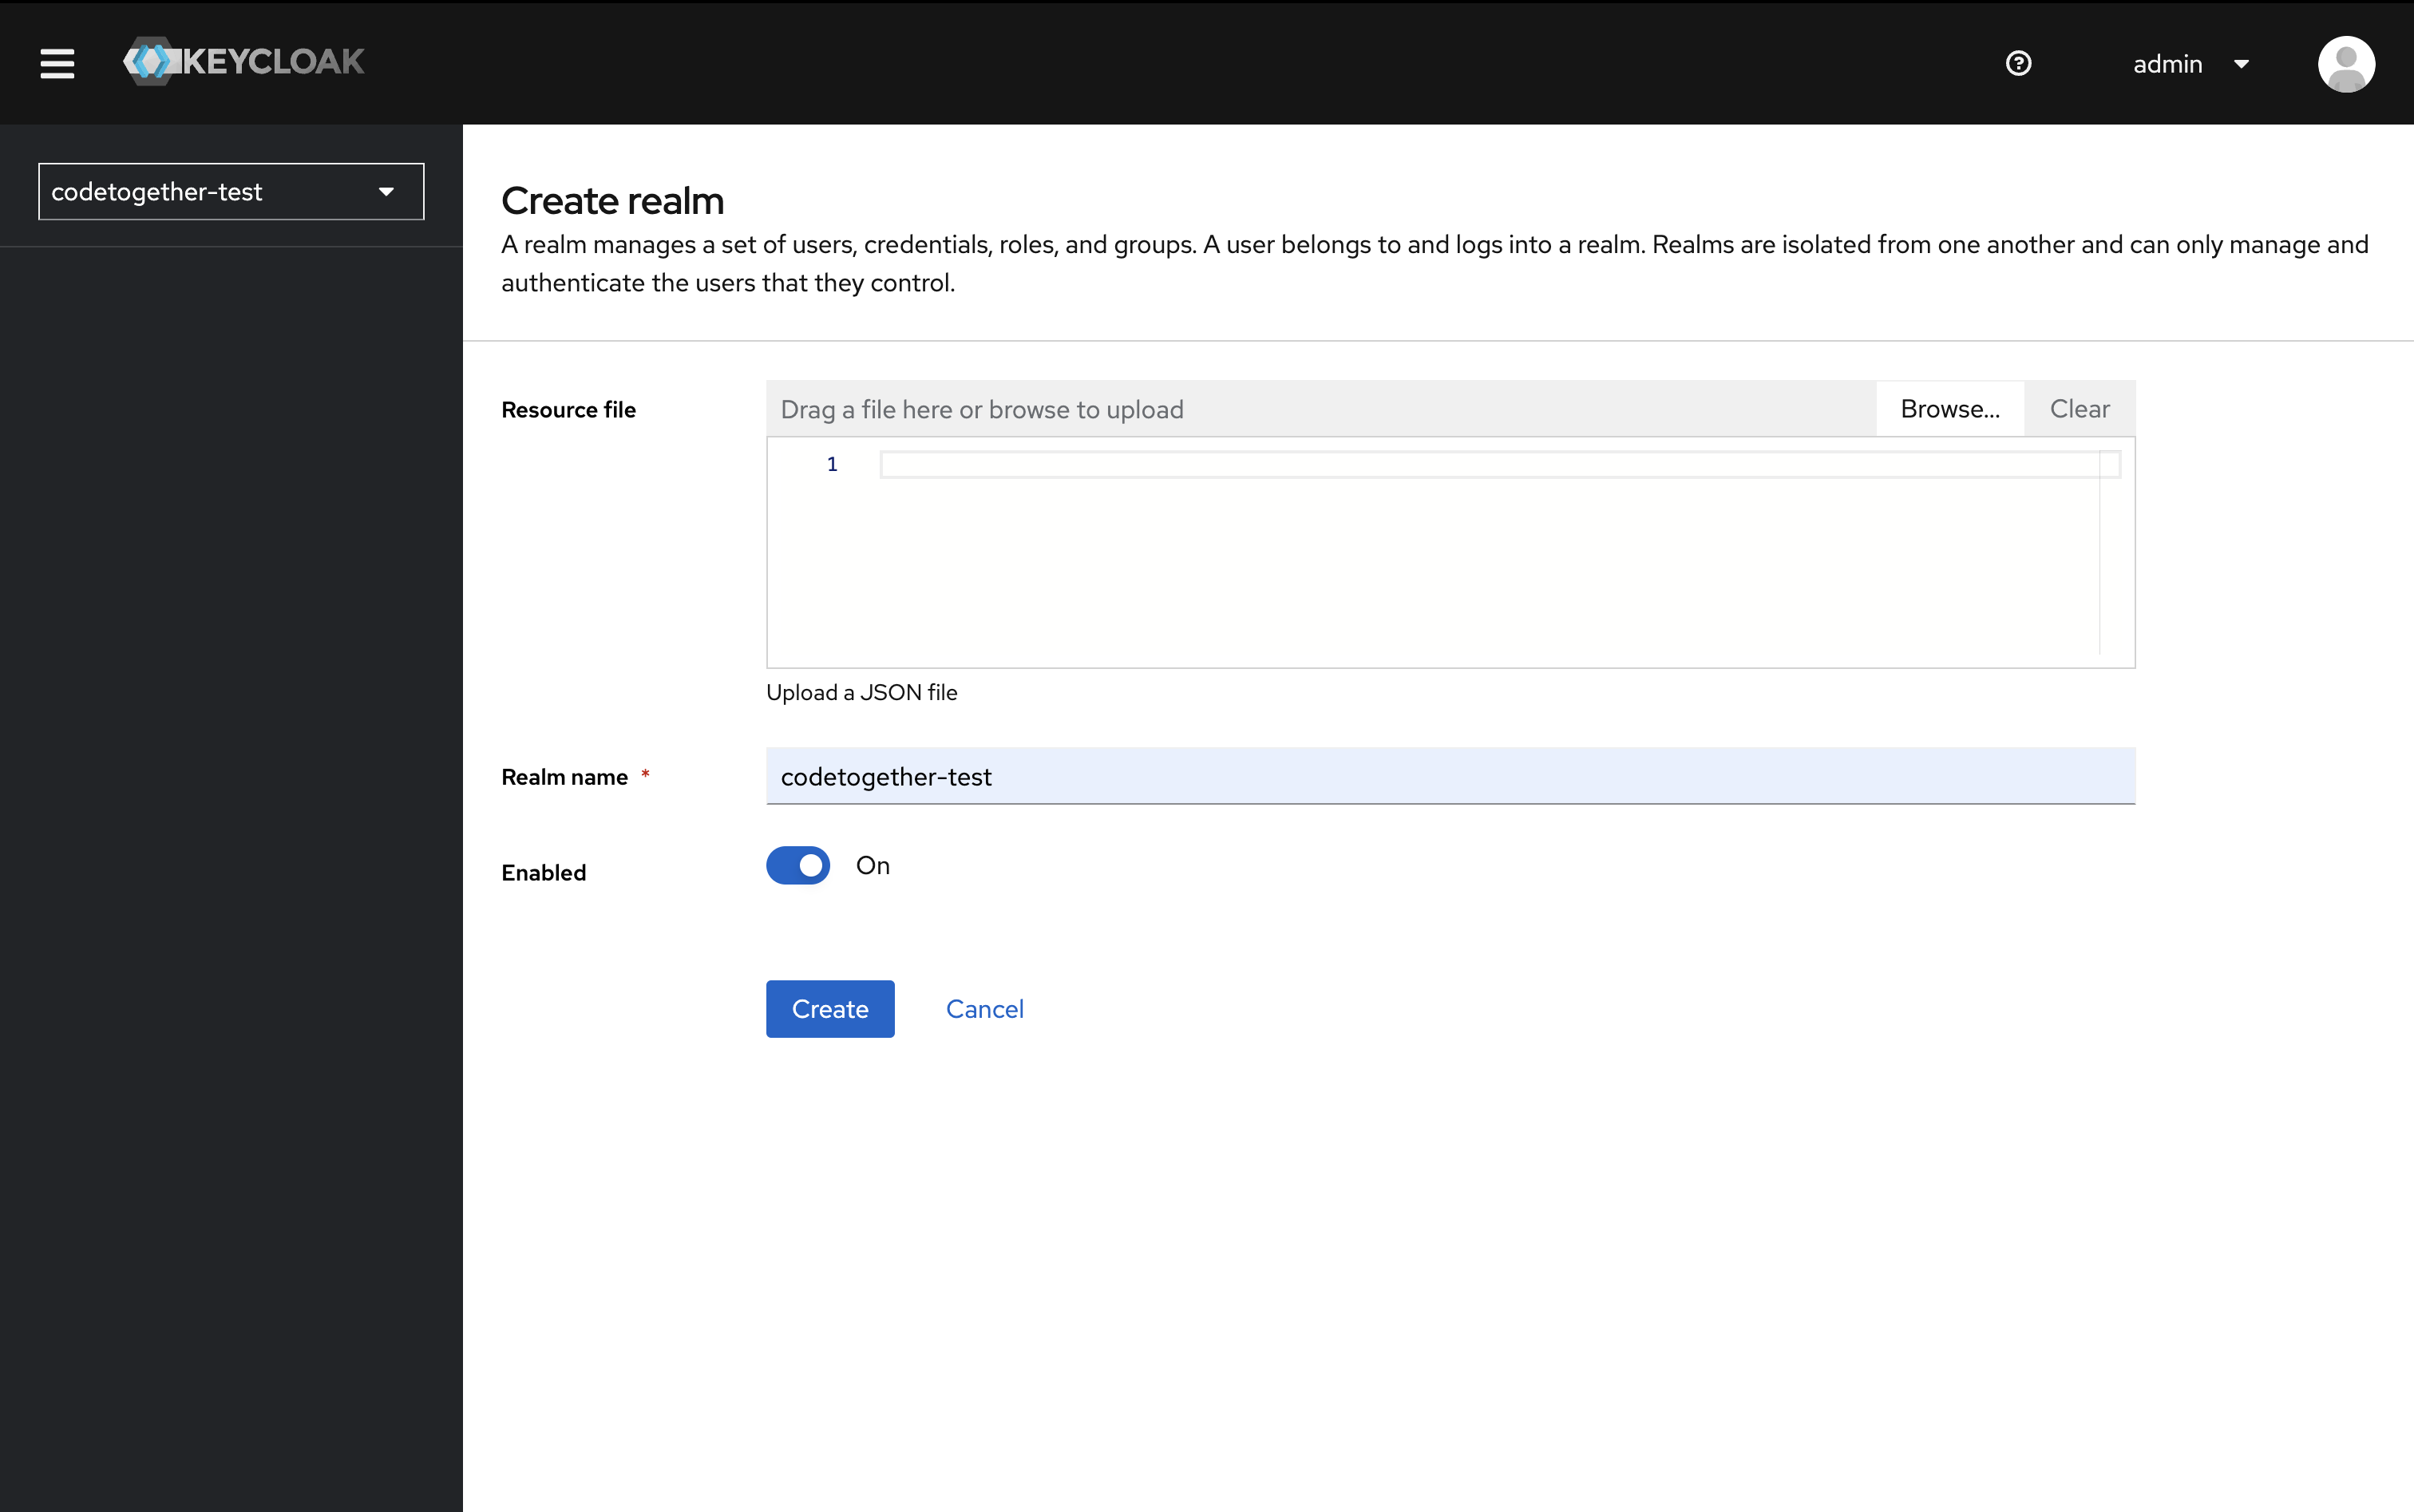
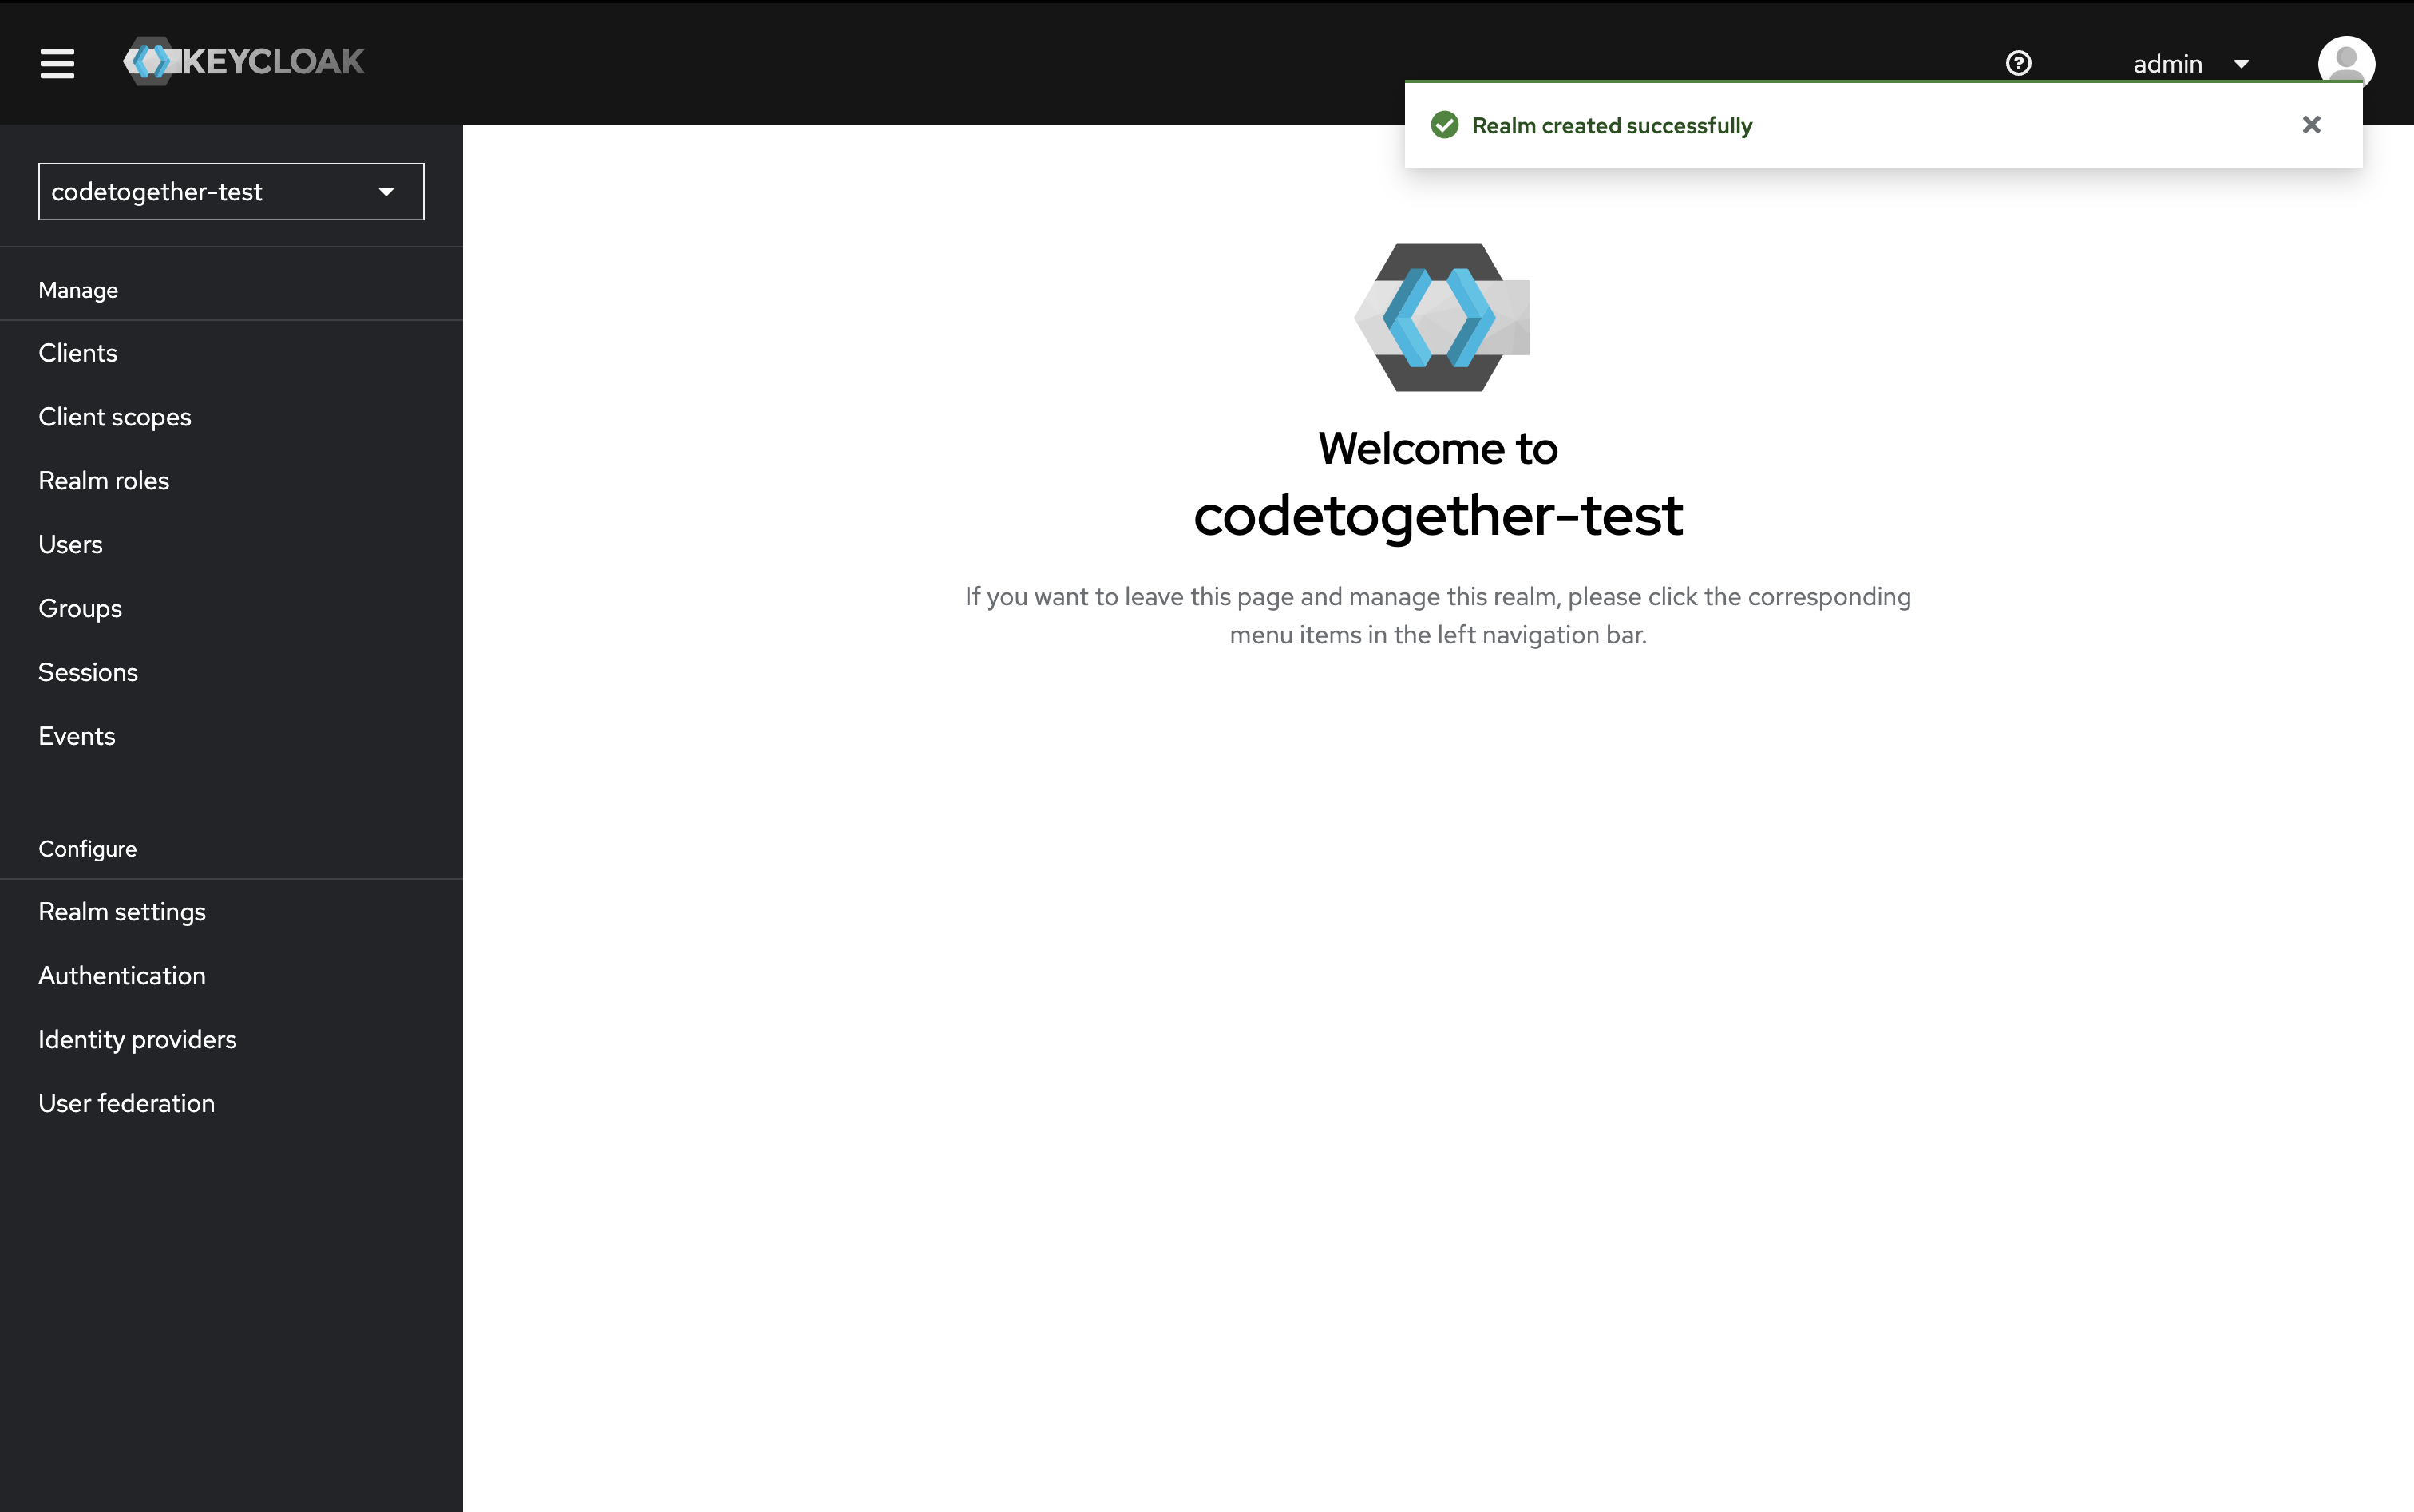
1.2. Specify the realm name: you can use any name, for example codetogether. 3. Click Create.
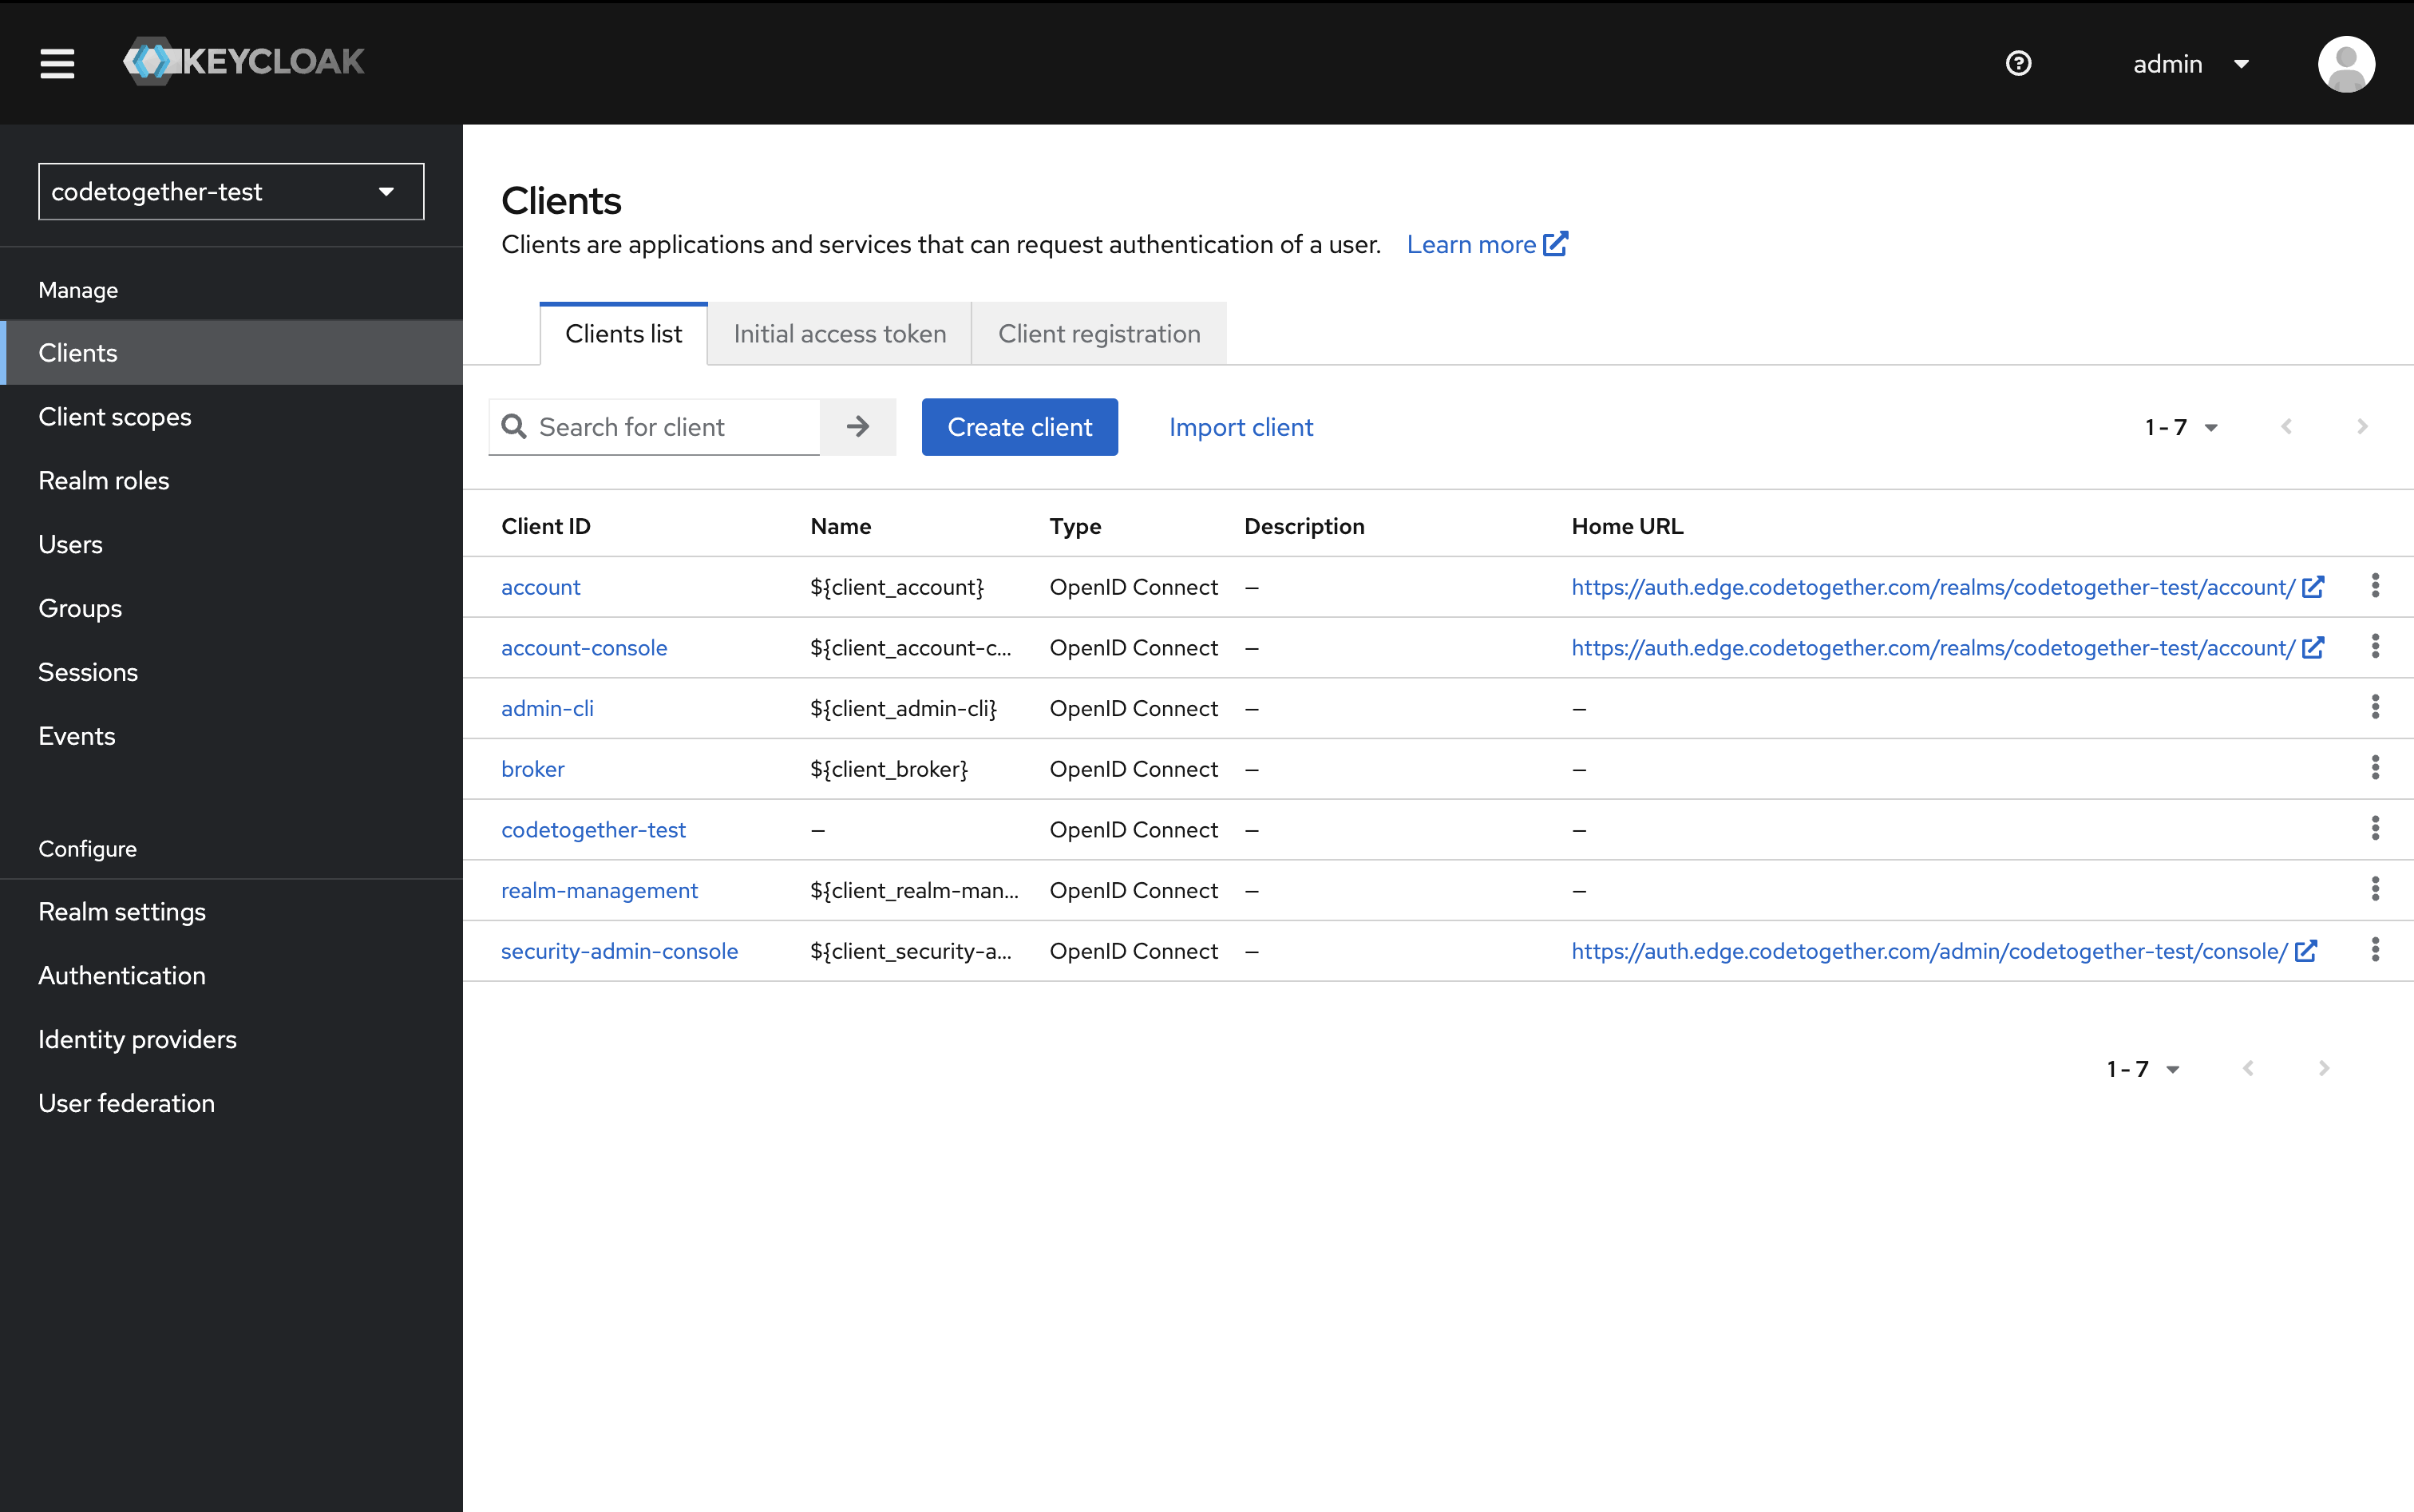
2. Create a Client
You must select the realm you just created from the realms dropdown before continuing.
2.2. In the left-hand panel, click Clients, then click Create client.
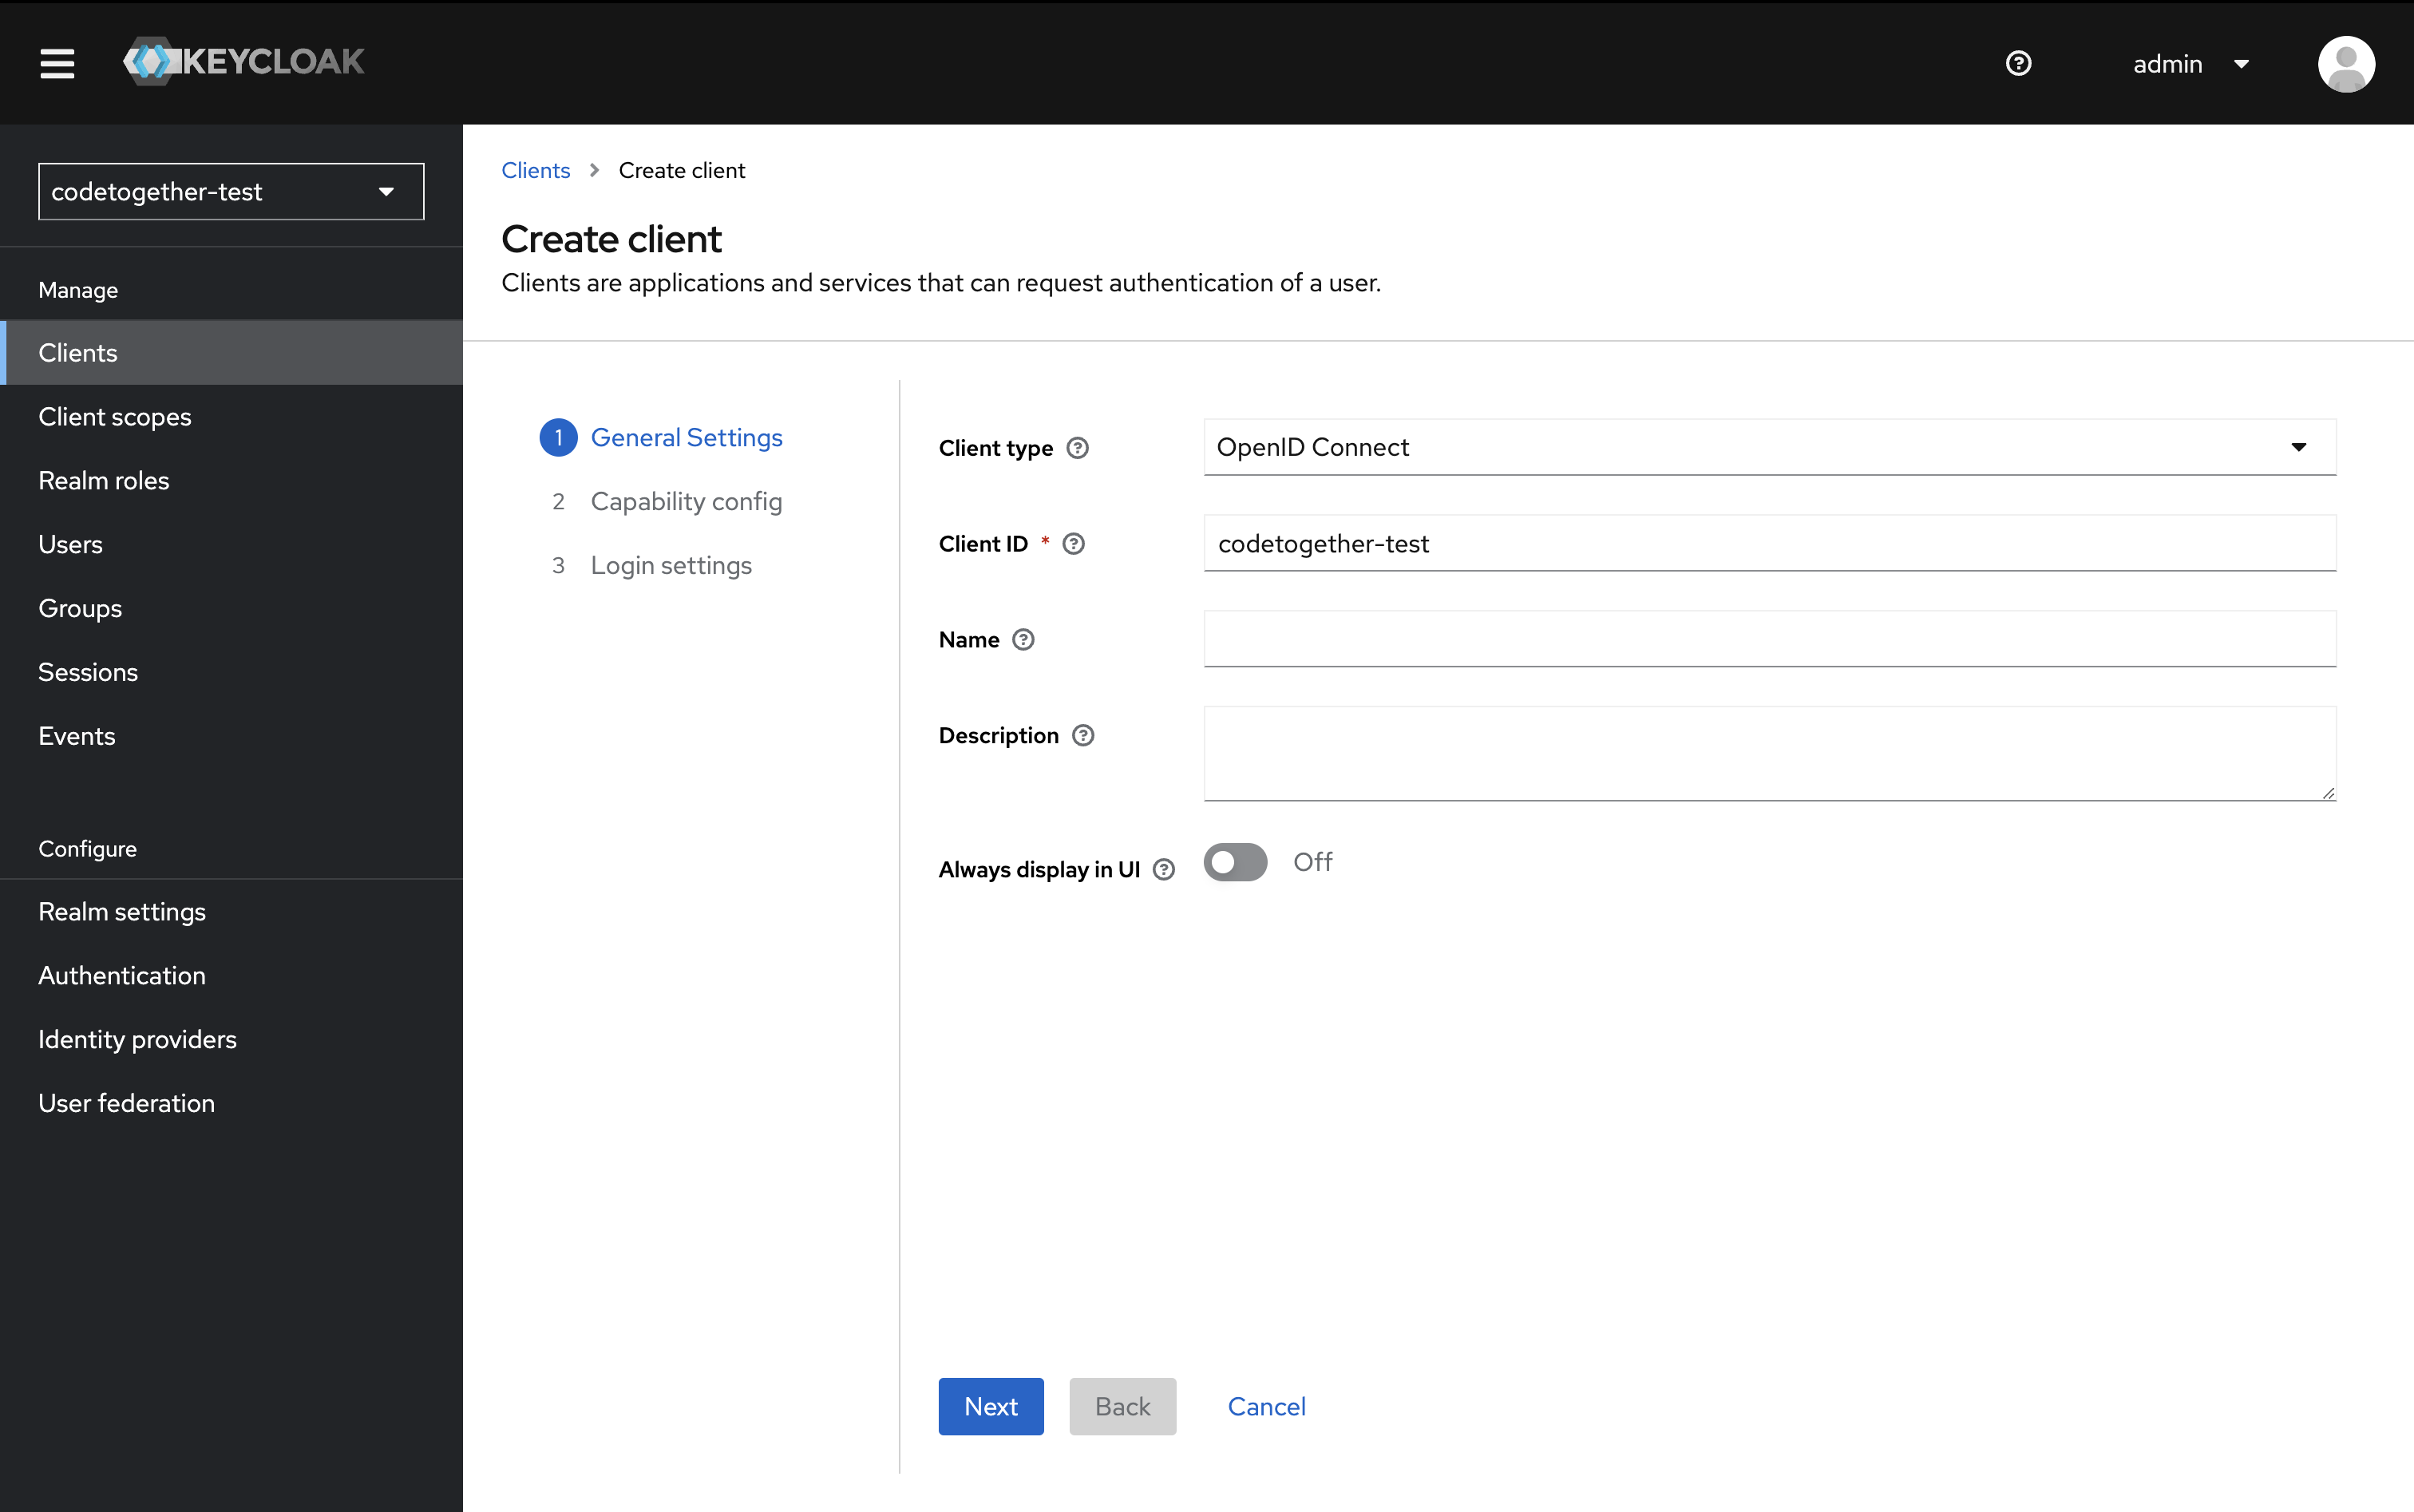
2.3. Specify the client ID: it can be any name, but as a best practice, use the same name as the realm — for example, codetogether — and click Next.
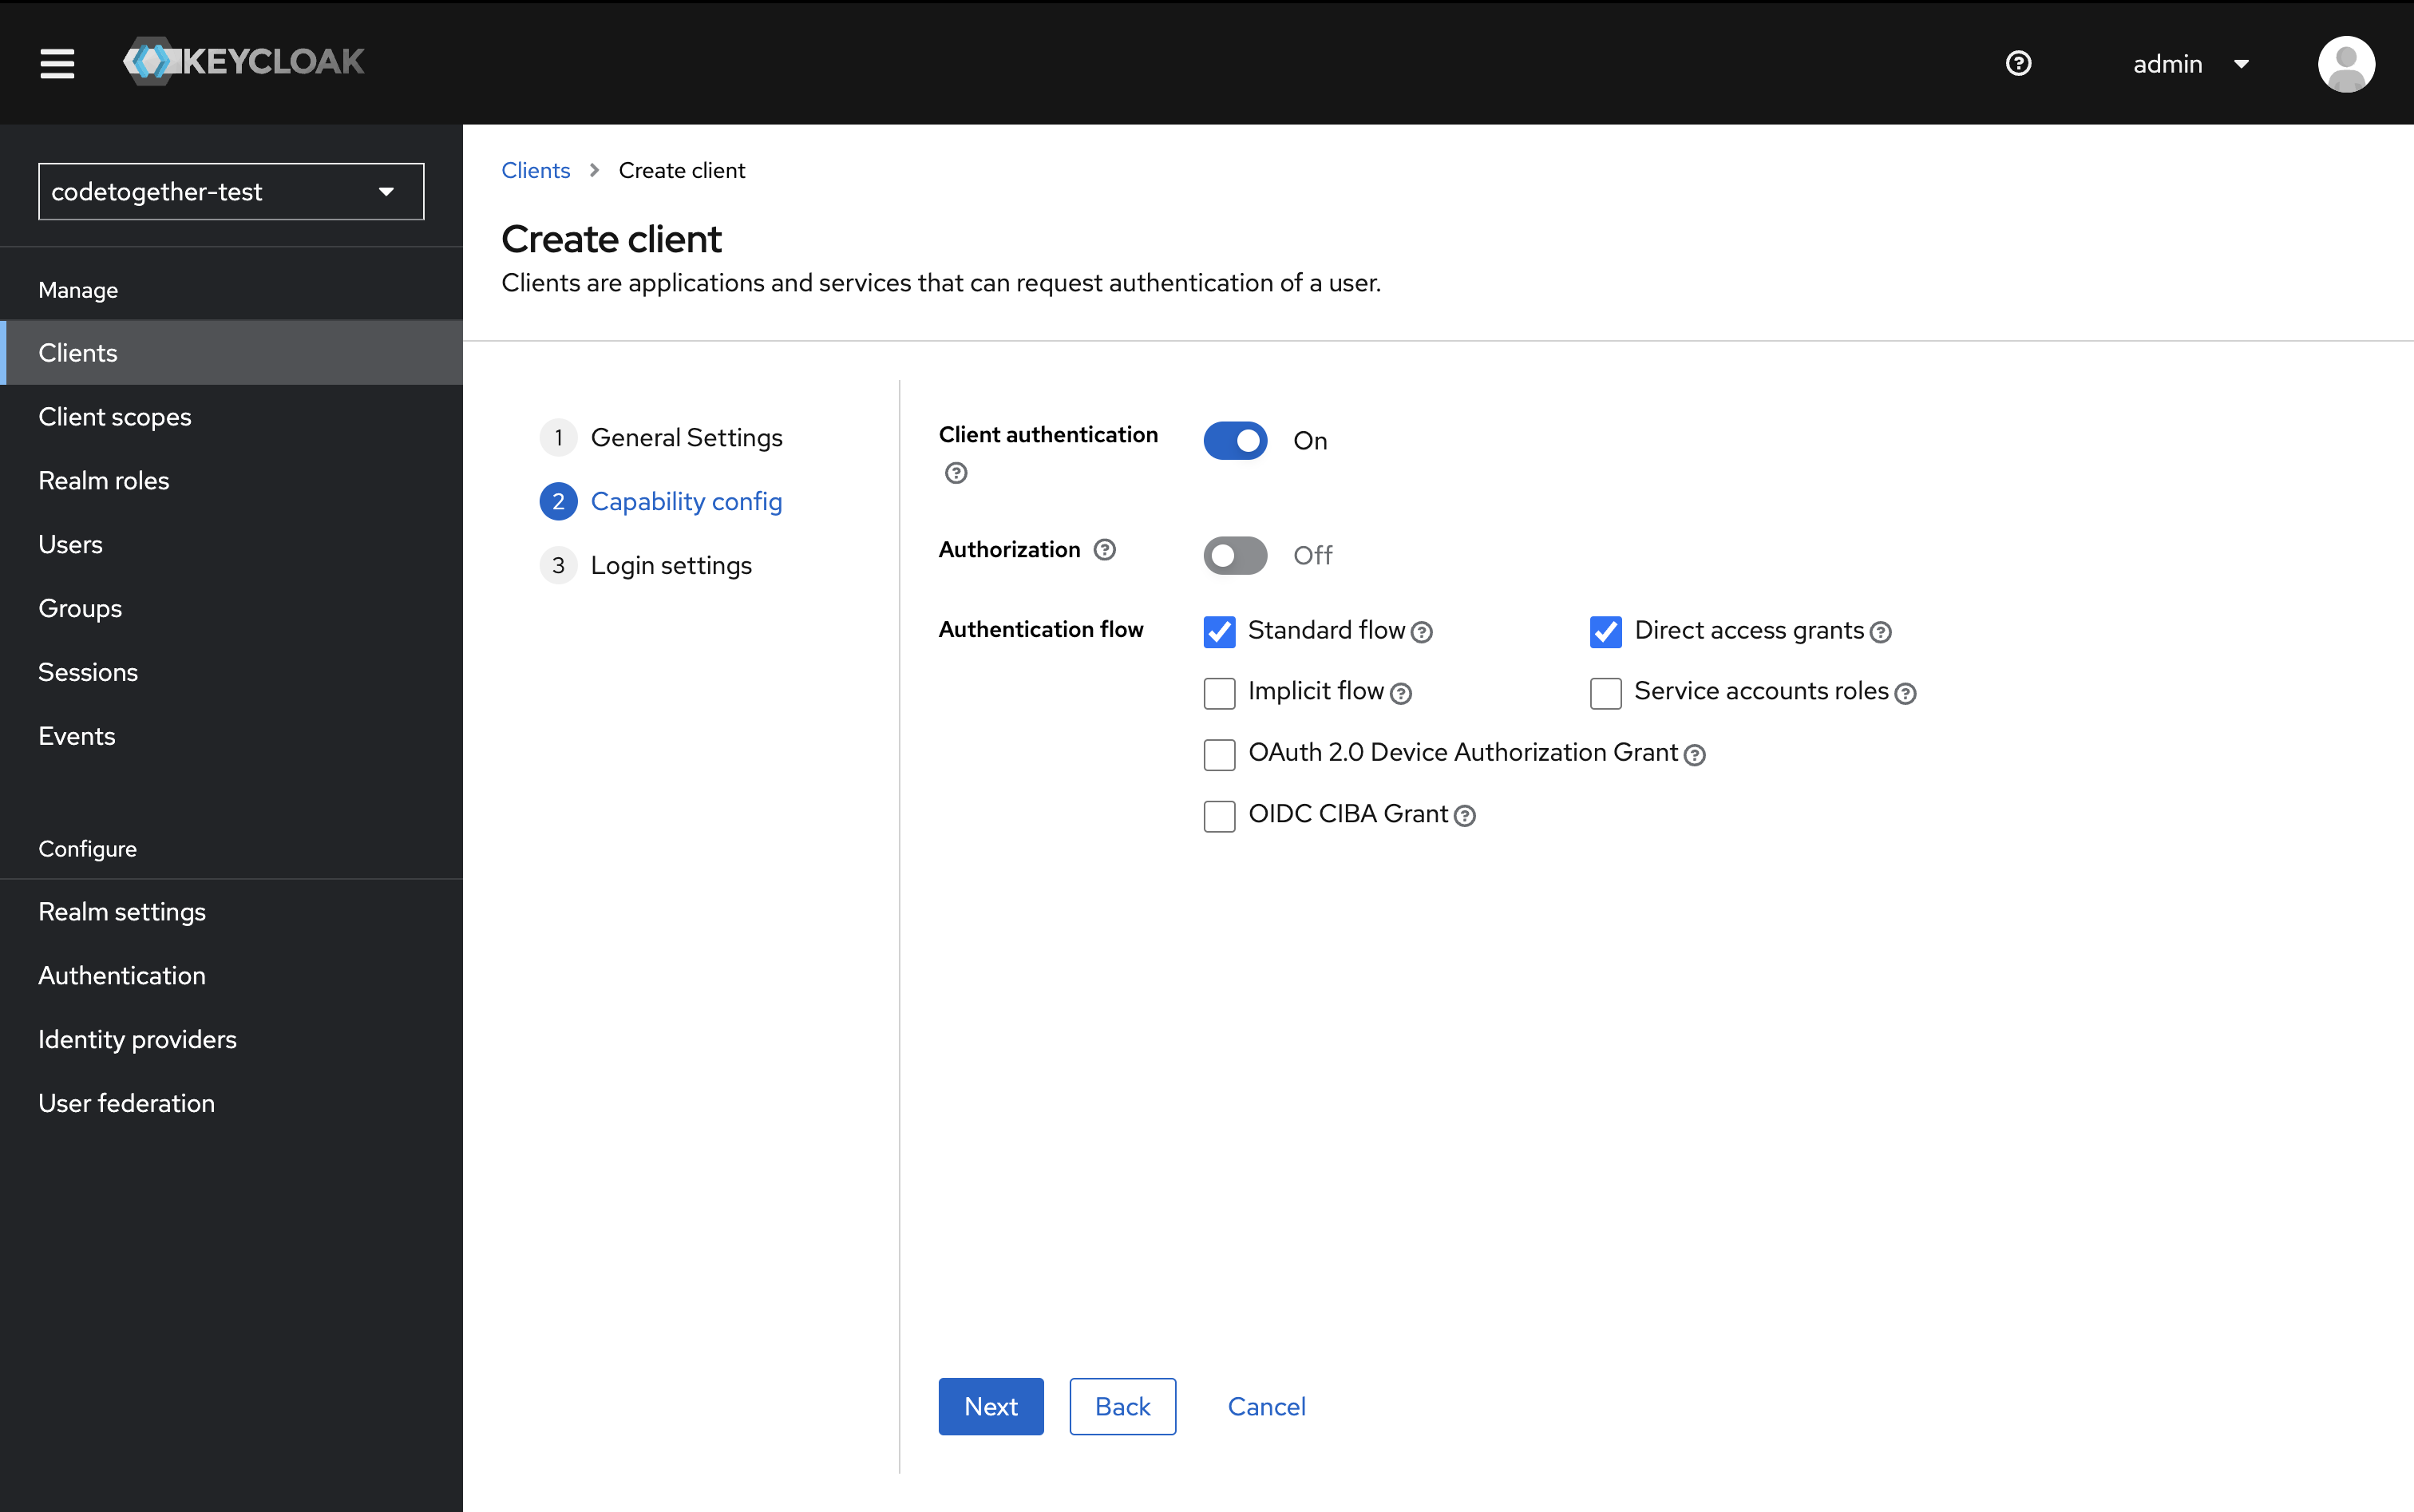
2.4. In the Capability Config section:
- Client authentication: On
- Authentication flow: Enable Standard flow and Direct access grants Then click Next.
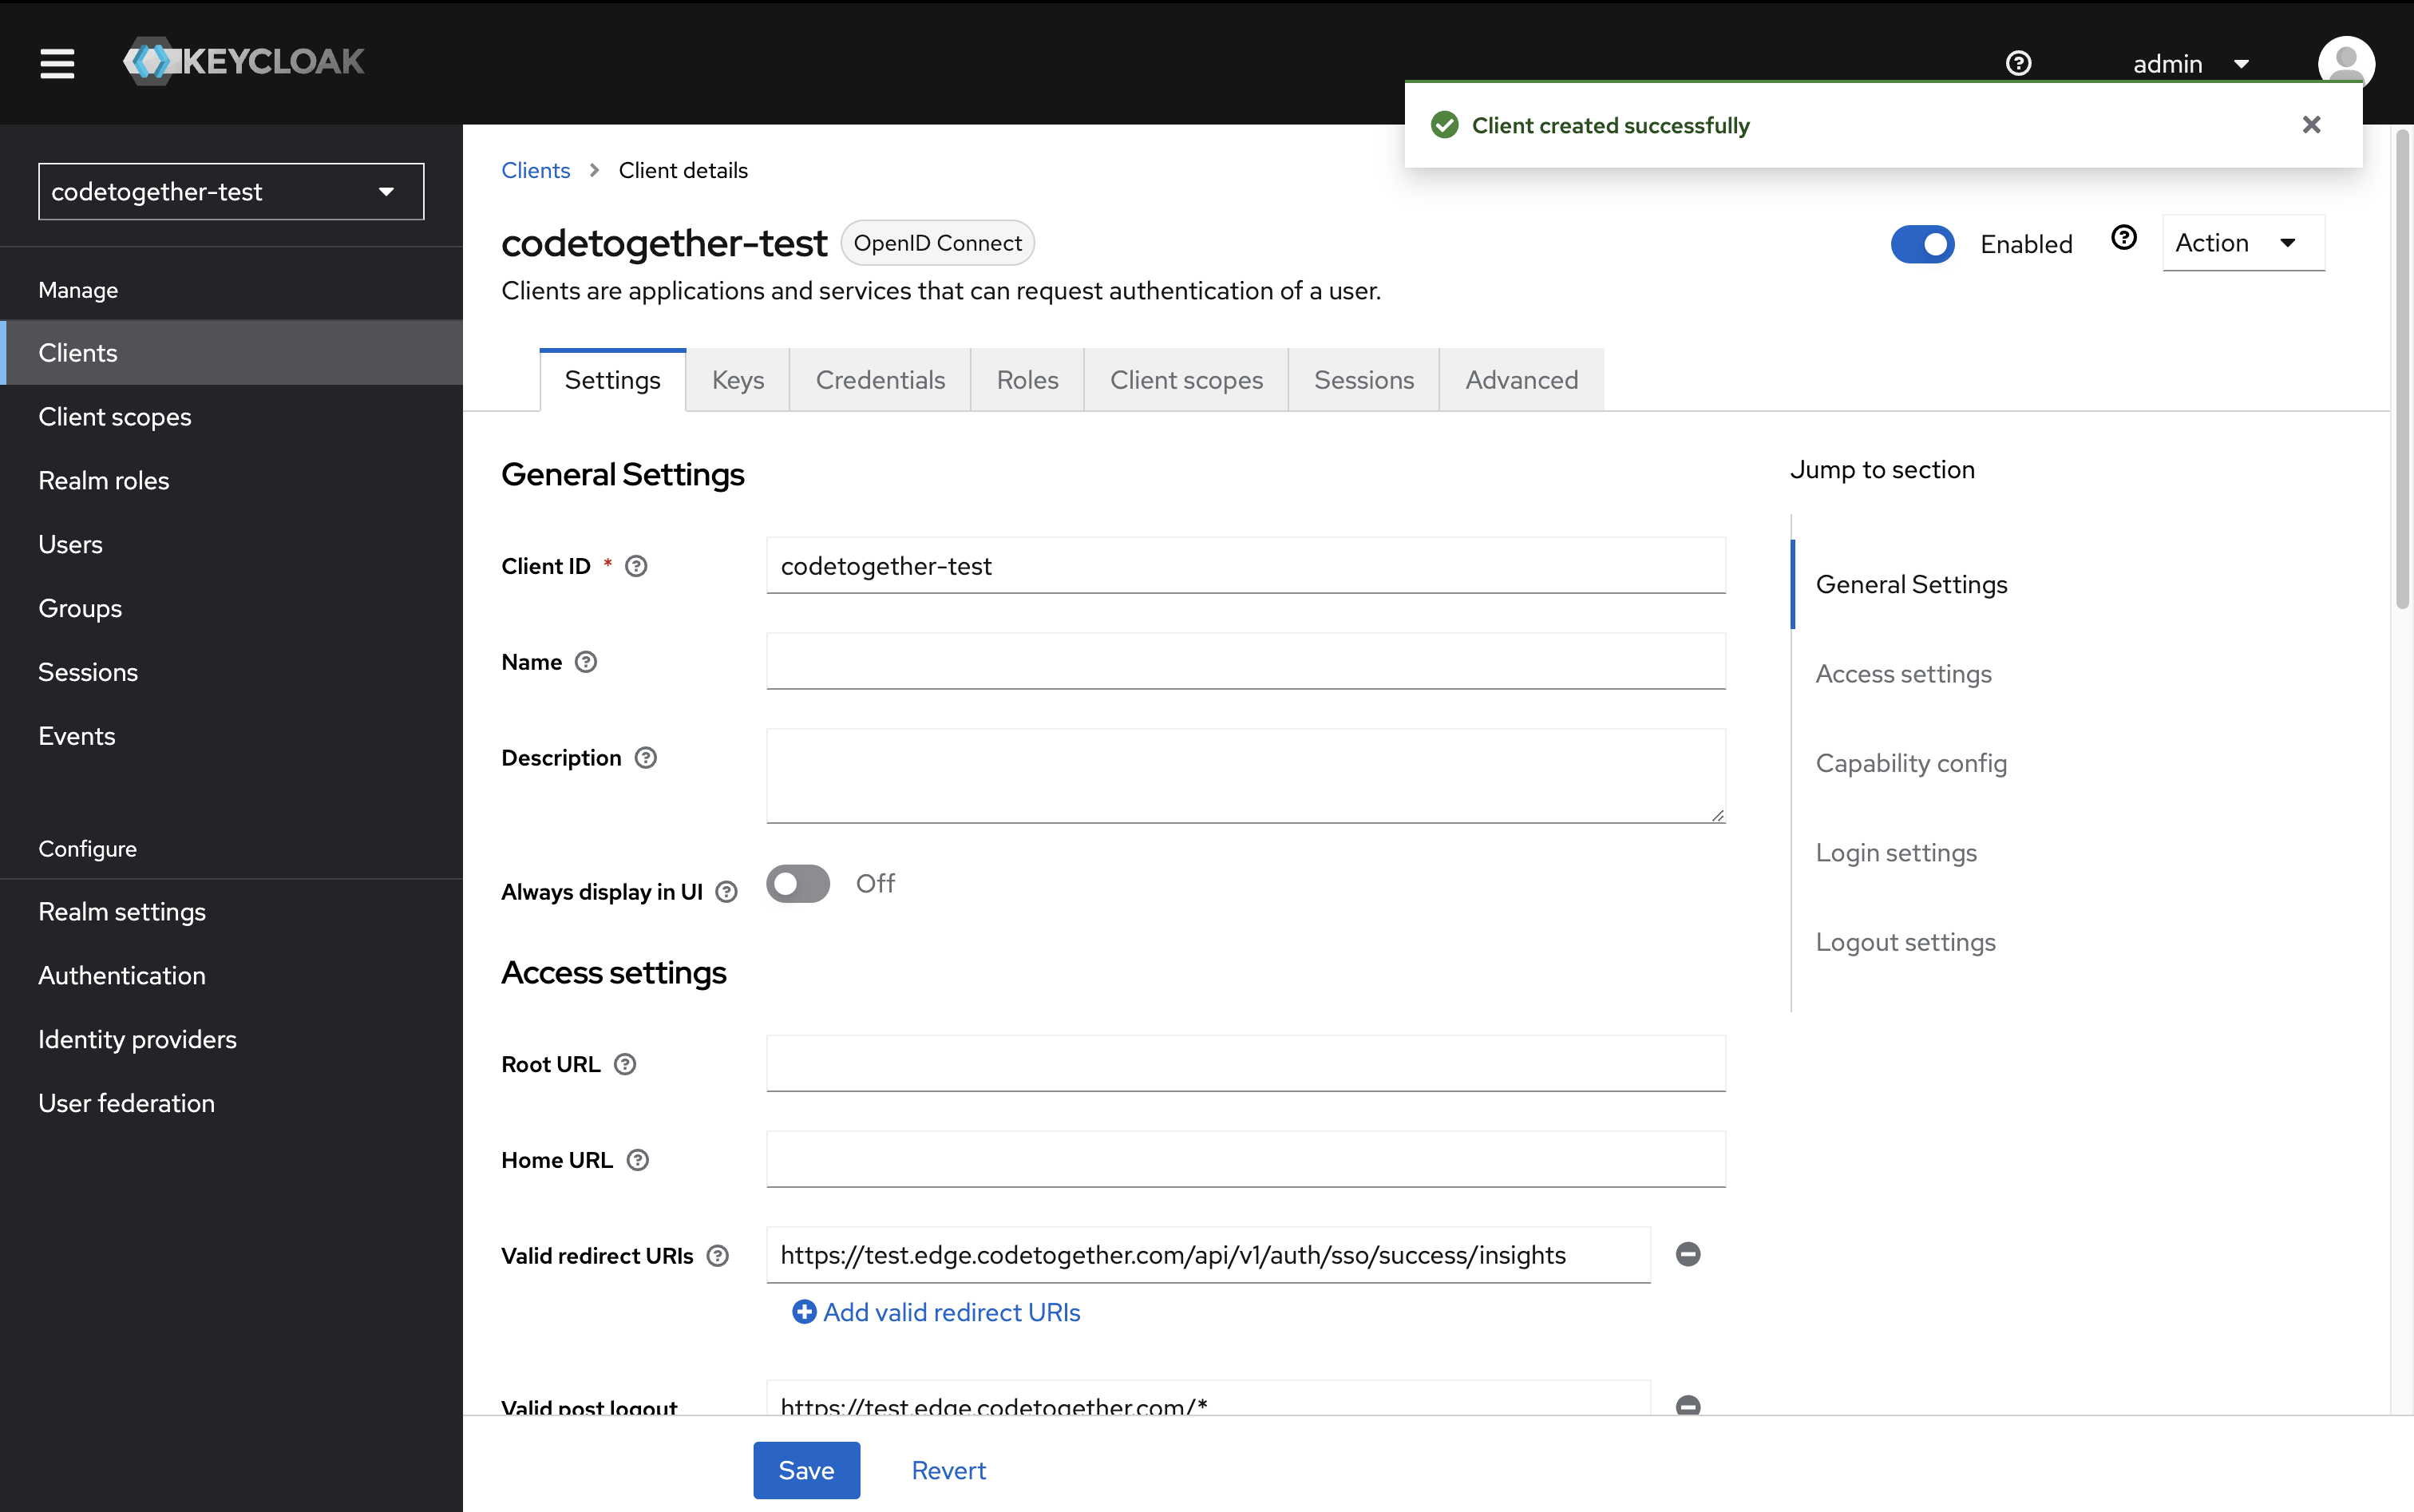
2.5. In Login Settings, add the following:
Valid Redirect URIs Enter the URI that users will be redirected to after a successful login.
Example:
https://test.edge.codetogether.com/api/v1/auth/sso/success/insightsValid Post Logout Redirect URIs Enter the URI users will be redirected to after logging out. Wildcards are allowed.
Example:
https://test.edge.codetogether.com/*Web Origins Define which origins are allowed for CORS. This should match your application domain (without any path).
Example:
https://test.edge.codetogether.com
Make sure these values match what you’ve configured in your cthq.properties file.

2.6. Click Save.
3. Create a Role
3.1. In the left-hand panel, click Realm roles, then click Create role.
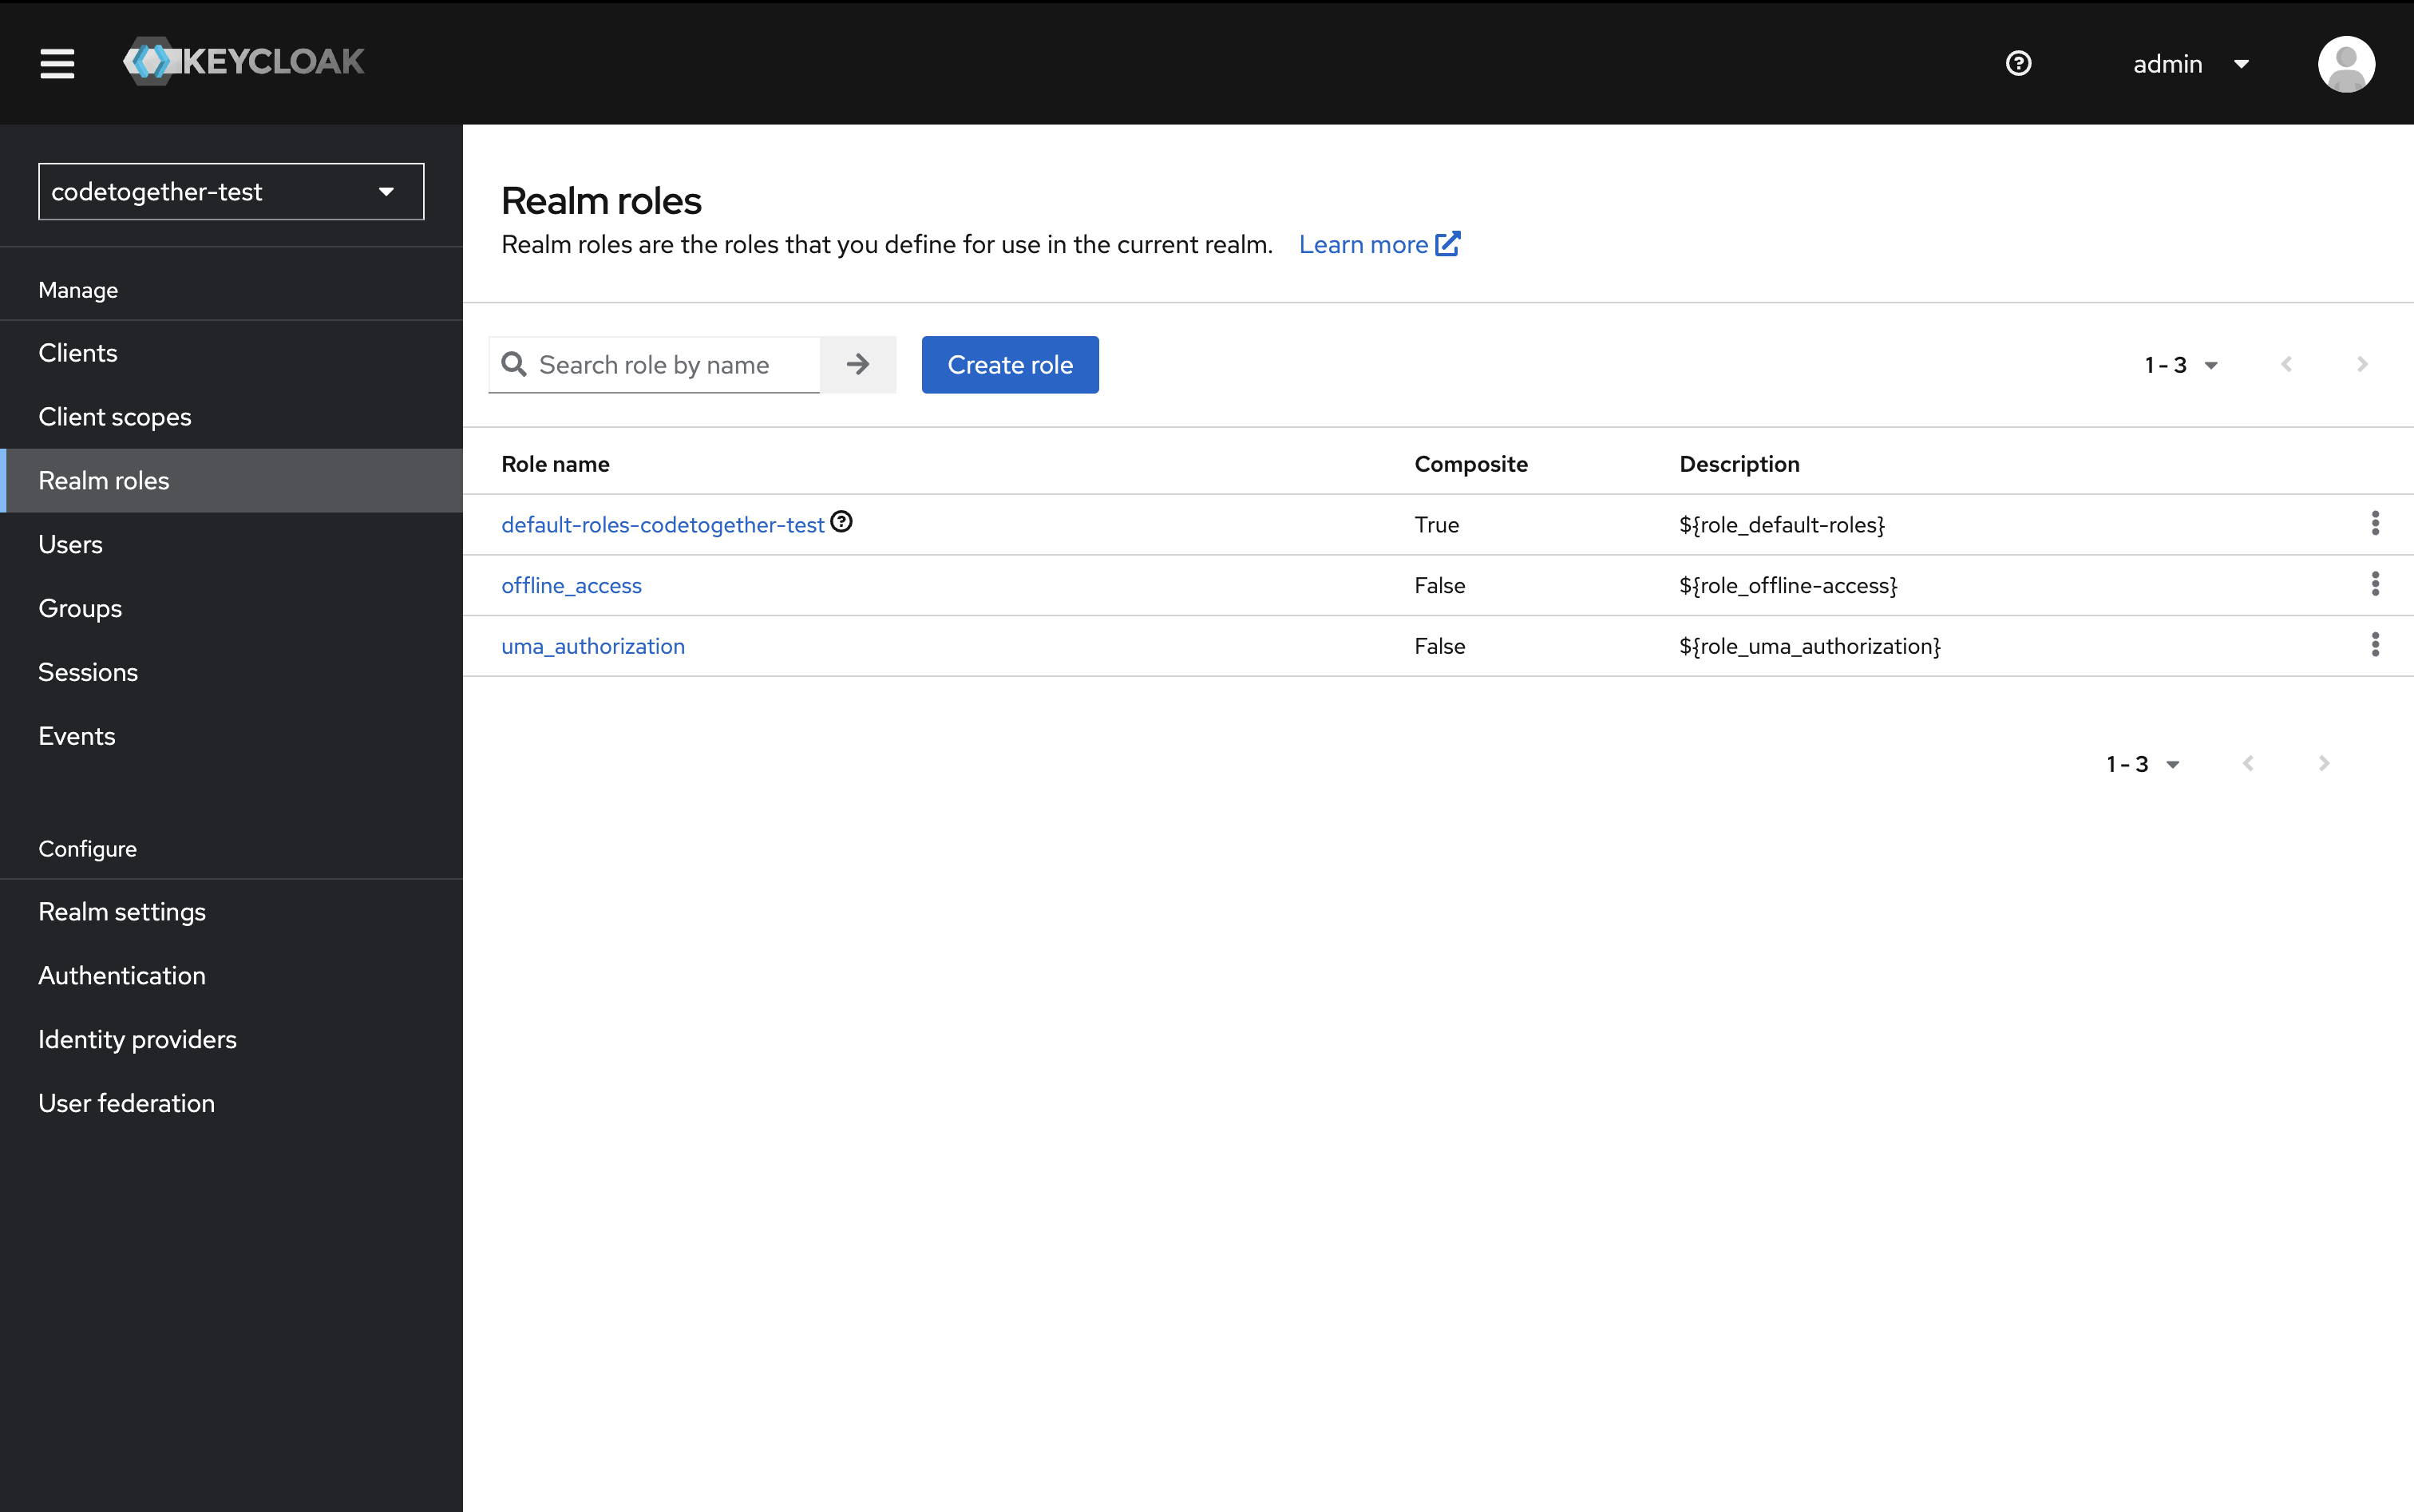
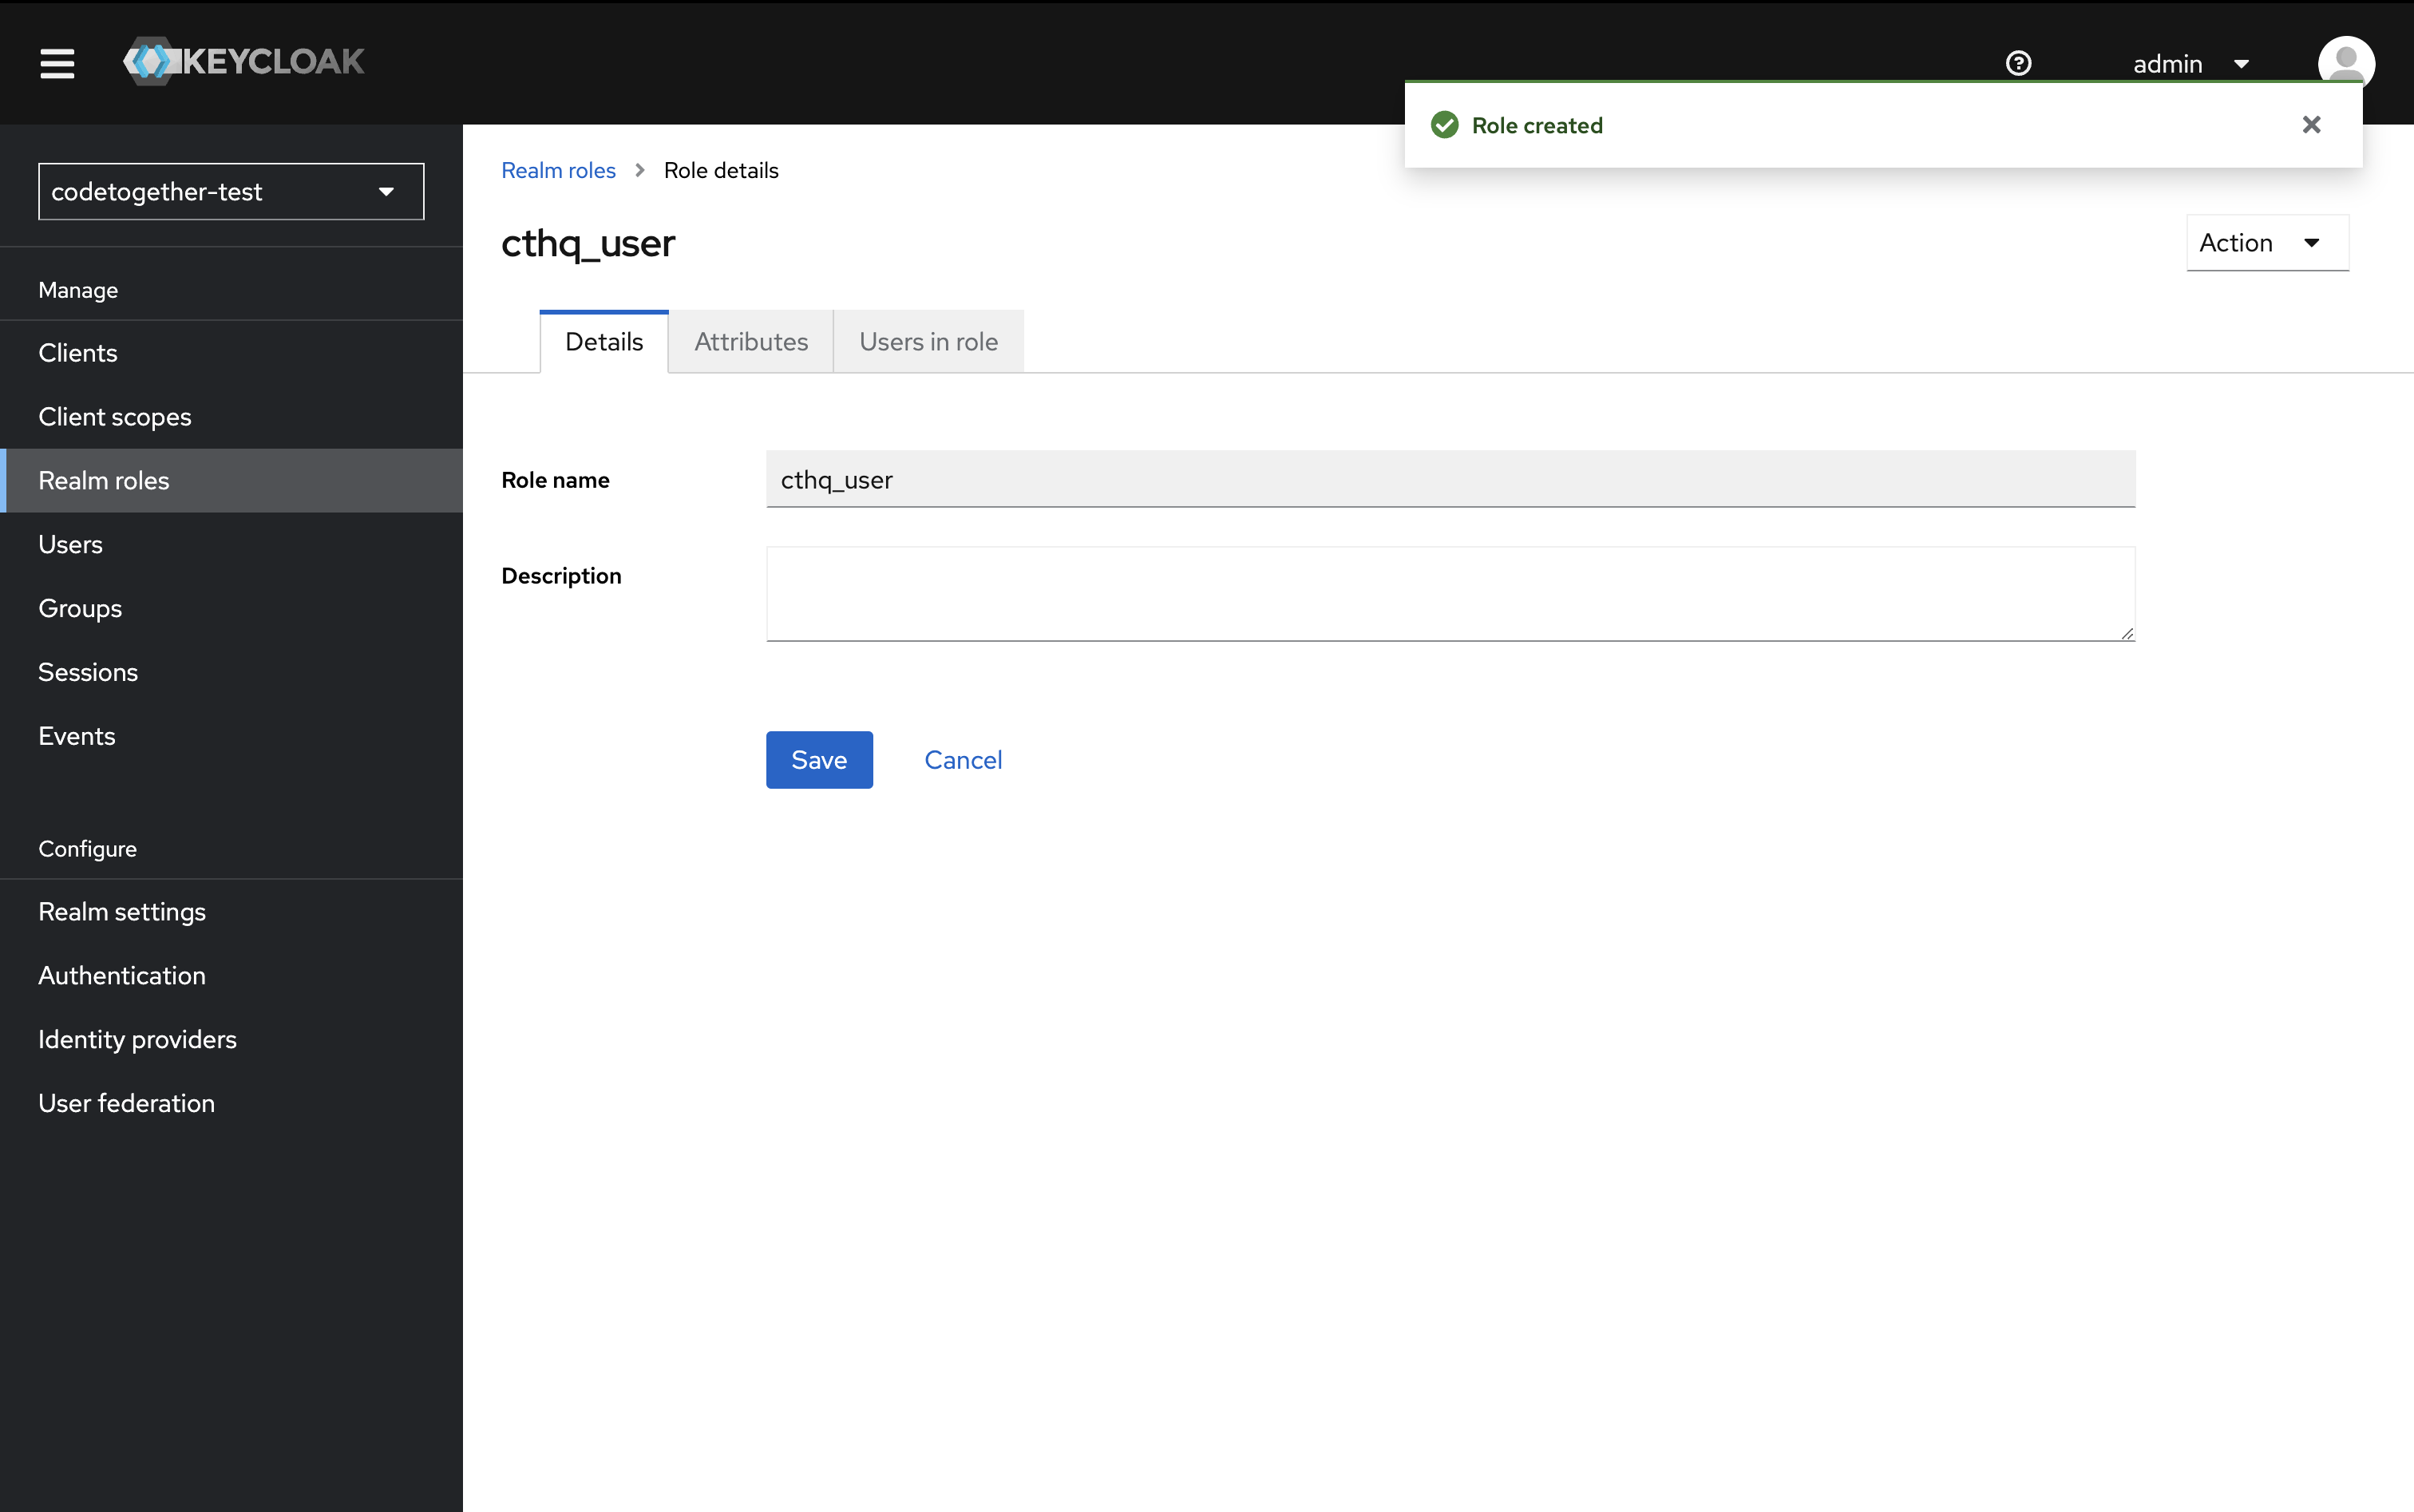
3.1. Specify the role name: cthq_user.
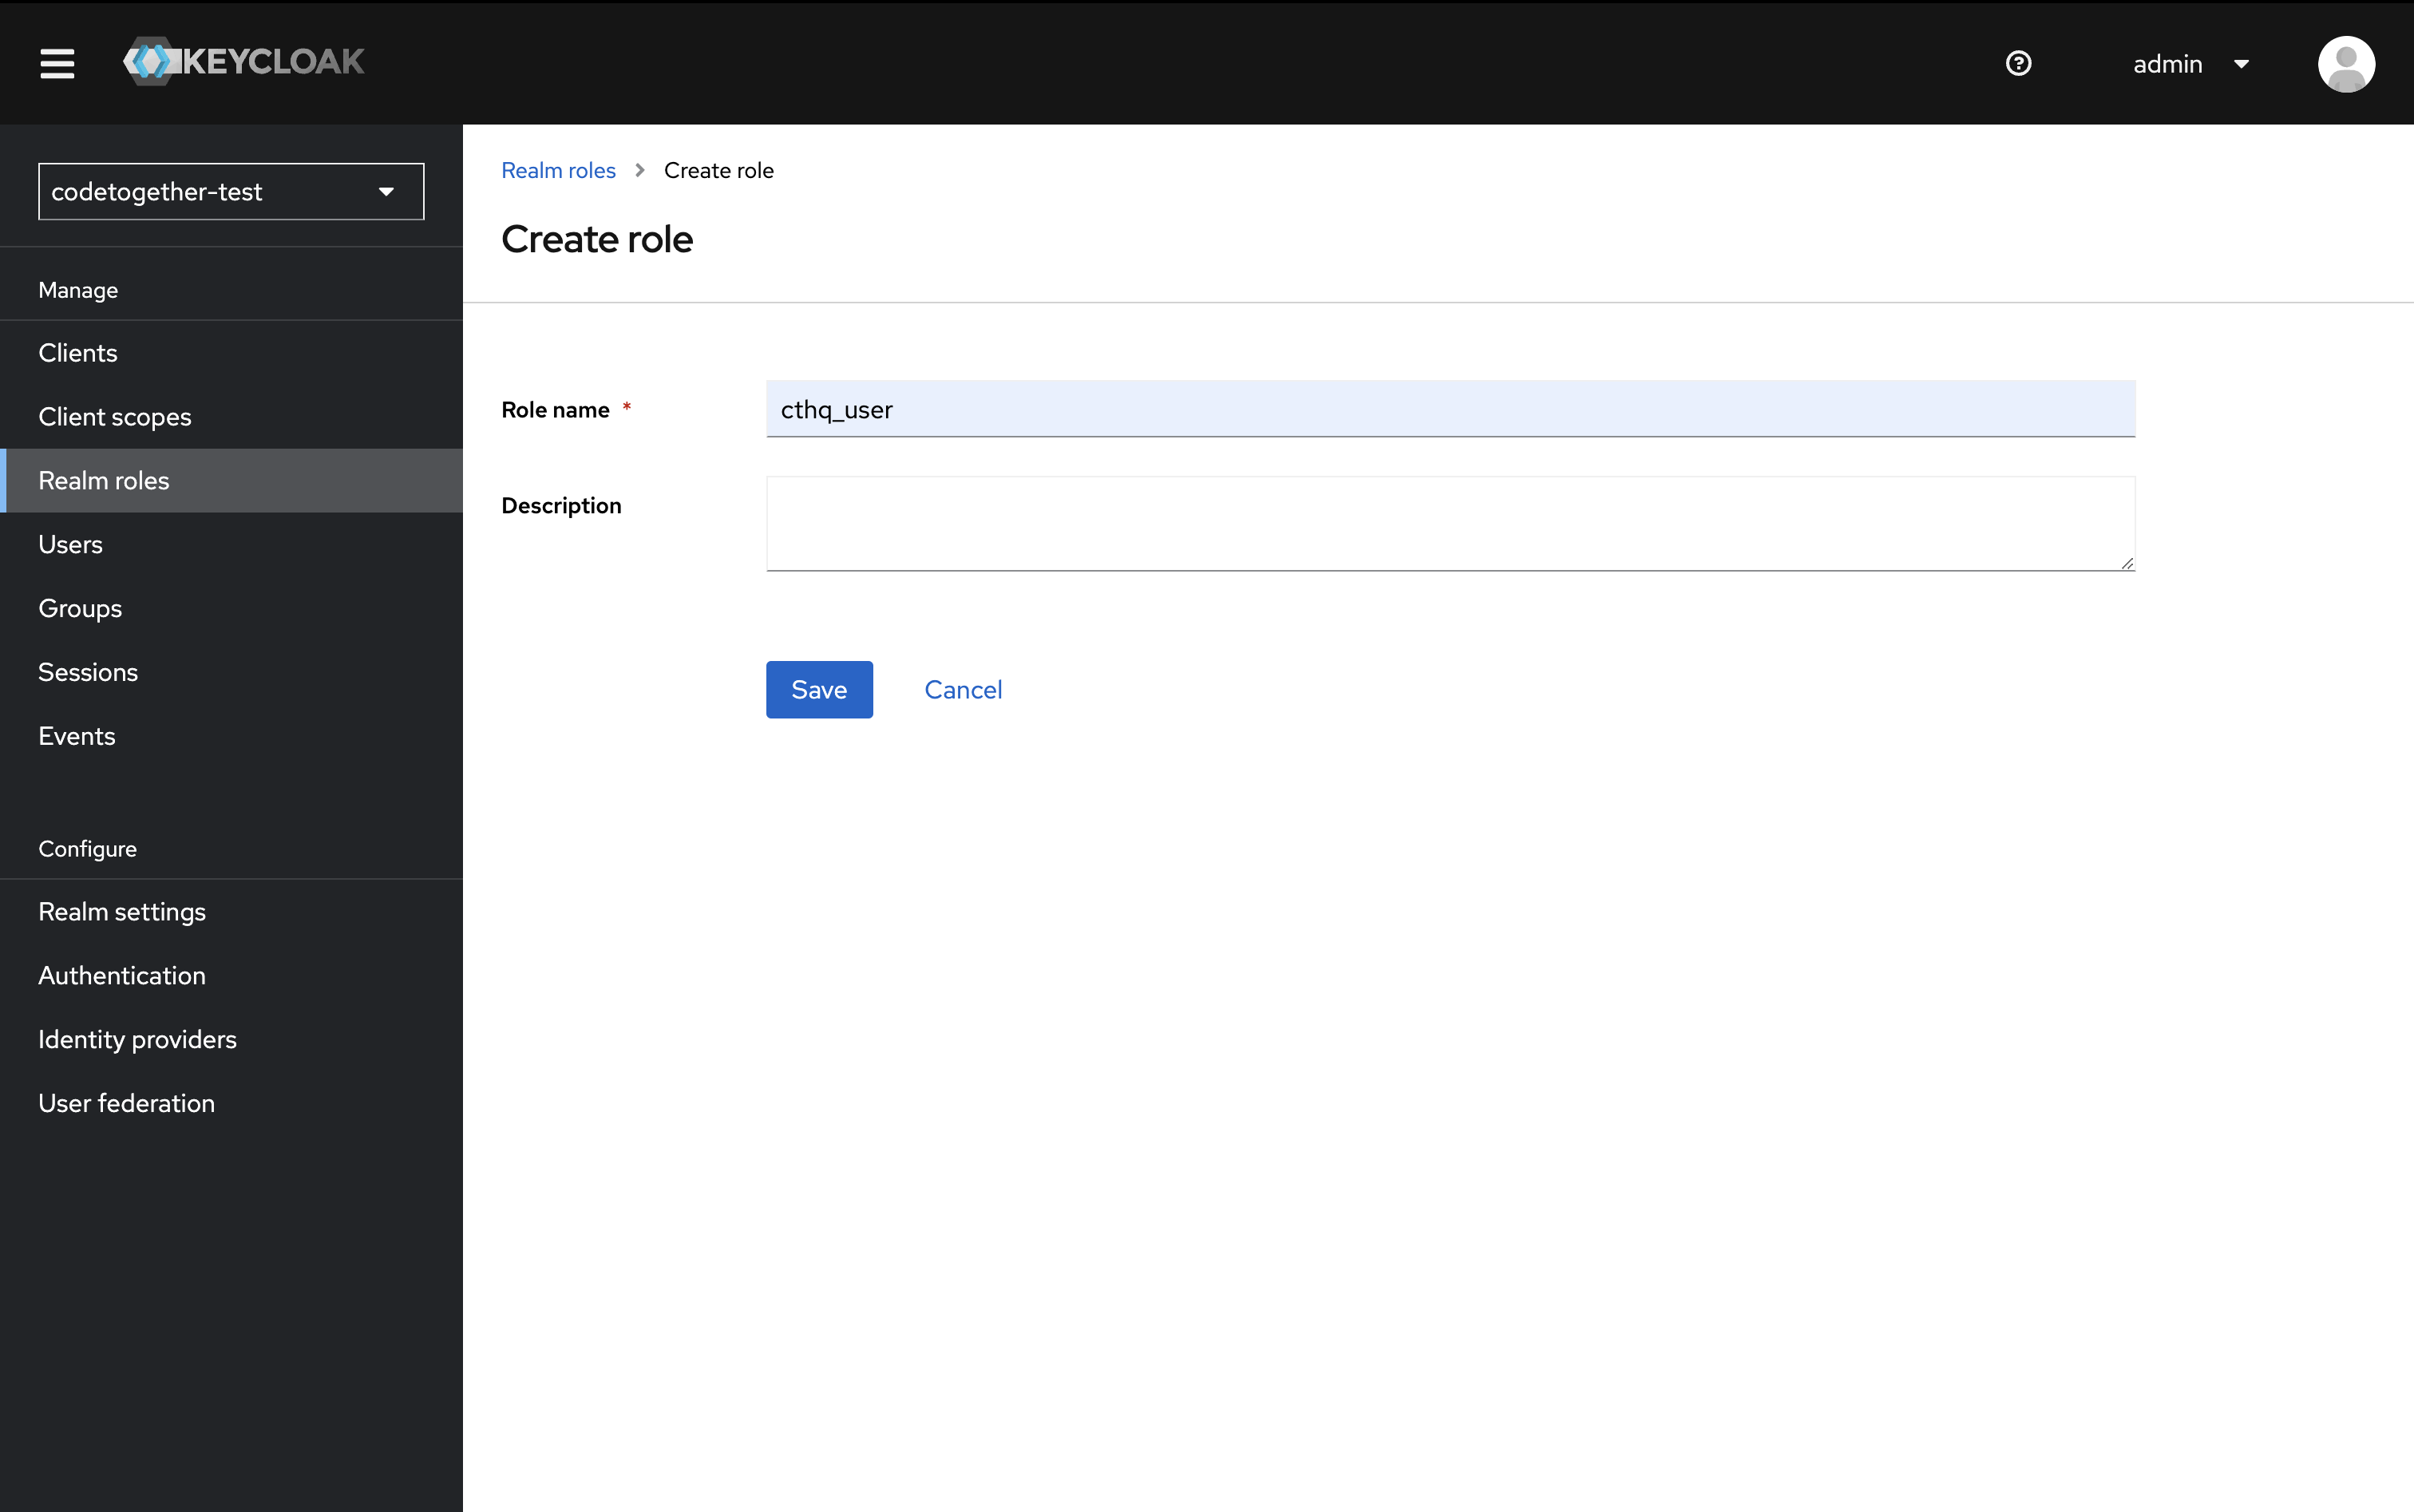
3.2. Click Save.
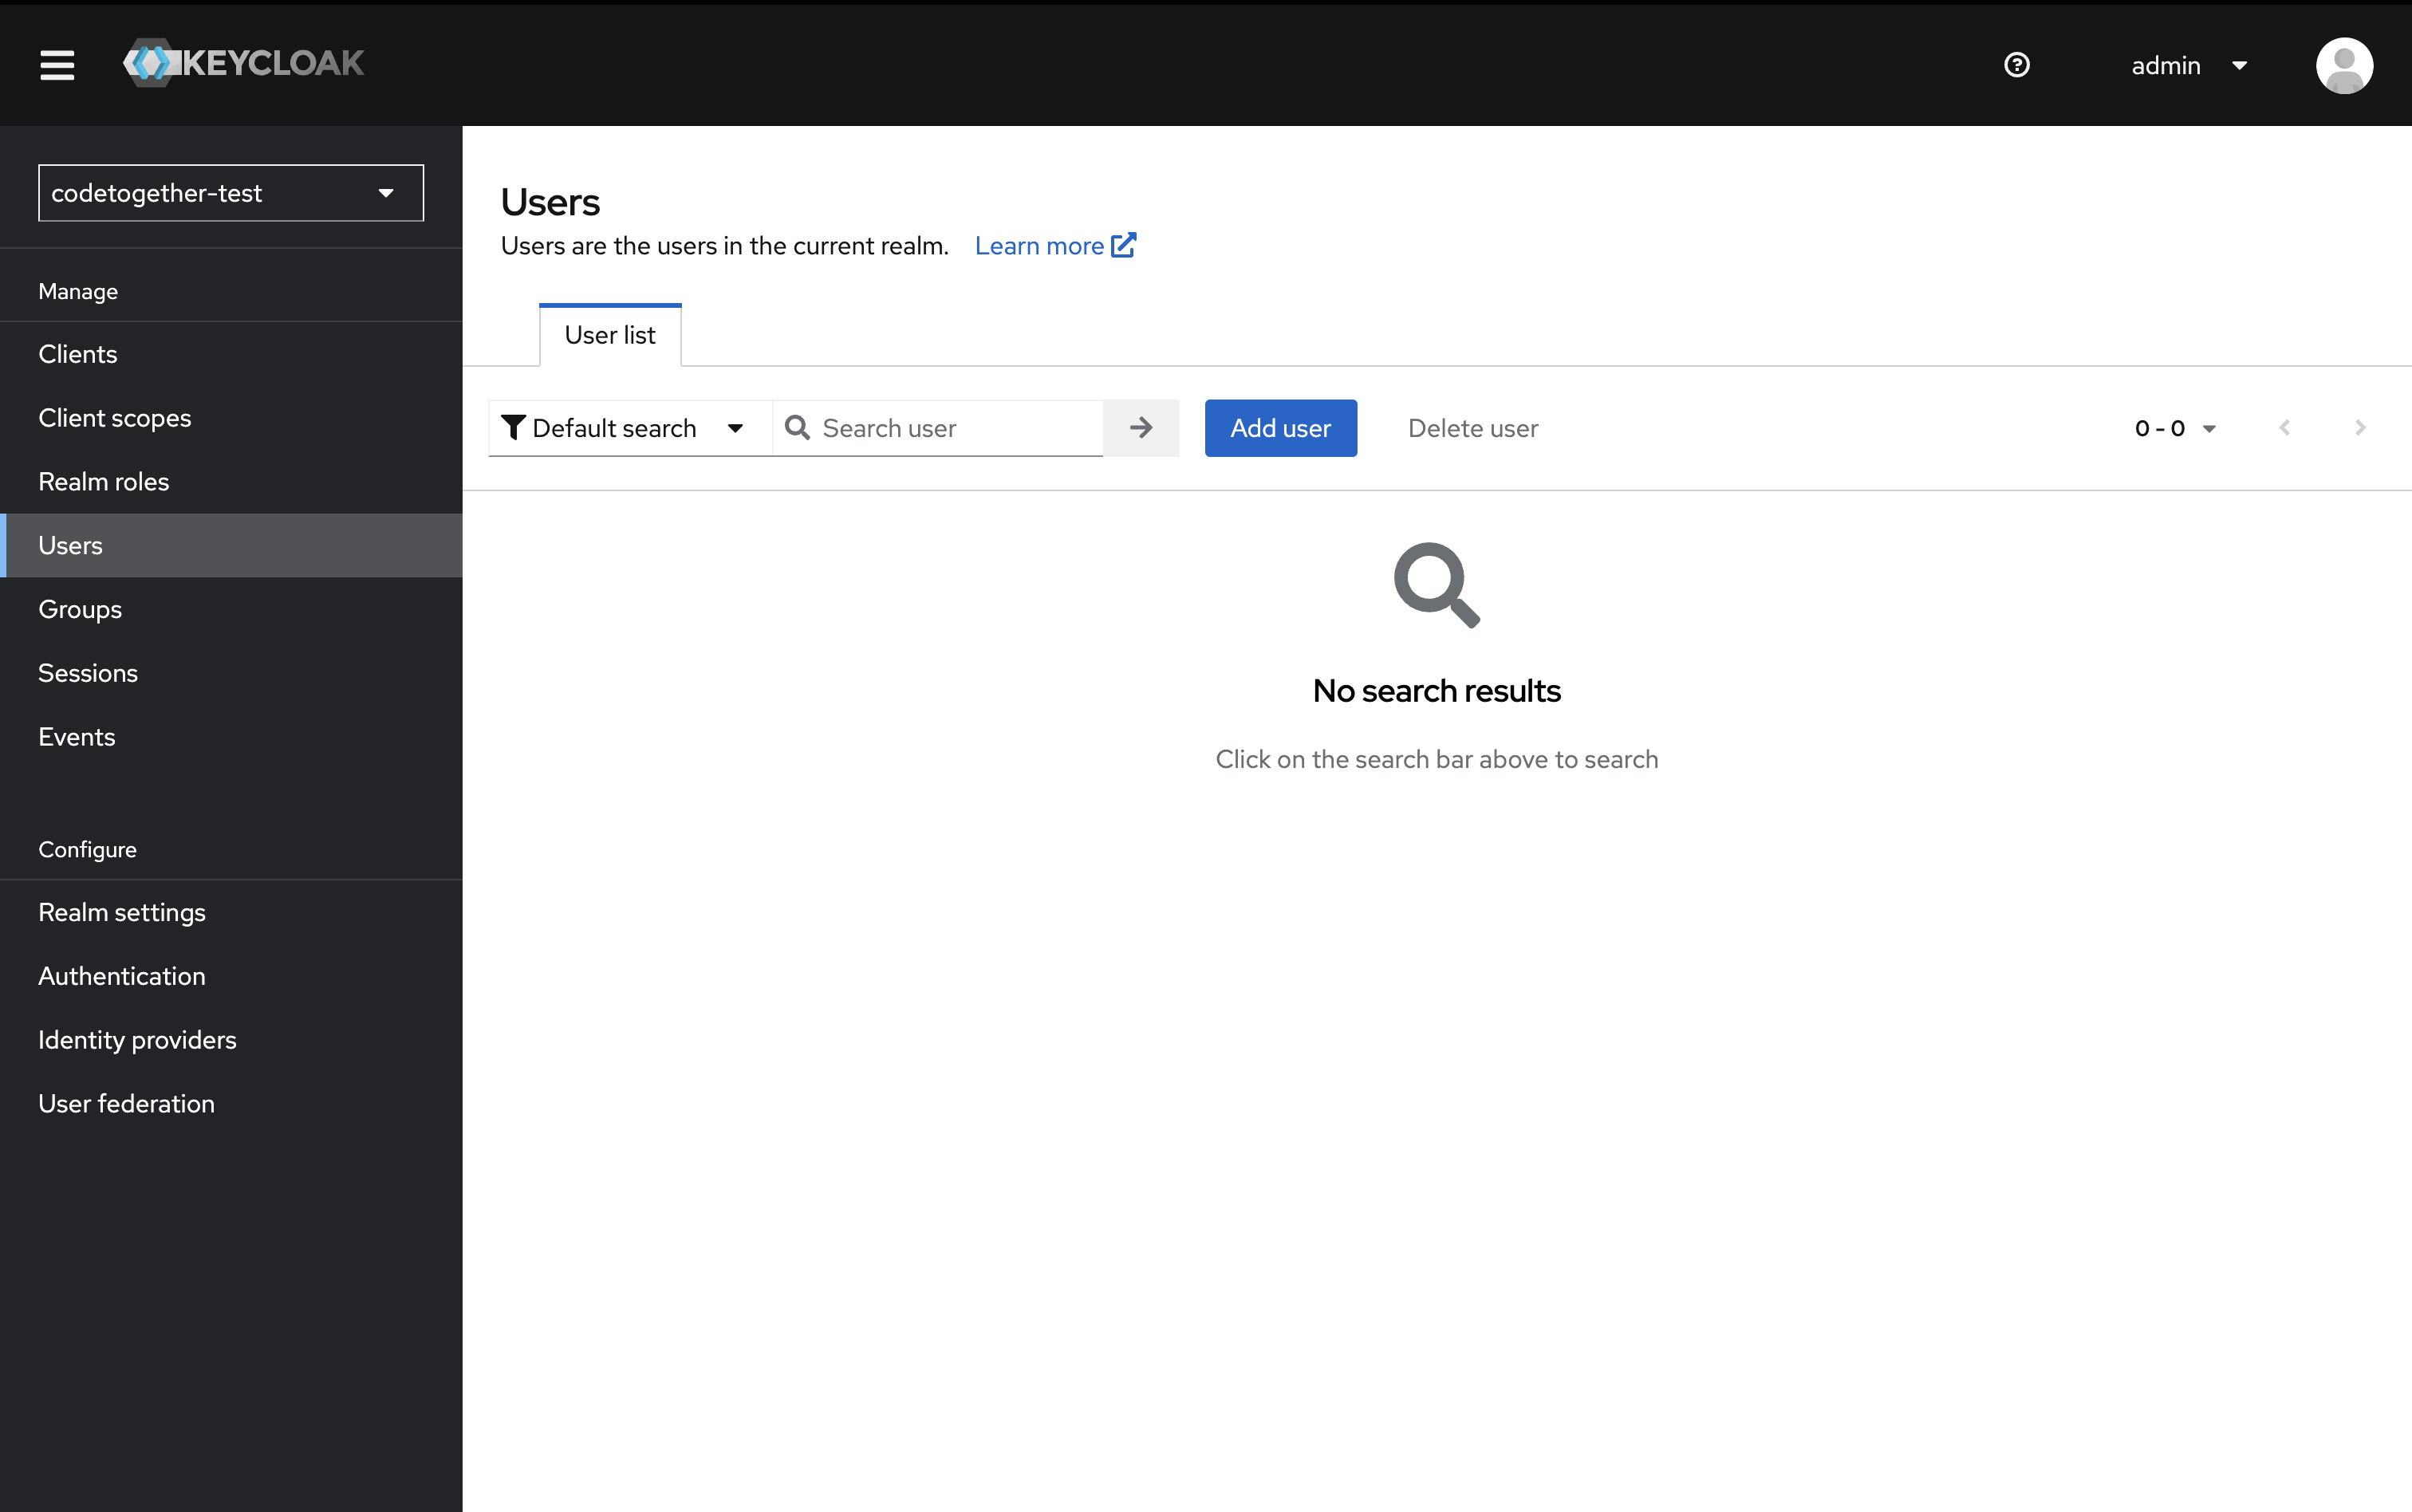
4. Create a User
This setup does not include email verification because an email server has not been configured. As a result, each user must have a password manually set.
The final step is to create a user account for each CodeTogether HQ user:
4.1. In the left-hand panel, click Users, then click Add user.
4.2. Fill in the required fields:
- Username
- Set Email verified to On
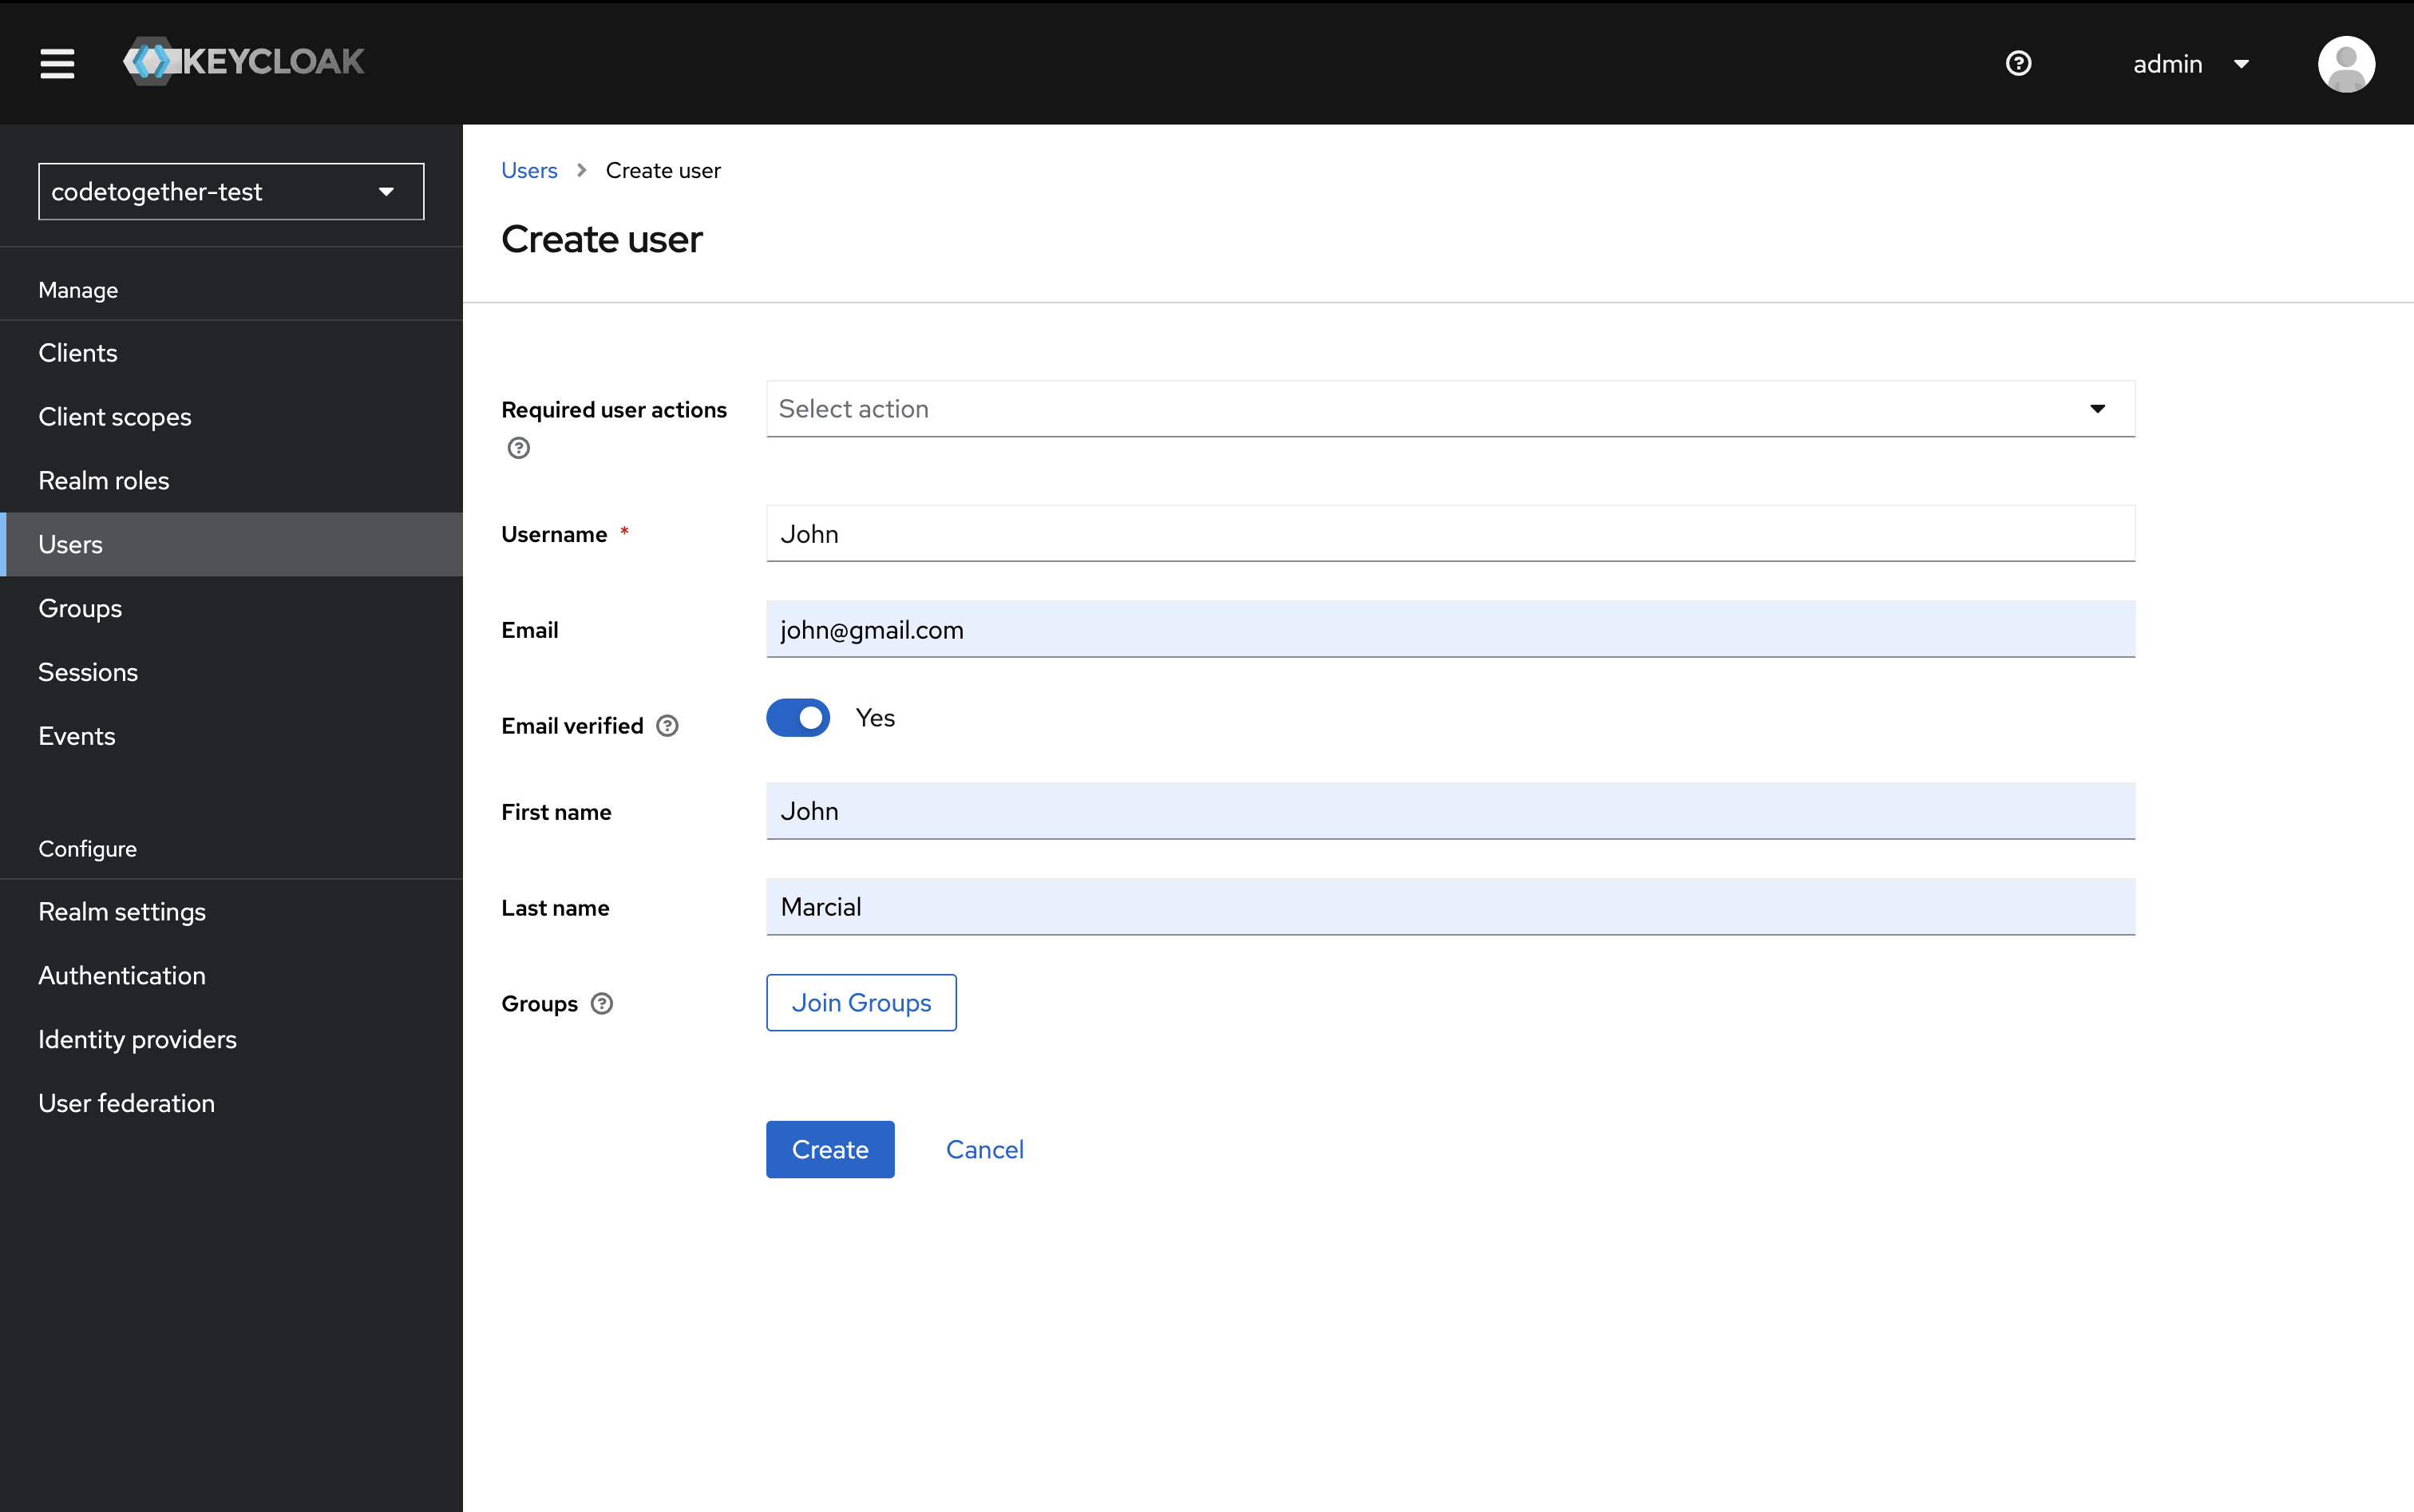
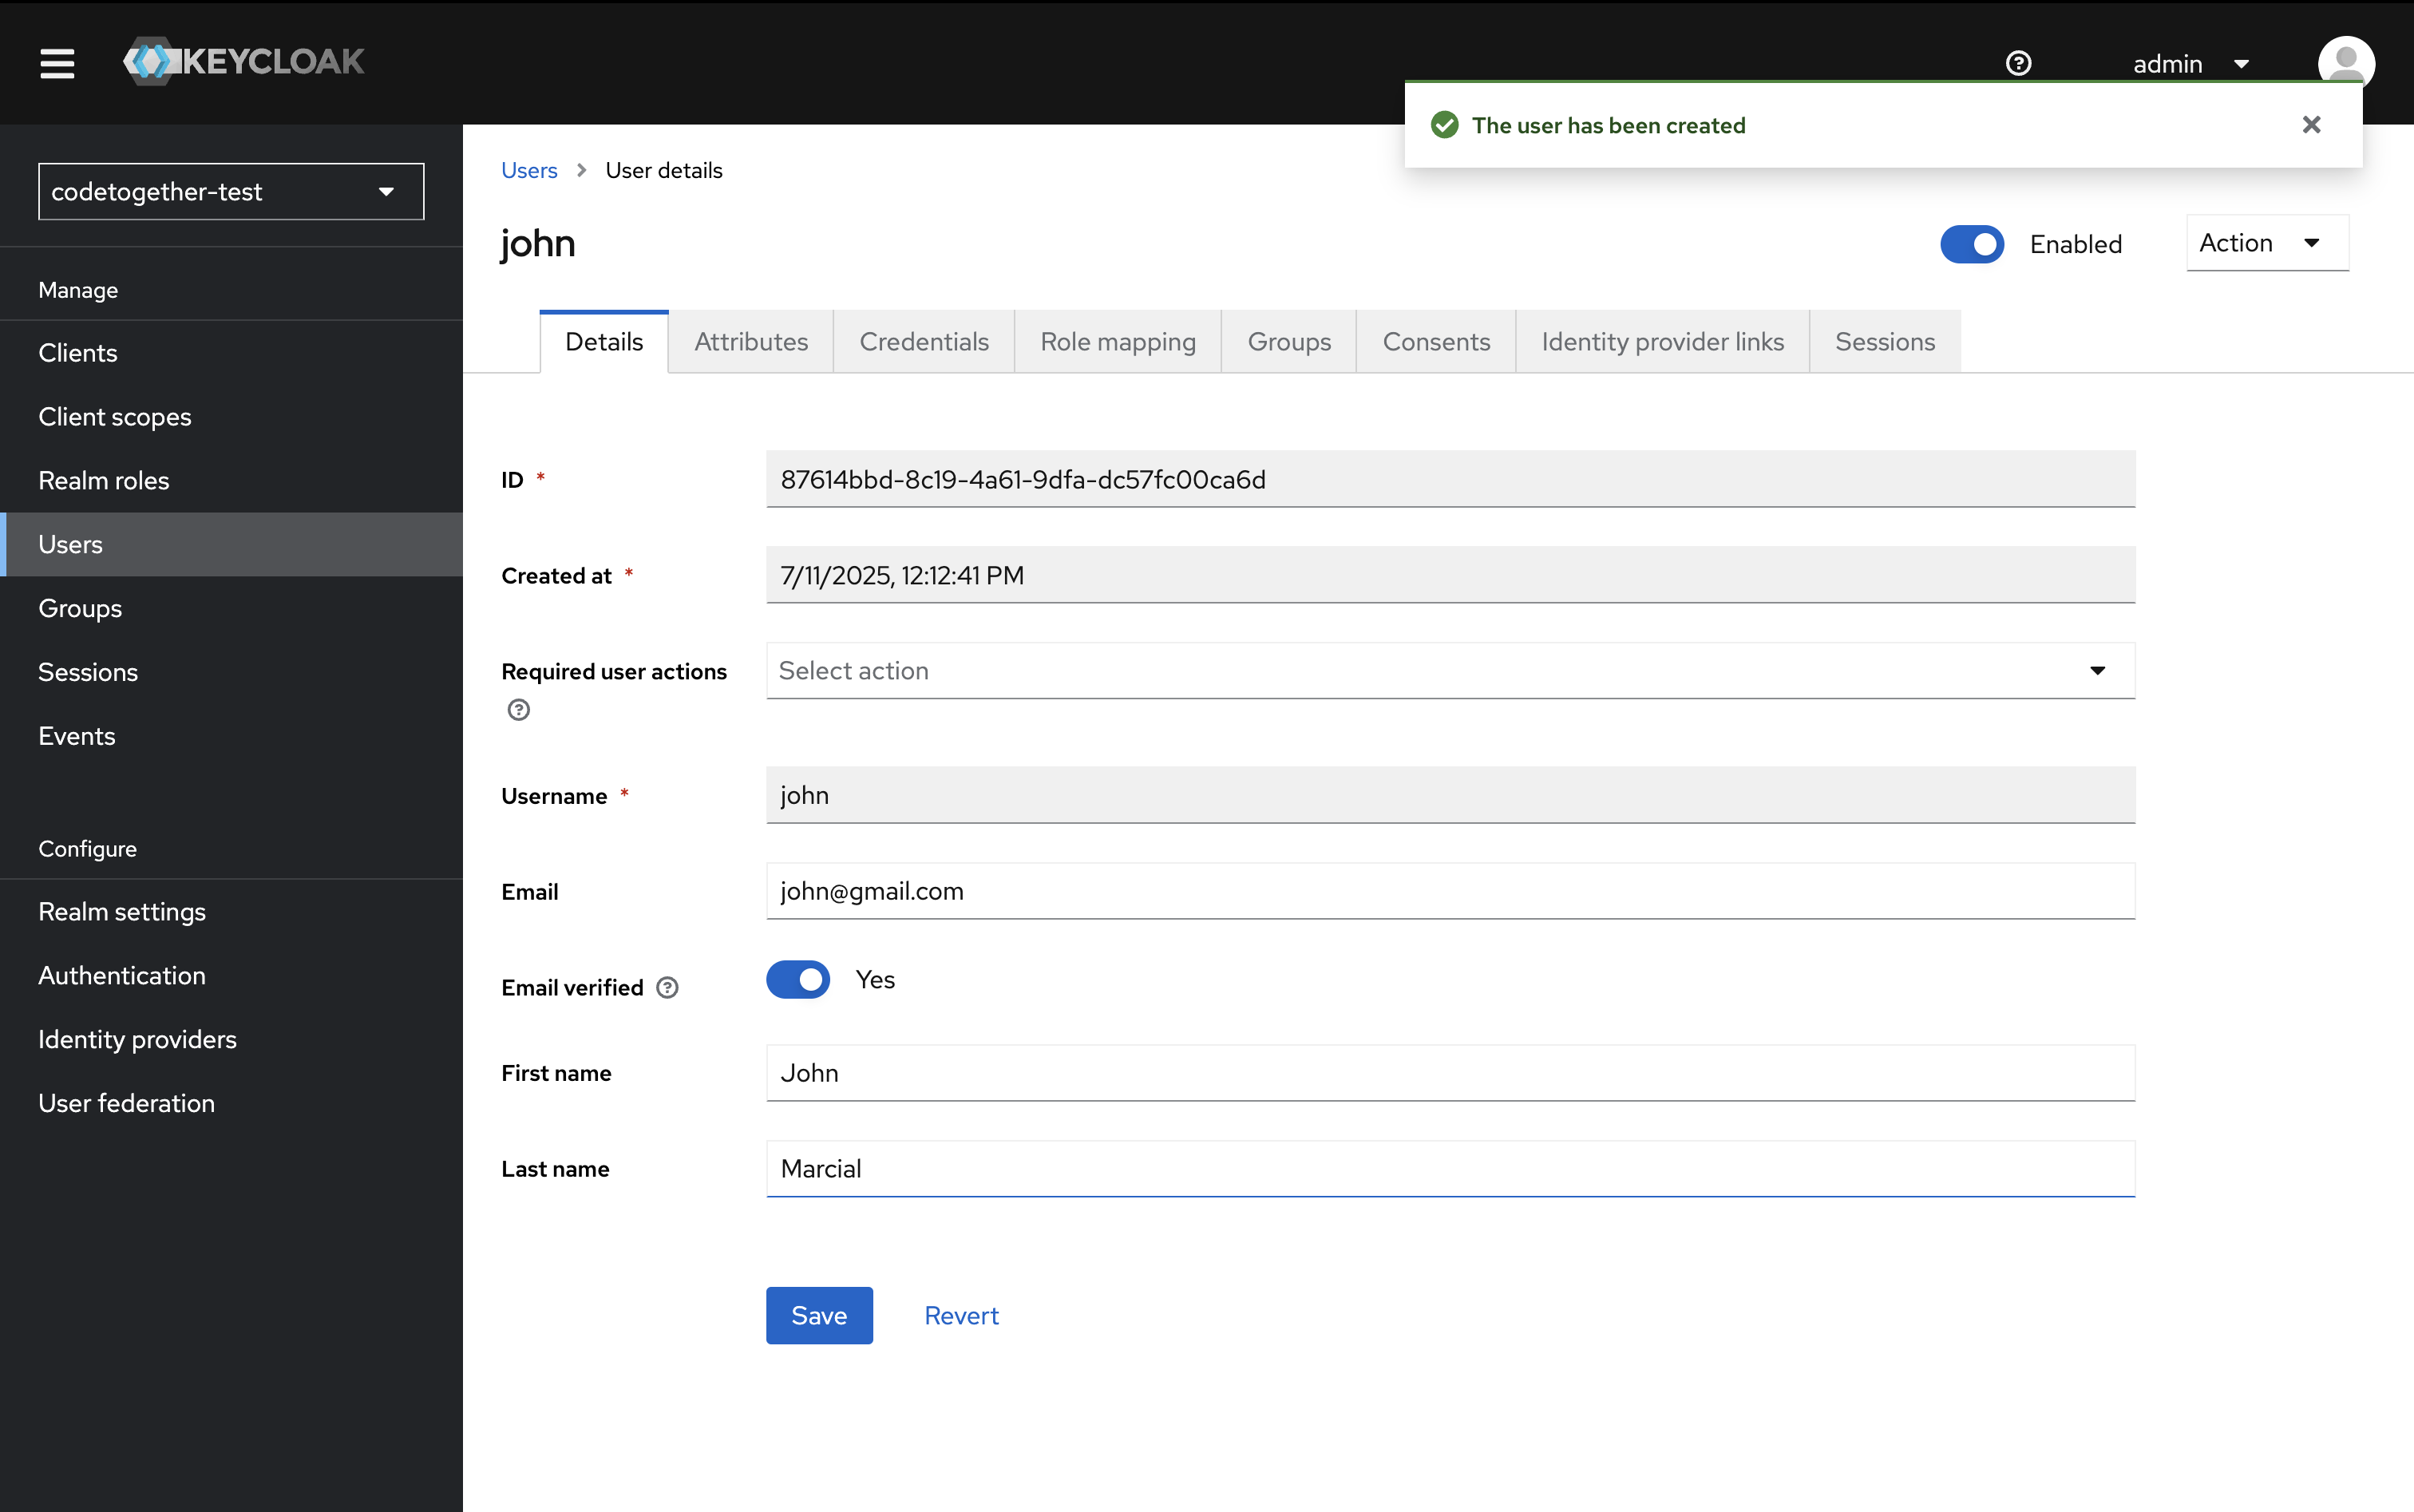
Then click Create.
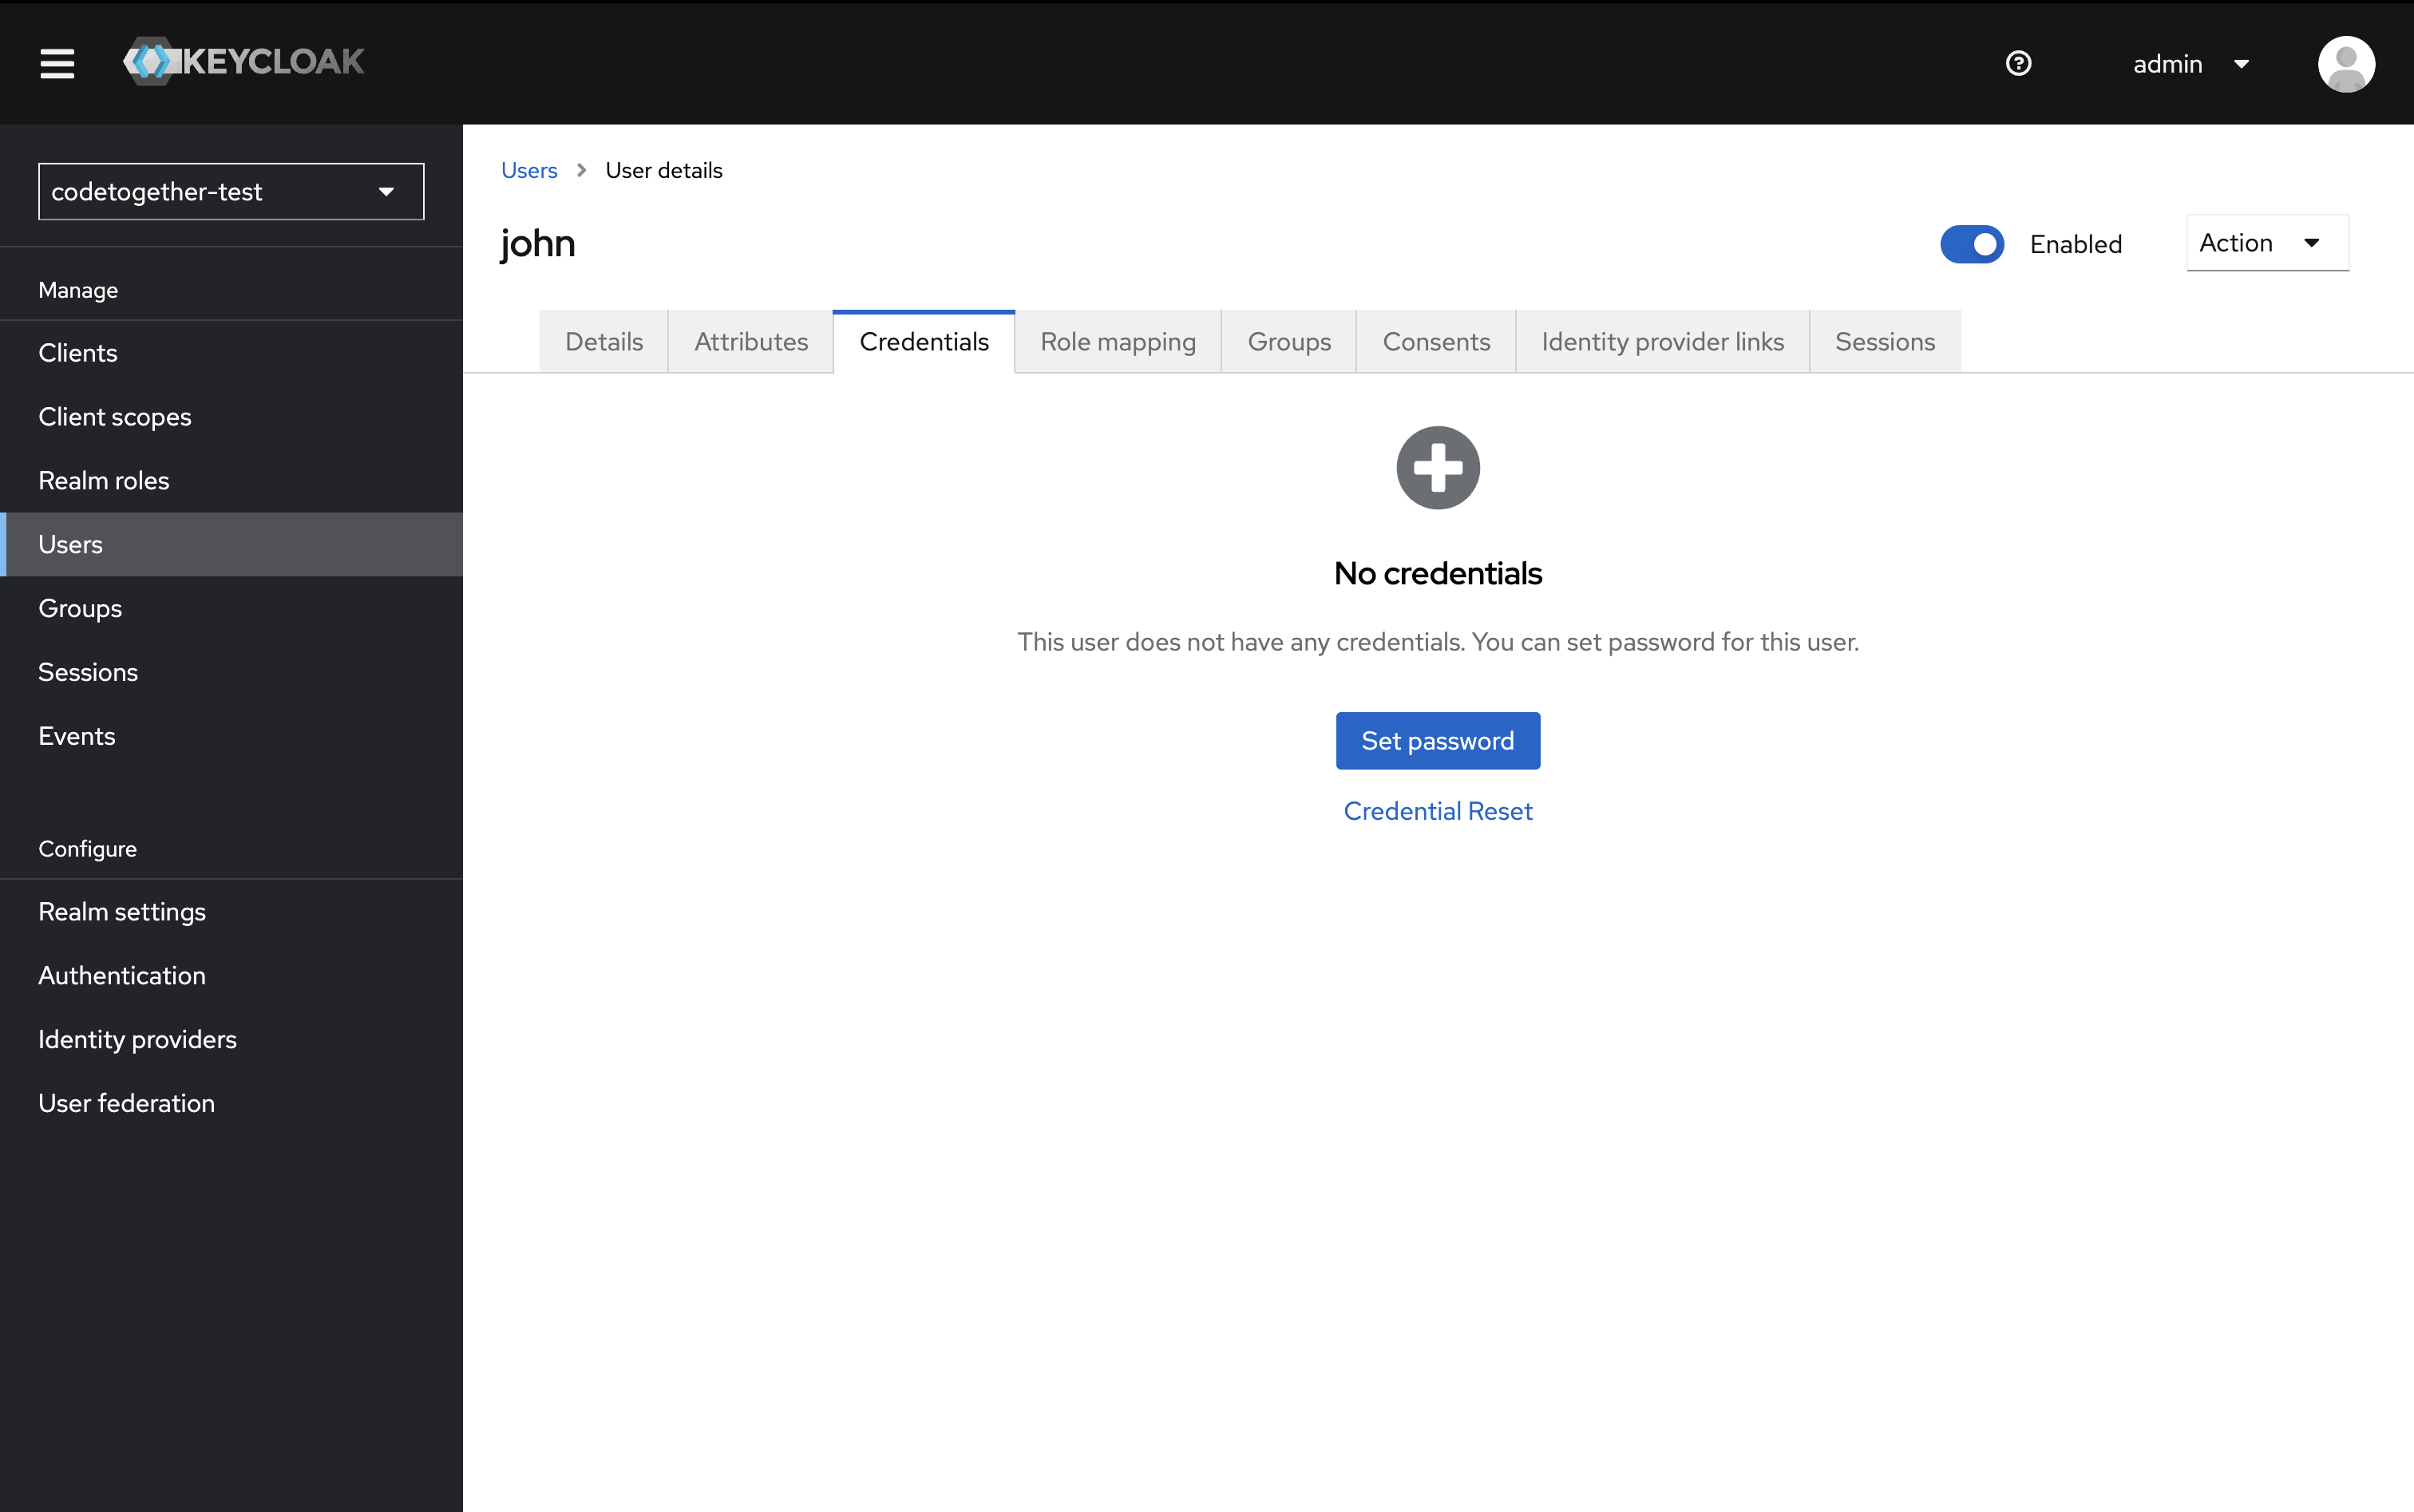
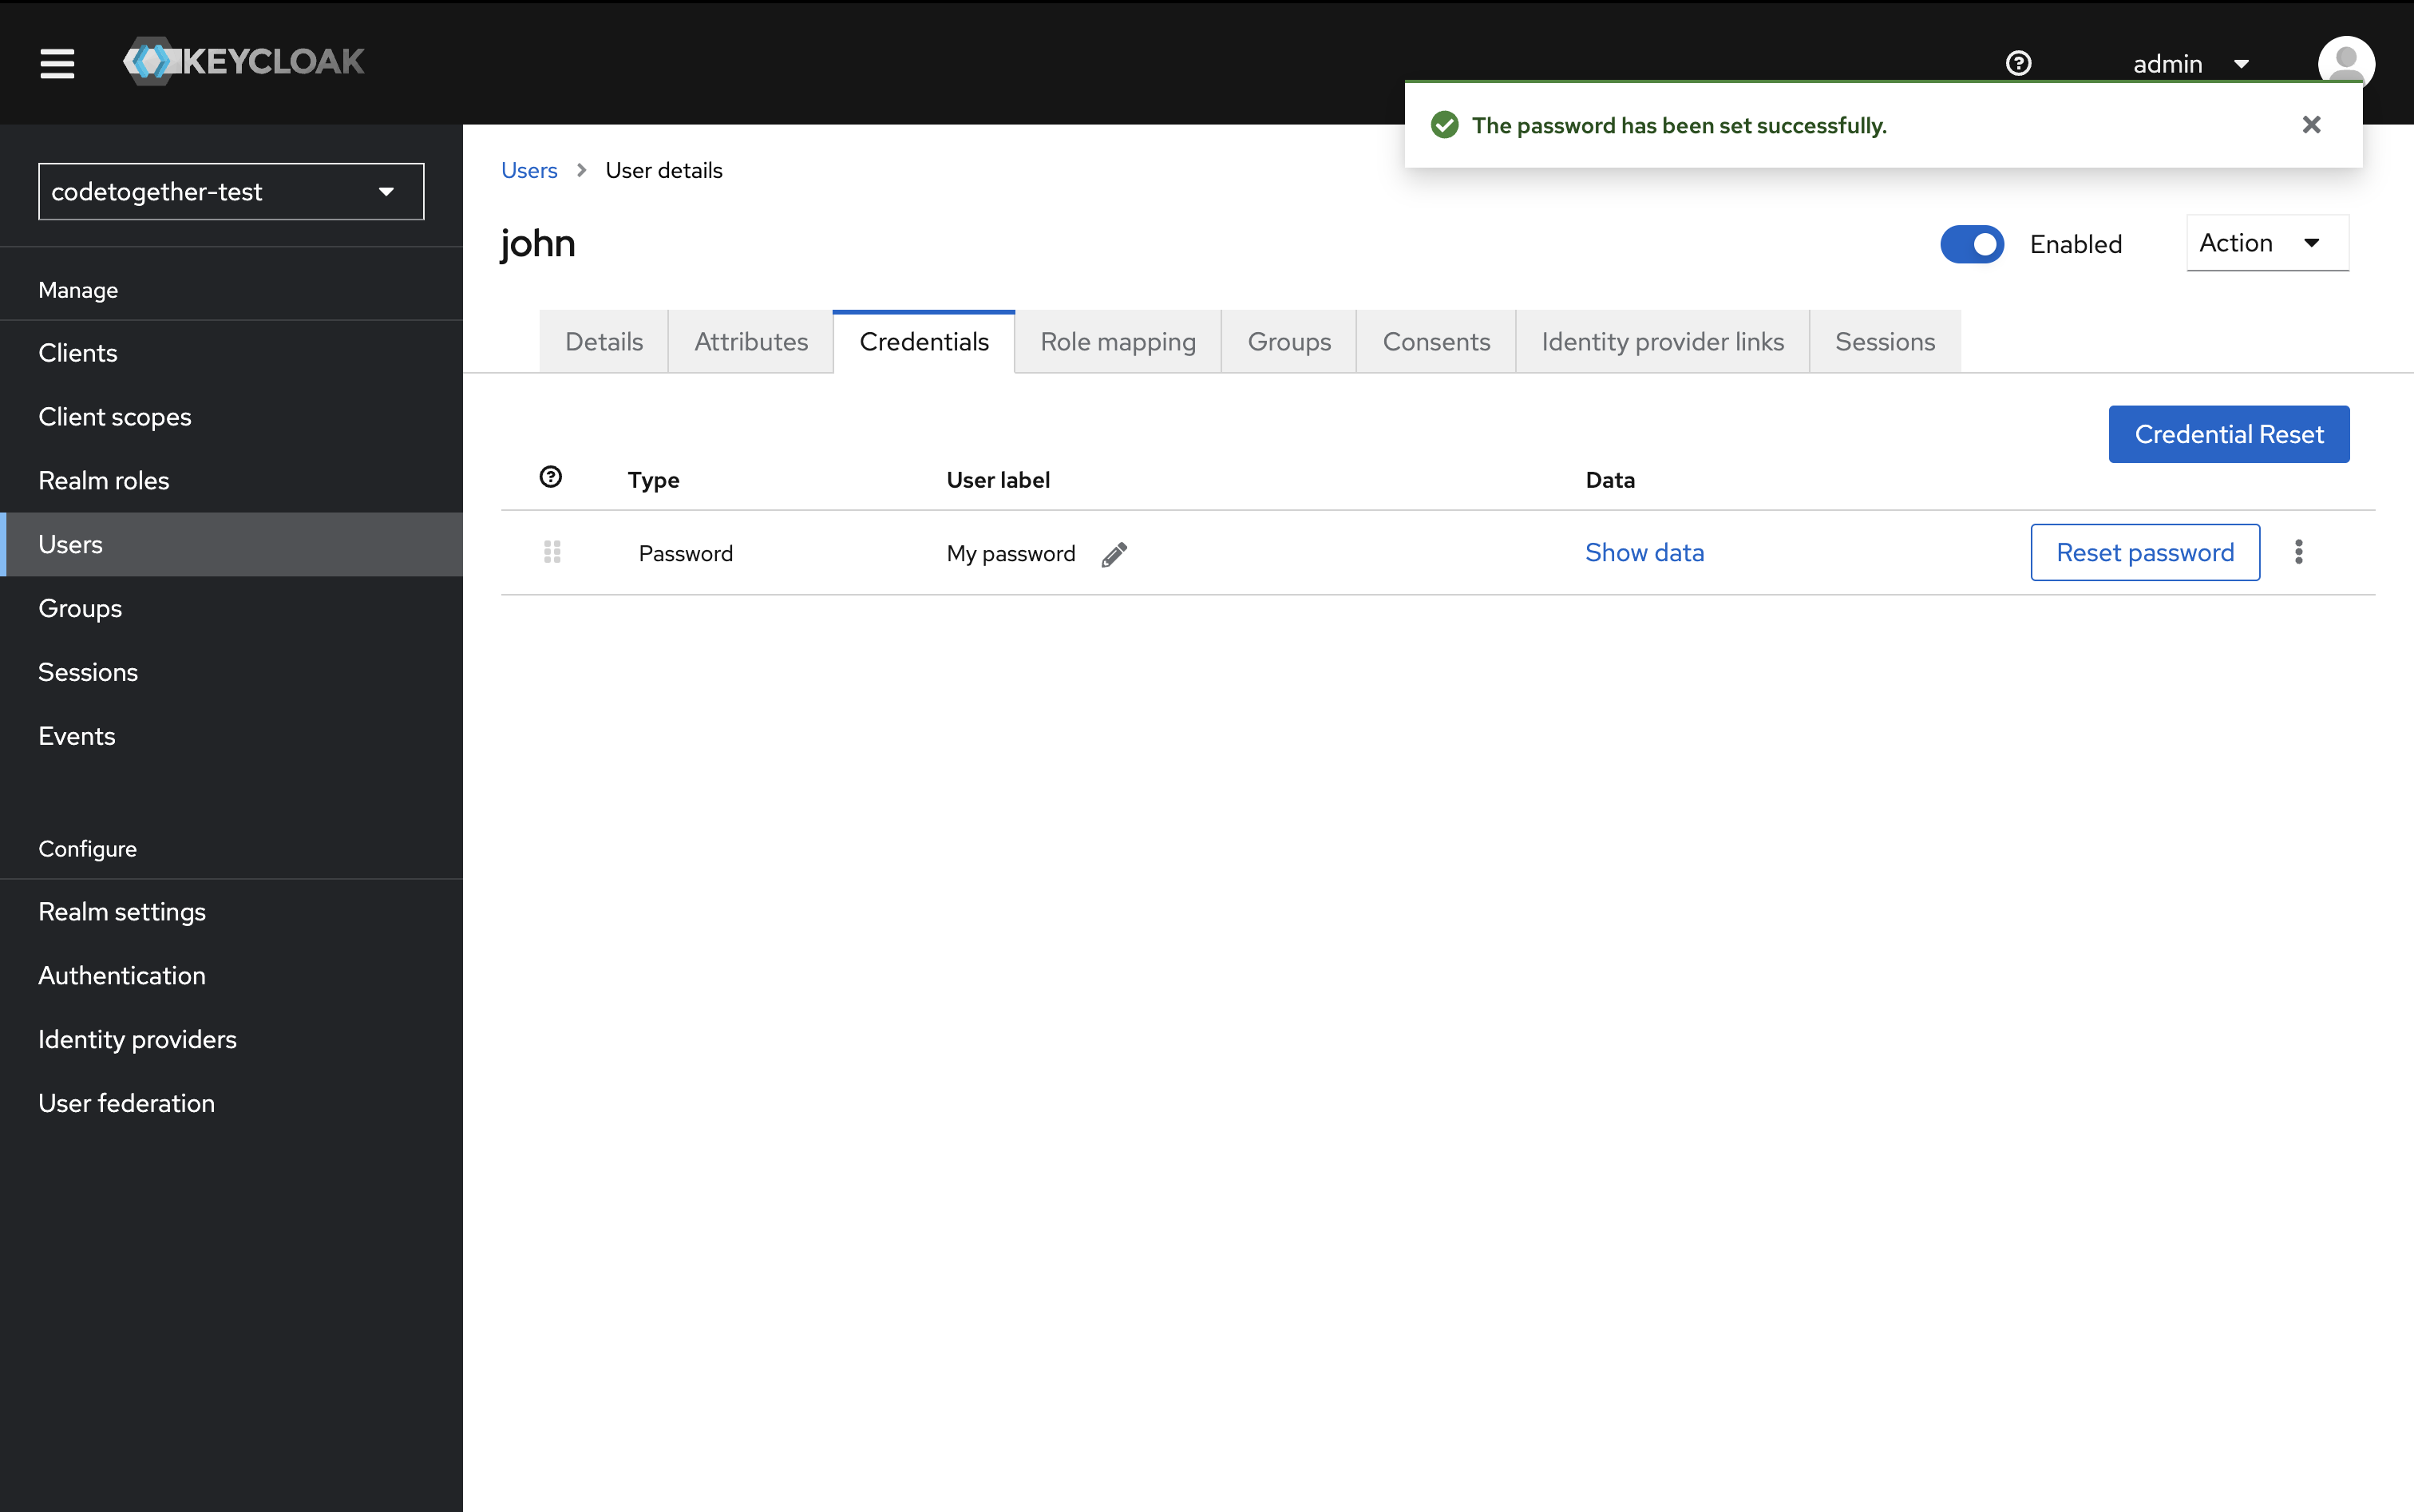
4.3. Switch to the Credentials tab and click Set password.
4.4. Enter the desired password. Set Temporary to Off.
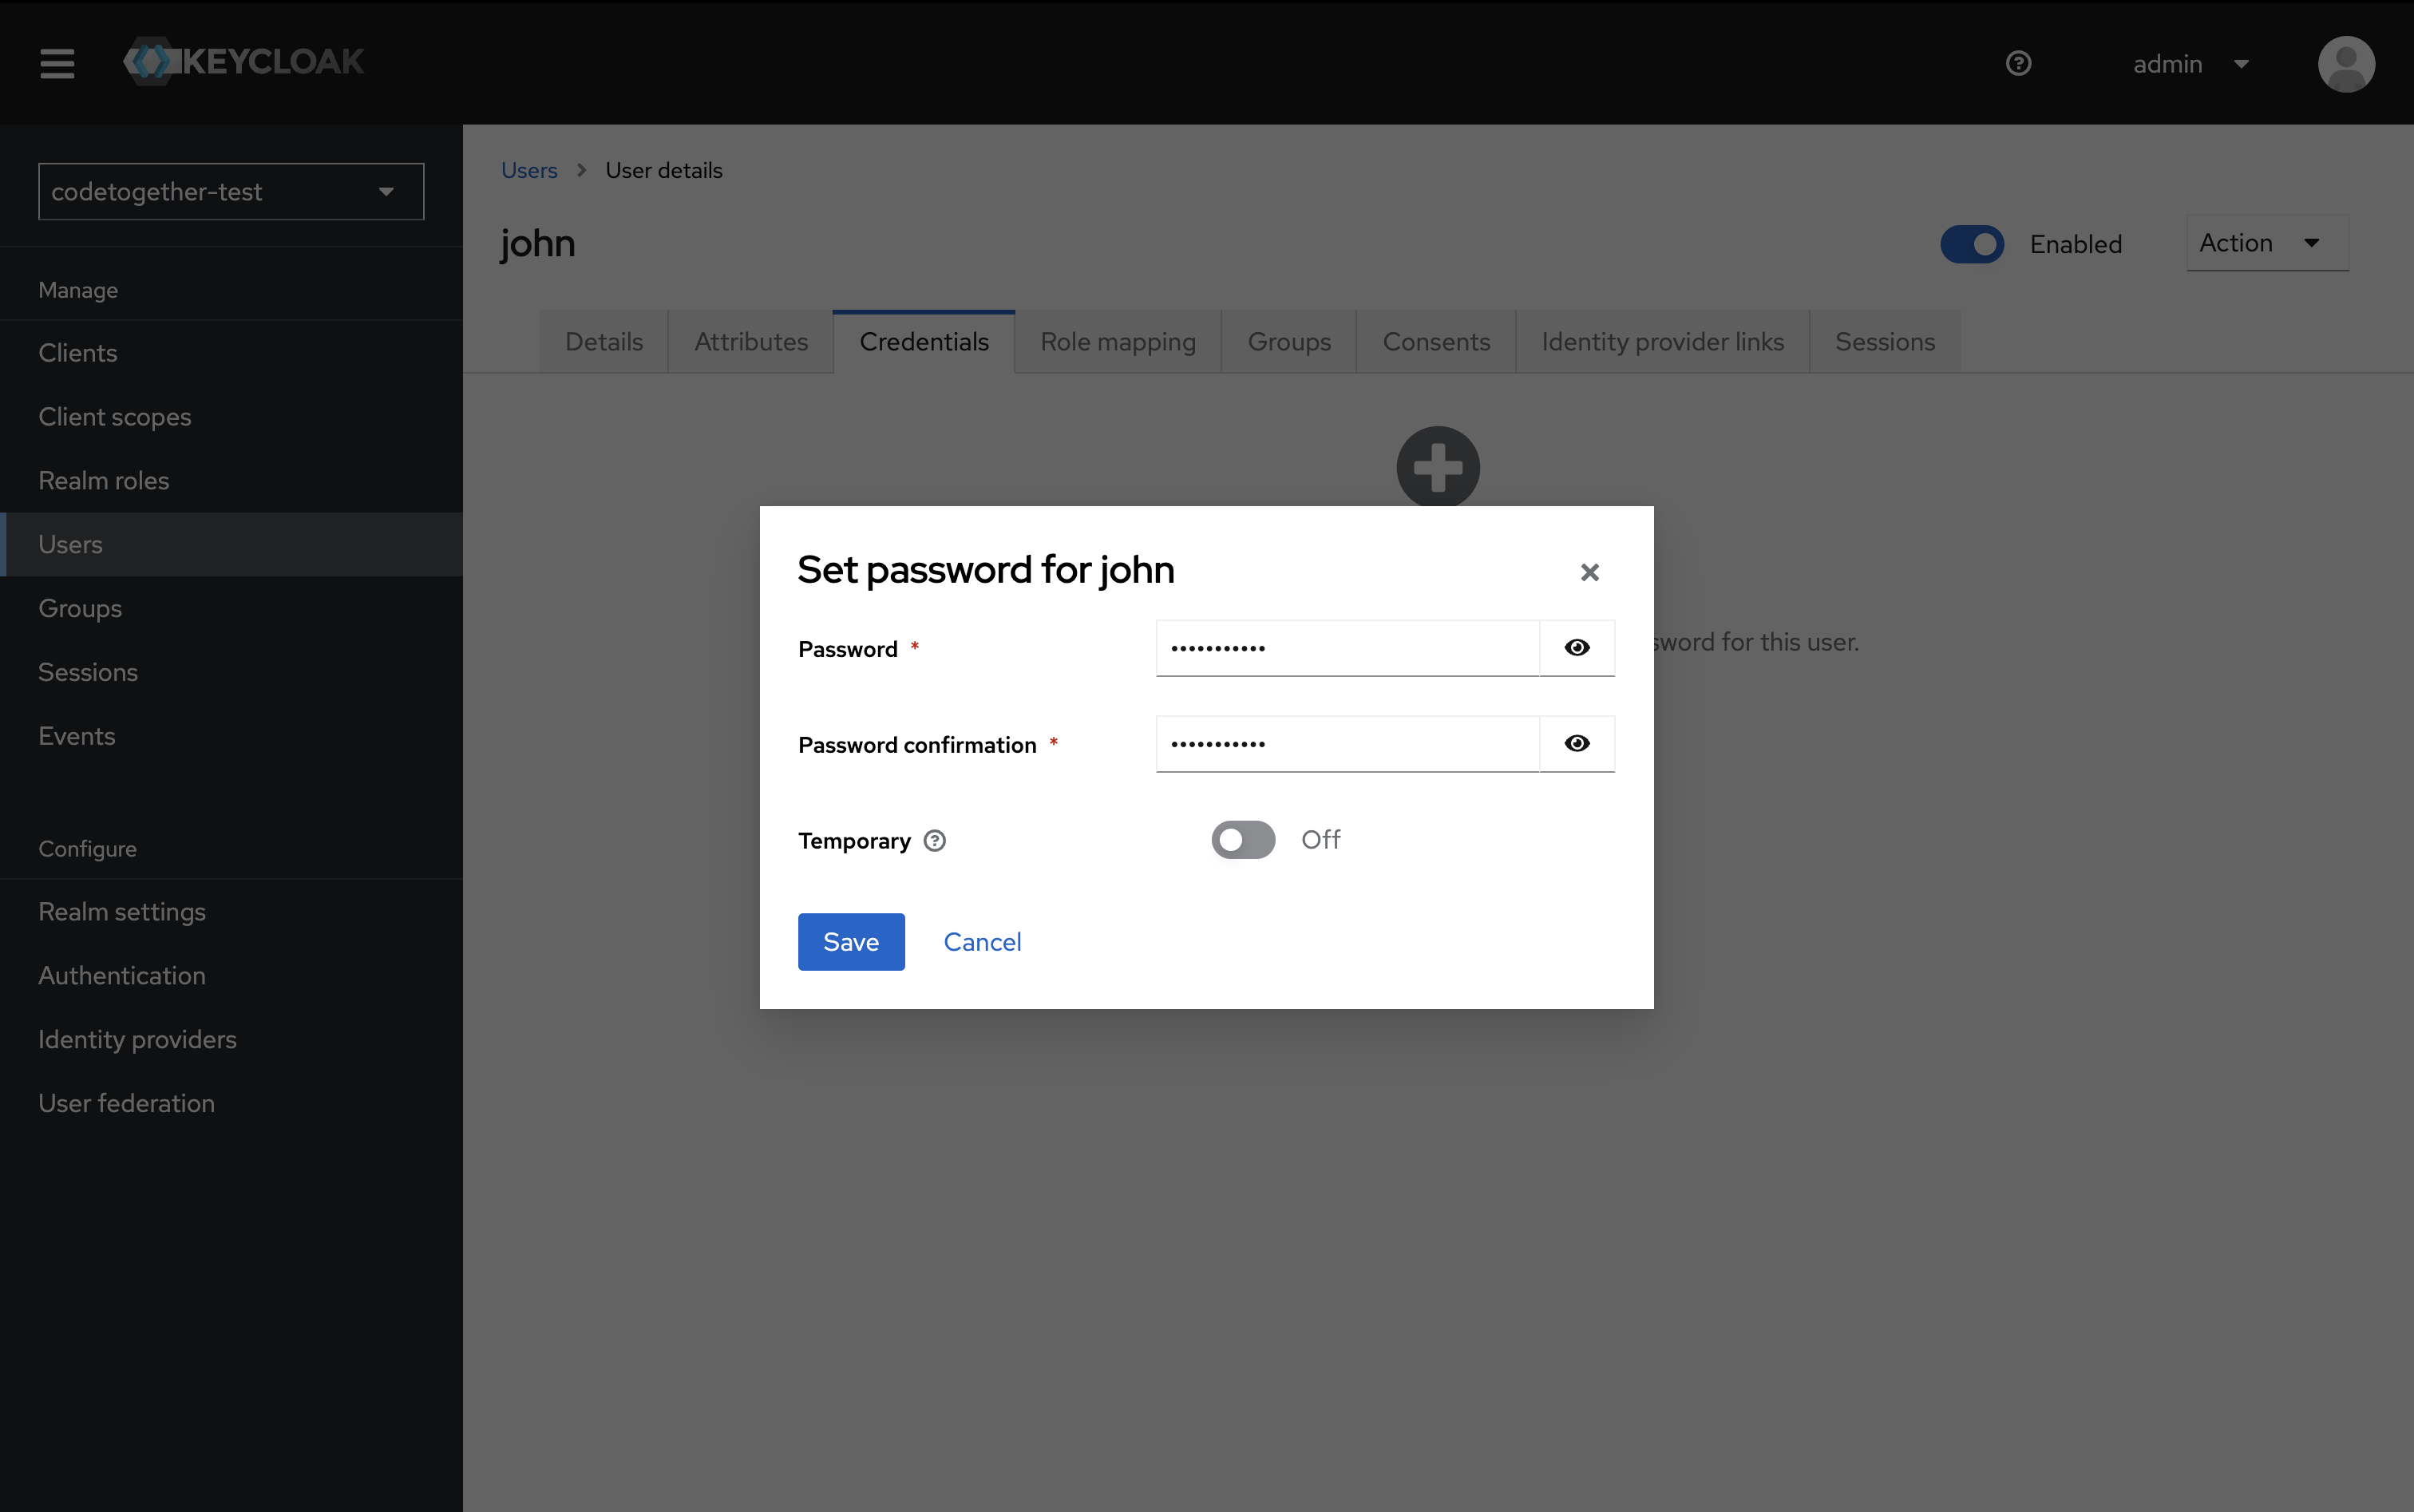
Then click Save.
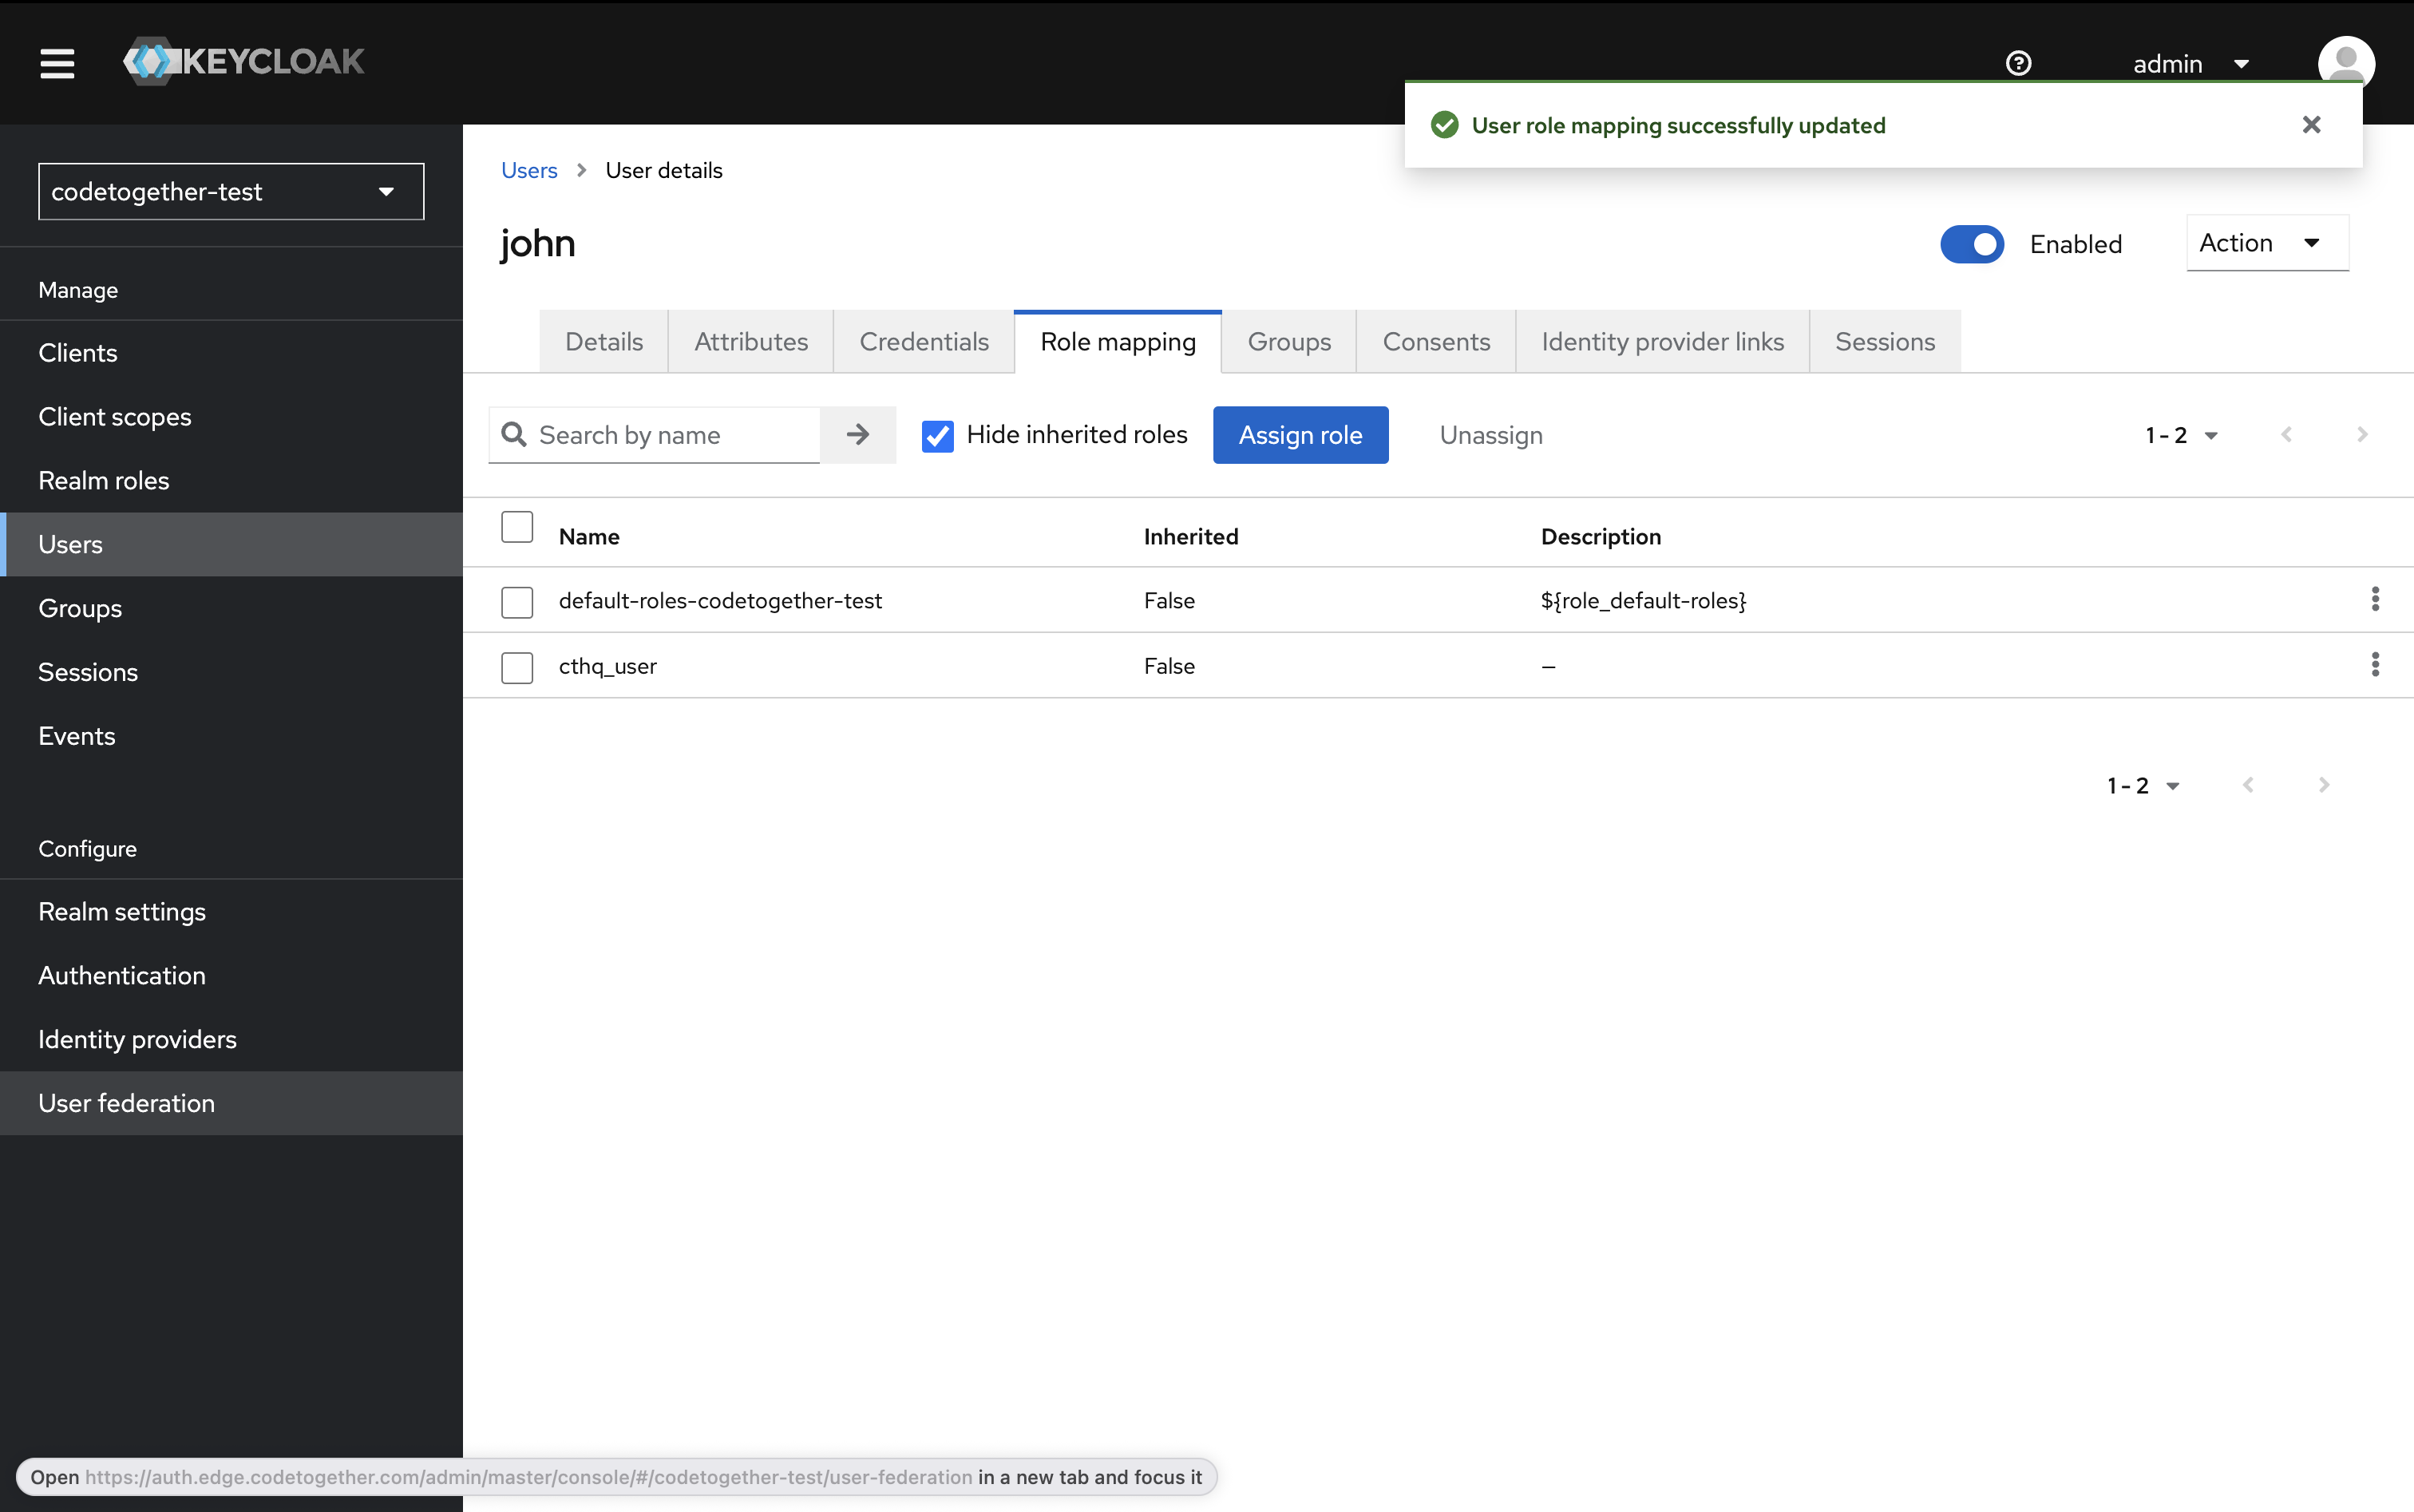
4.5. Switch to the Role Mappings tab.
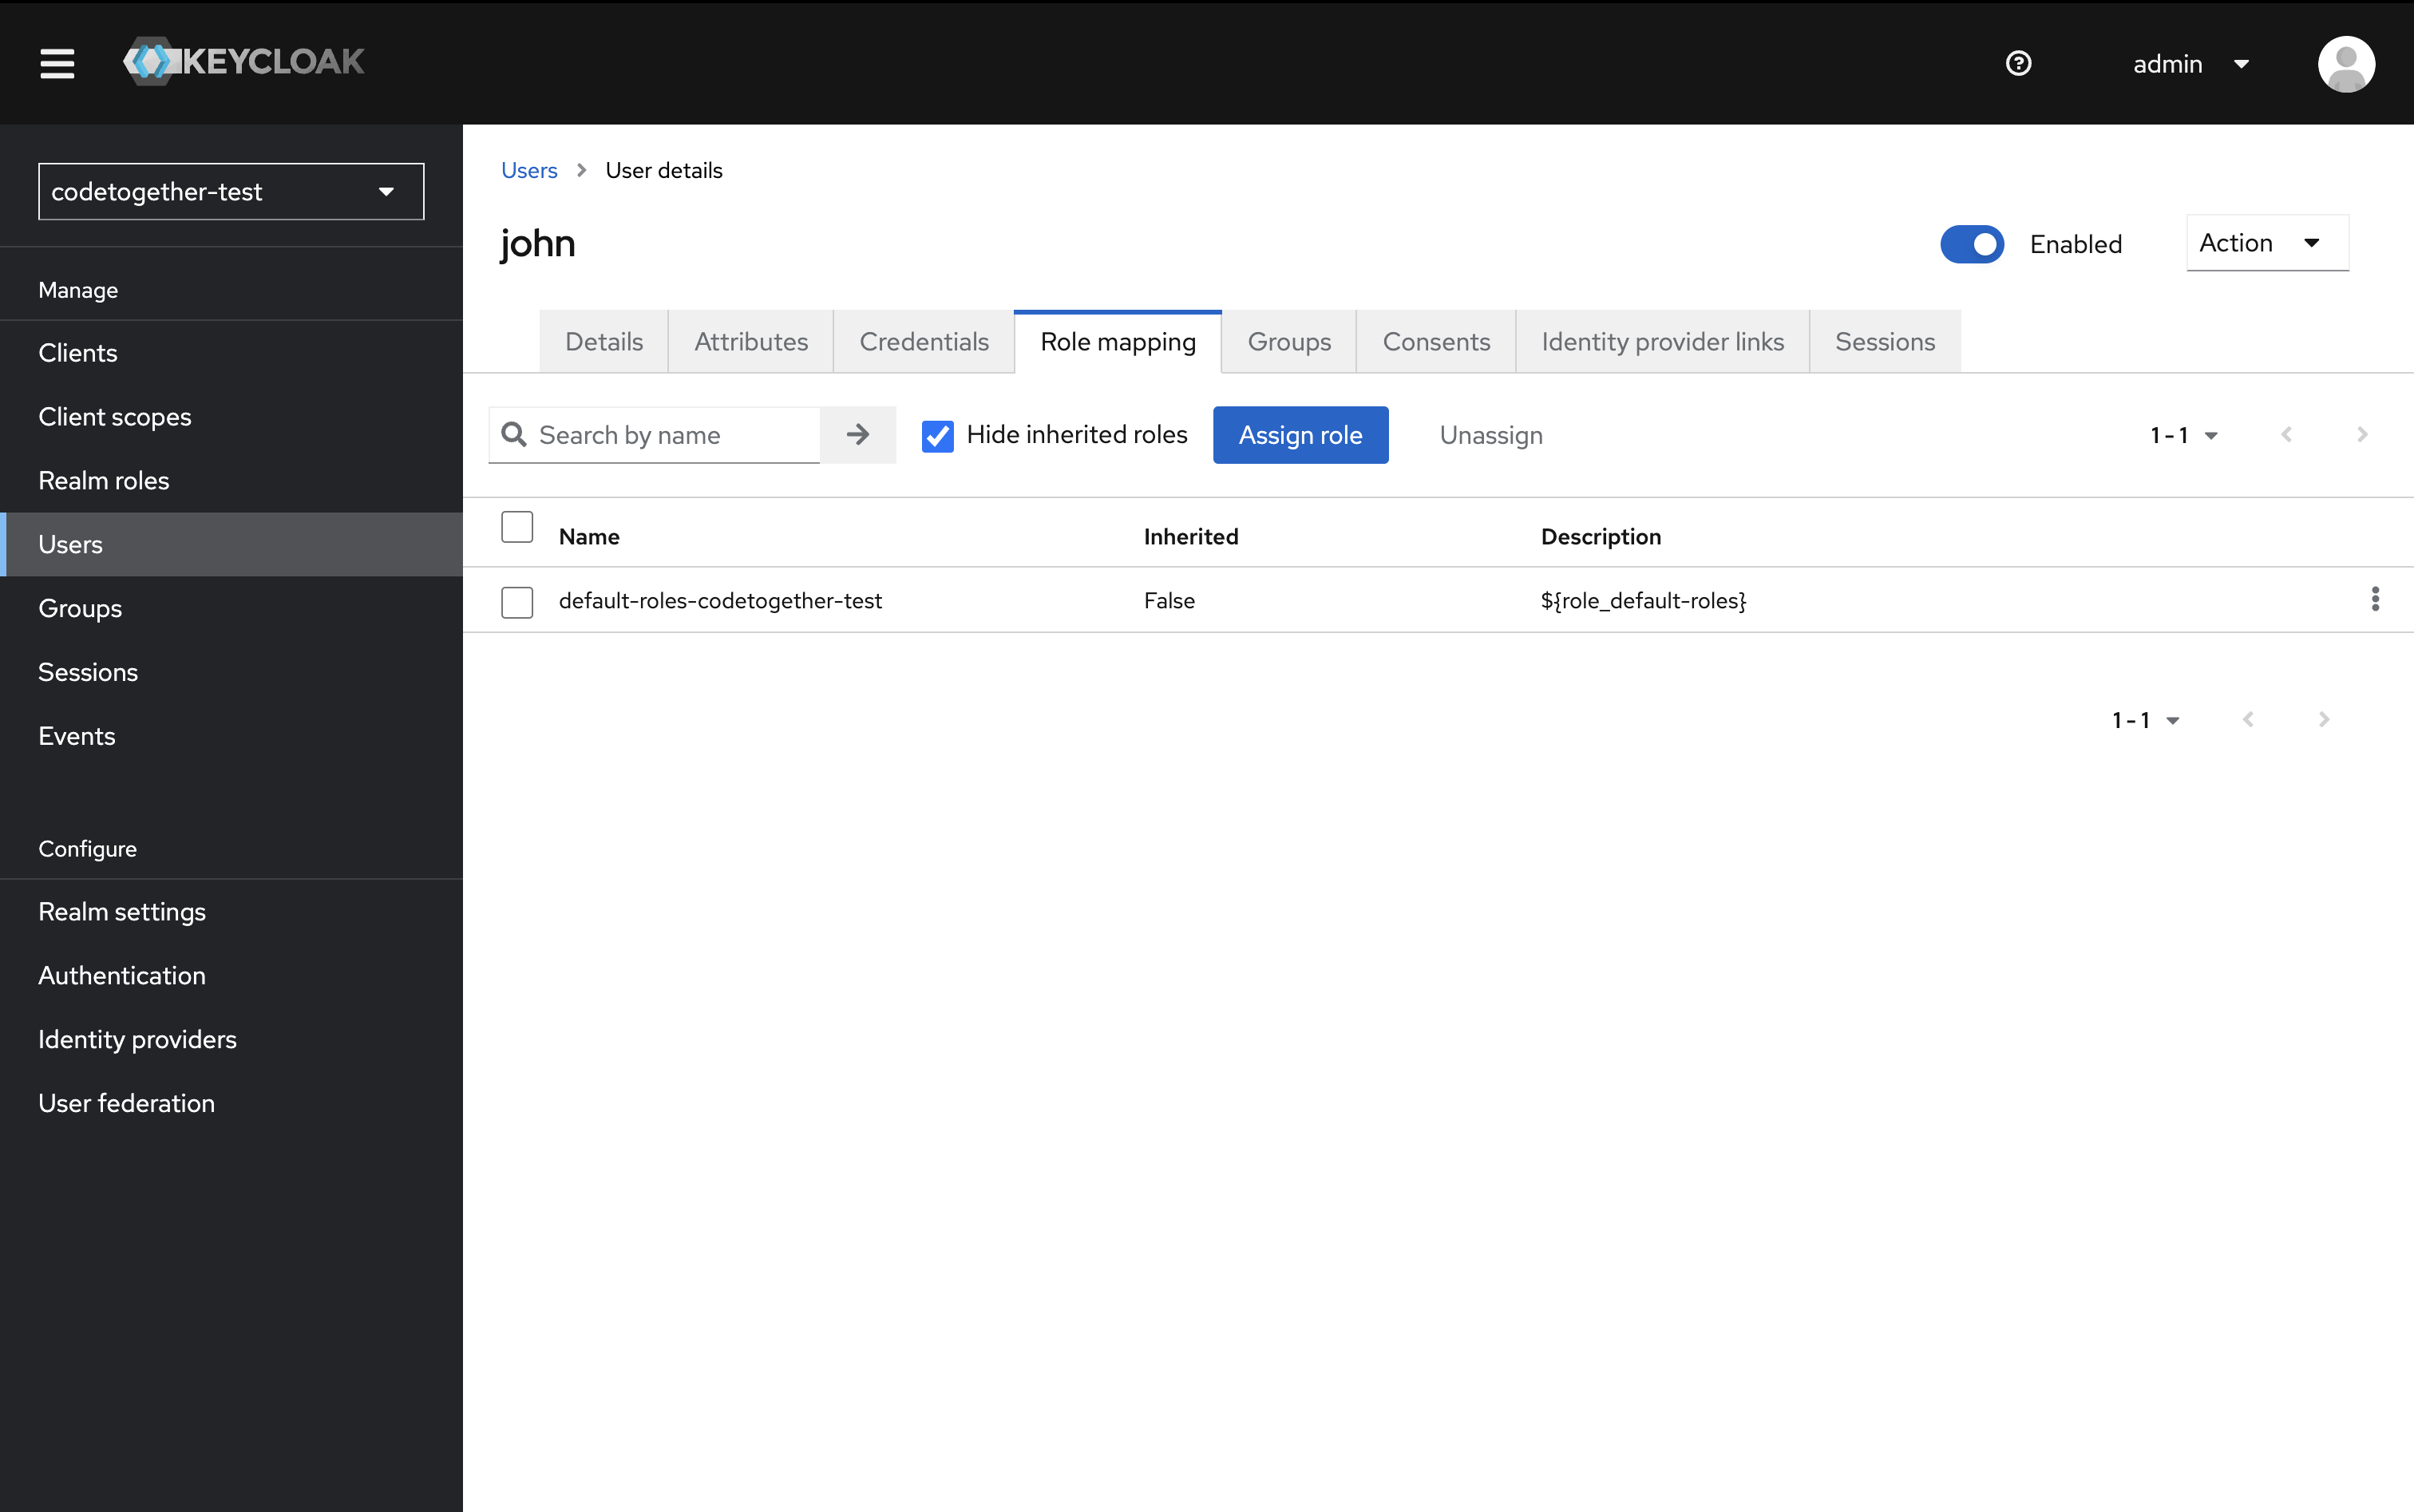
4.6. Click Assign role, select the cthq_user role. Then click Assign.
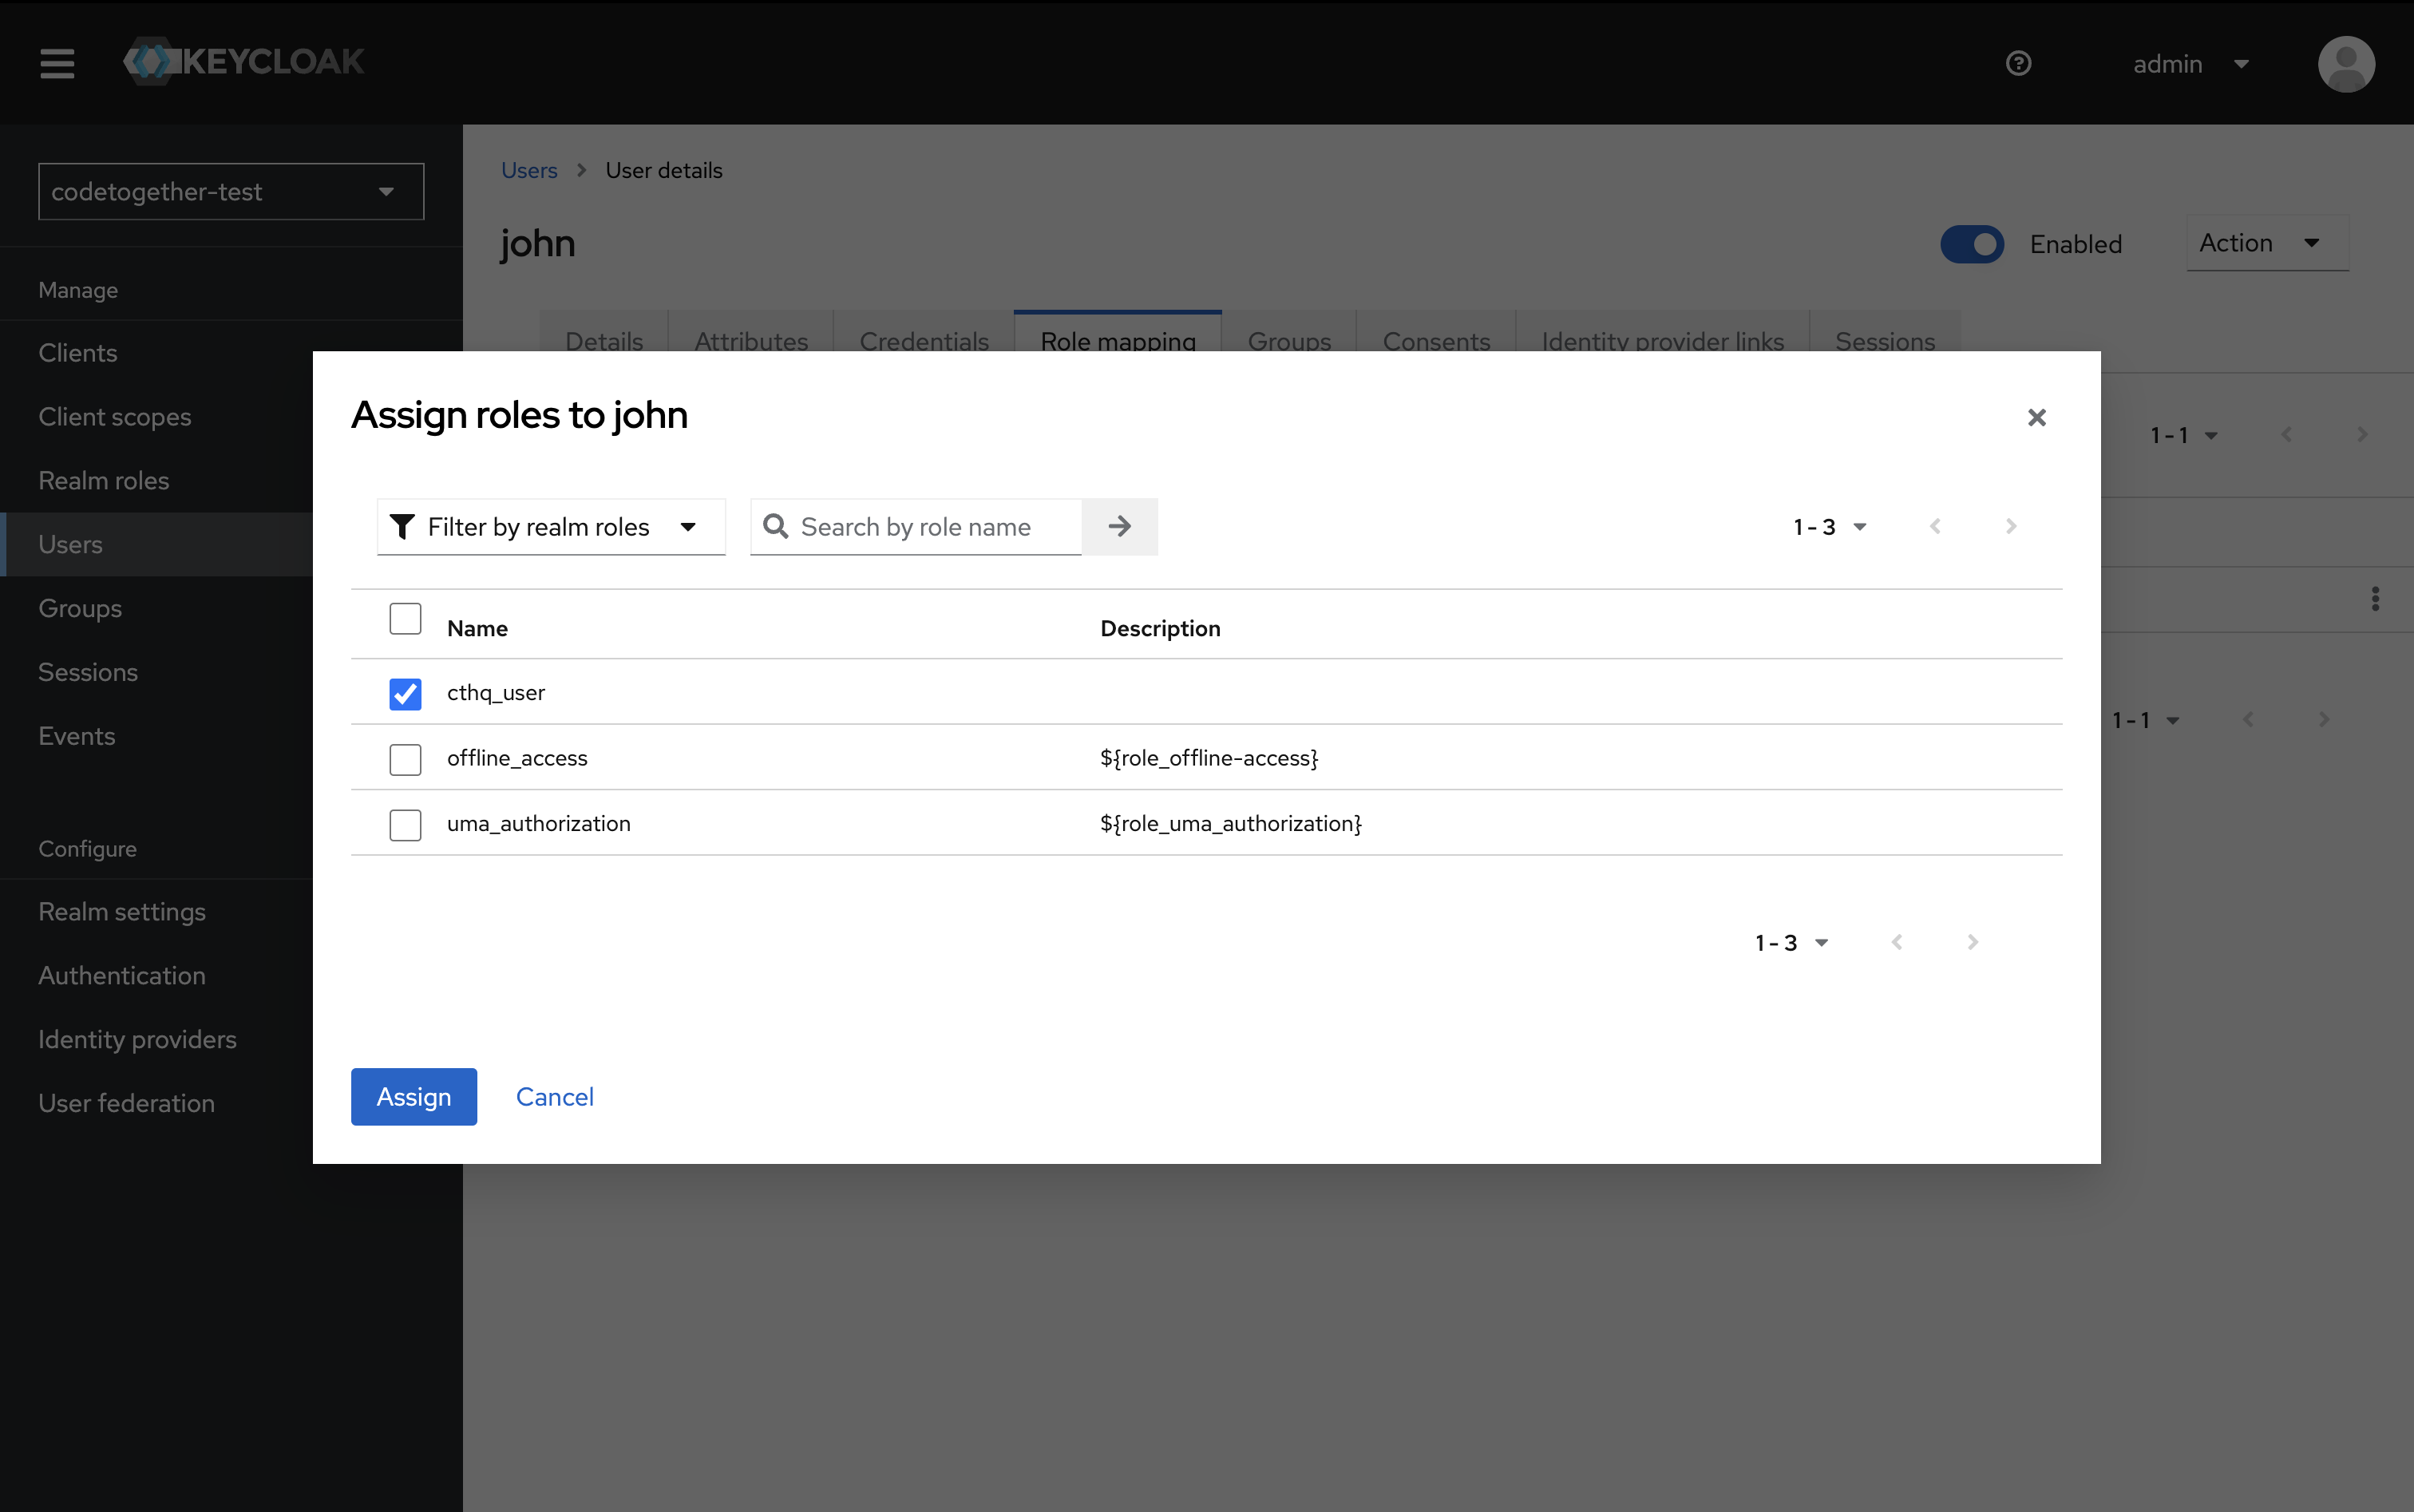
You should now see the assigned role under Assigned Roles.