Create a work area
Use this guide to add a work area for a slice of your organization's activity. You'll pick a template, set its coverage, grant access, and confirm the numbers look right.
- Deployment: SaaS, On-premises
- Role: Super Admin (Owner on SaaS), Admin
The type you pick decides the kind of coverage the work area accepts. Type, name, coverage, and access all stay editable after creation; only the default company work area is fixed.
Before you begin
To create a work area, you need all of the following:
- Super Admin or Admin on the organization: Creating and editing work areas requires one of these tenant roles. On-premises the role is displayed as Super Admin everywhere it is shown or selectable; on SaaS the same role is labelled Owner. The work area role named Owner is a different role. See Roles reference.
- The reporting question this work area answers: A work area exists to scope a view. If an existing work area already answers the question, add people to it instead.
- The repositories or committer emails it covers: Have these ready. See Work area templates reference for what each template accepts.
1. Pick a template
In the sidebar, next to the Work Areas heading, select New Work Area. The dialog steps through Type, Name, and one coverage step named for what it picks: Repositories, Developers, or Work Areas. A mixed work area picks both repositories and developers, so its dialog has four steps.
A work area's template is what the portal calls its Work Area type, so the step named Type is where you pick the template.
Choose the type that matches the question you want answered:
| Question | Type |
|---|---|
| What is happening in these repositories | Project |
| What are these people working on | Team |
| What are these people doing in these repositories | Mixed |
| How do these existing work areas look together | Combined |
Your organization already has a company work area covering everything, provisioned when it was created, so Company is not offered in this dialog. To give another group organization-wide reporting, grant them a role on that existing company work area, as described in Grant access, rather than creating a work area.
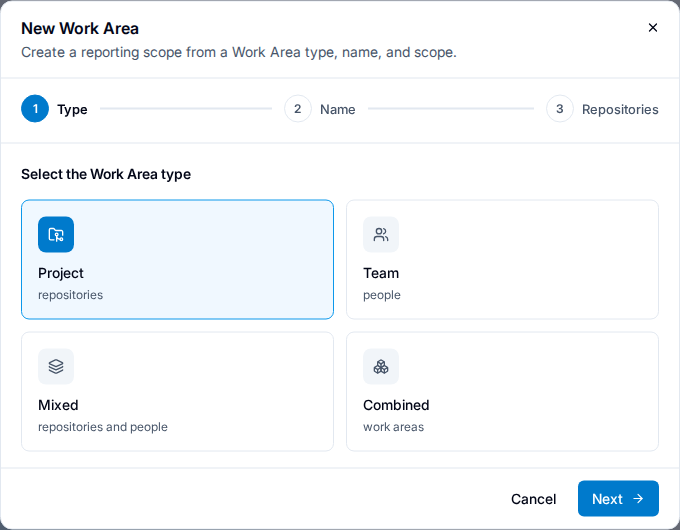
- Select the type, then select Next. The Name step opens.
- In Display name, type the work area's name, then select Next. The coverage step opens.
2. Set the coverage
Coverage is required: with nothing selected the step reads Scope needs attention and the button to continue stays disabled. Fill in the coverage the template requires:
- For a project work area, add repositories. In Search repositories, type a name or a remote URL, then select a match. The result list stays hidden until the field has a query, so an empty field showing nothing is the picker waiting for one, not a picker with no repositories to offer.
- For a team work area, select people from the subject list. Filter it by display name or by the email that appears on their commits, which is not always their login address.
- For a mixed work area, add repositories on the Repositories step, select Next, then select people on the Developers step. Coverage is the intersection, so only activity in those repositories by those people is reported.
- For a combined work area, add child work areas. Coverage is the union of the children, and the children stay live rather than being copied.
- Select Create. The work area appears in the sidebar under its type.
After the work area exists, the same coverage picker is reached from its settings: open the work area, open the Work Area actions menu, then select Work Area settings. That drawer carries Display name, Work Area type, the coverage picker, and a Save Details button. The following two figures were taken in the drawer.
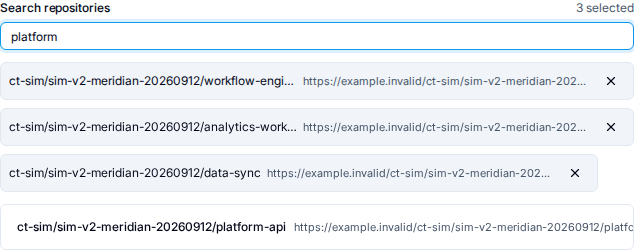
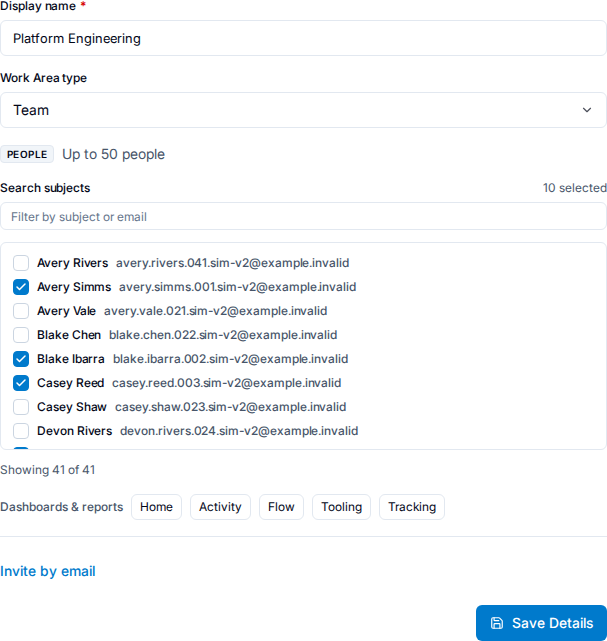
Each template caps how much coverage it accepts. A single coverage step and the settings drawer state the cap beside the picker; the Mixed dialog's two coverage steps do not. See Work area templates reference for the limits.
3. Grant access
Grant a work area role to each user or group that needs the work area. Coverage does not grant access, so this step is required even for the people the work area reports on.
- Open the work area, open the Work Area actions menu, then select Manage access. The drawer lists the people and groups with a role in this work area, and only this one.
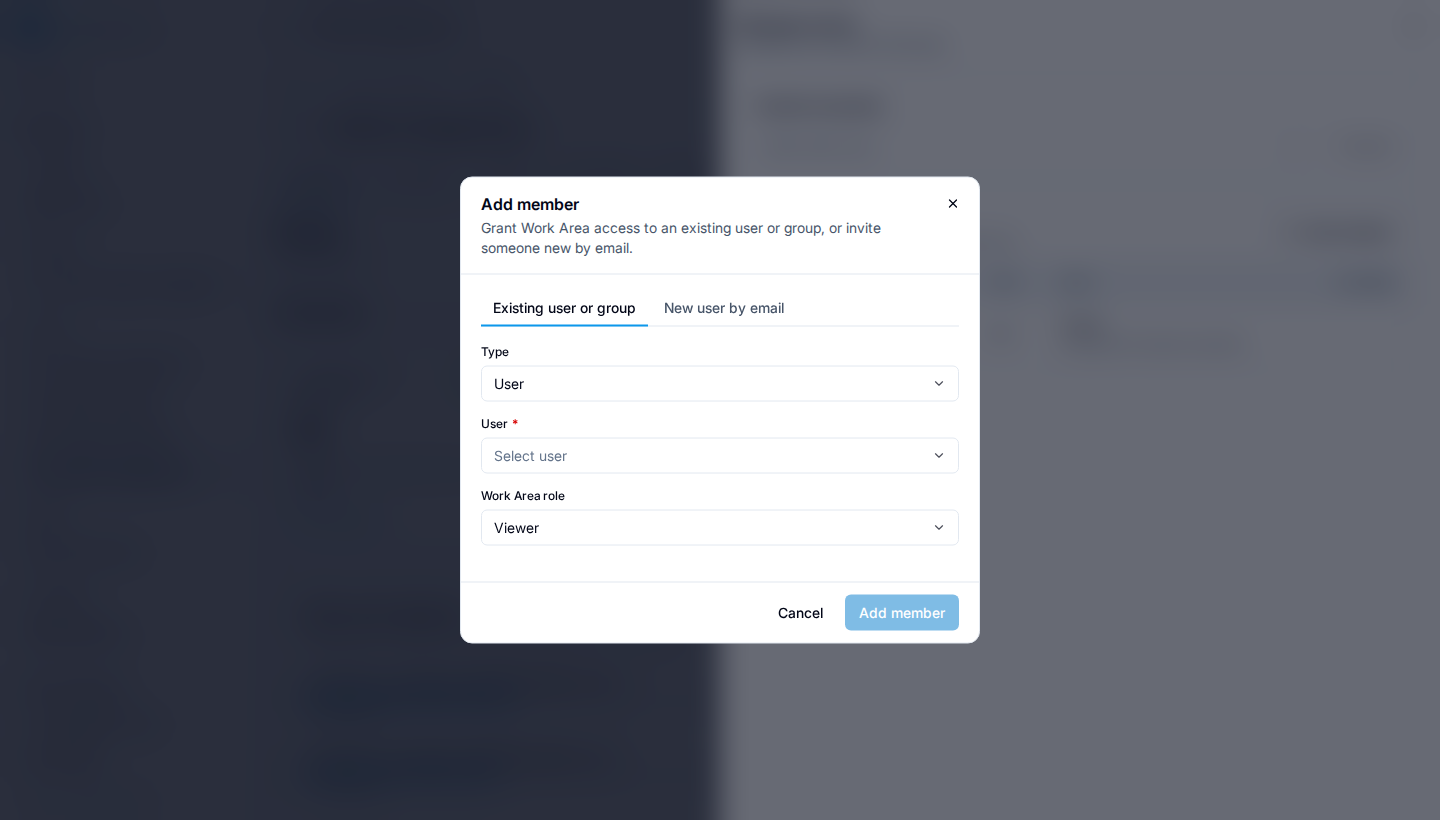
- Select Add member, then add an existing user or group on Existing user or group, or invite someone new on New user by email. Set Work Area role in either tab; it defaults to Viewer.
- Optional: grant Self Only to people who should reach their own activity inside this work area without seeing aggregate dashboards.
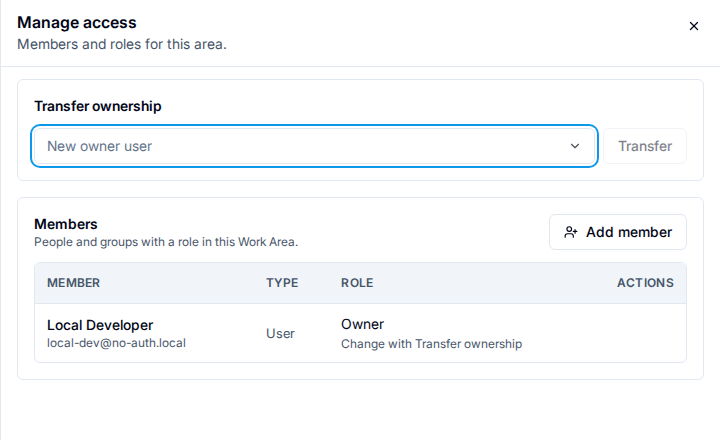
A member's role is changed in place from the same drawer. The exception is the work area's Owner, a work area role distinct from the SaaS tenant role of the same name, whose row carries Change with Transfer ownership instead: ownership moves through the Transfer ownership control at the top of the drawer.
The drawer's subtitle reads Members and roles for this area, on the company work area as well as on any other: a grant made here covers that work area, not the organization.
An invite sent from here grants the invited person this work area at the role you chose, and any other work areas they already have a pending invite to. It does not grant anything organization-wide, and the dialog says so.
Members of your organization who hold Global viewer, Admin, or Super Admin already read every work area and do not need a grant here.
Work area access can also be granted the other way round, from a user or group in Settings > Access rather than from the work area. See Manage access with groups.
4. Confirm the work area reports what you expect
- Open the work area and compare a recent period against a work area known to include the same activity. If the numbers are plausible, the coverage is right.
- If the work area is empty, confirm its coverage rather than its membership. An empty aggregate view almost always means the filter excludes the activity, not that access is missing.
Activity is processed asynchronously, typically catching up within about 15 minutes, longer after a bulk historical import. To check whether processing has caught up rather than guess, use the System Signals panel in developer traces, which reports pipeline lag directly.
Troubleshooting
The work area is empty but the people are members
Membership does not add activity. Confirm the repositories or committer emails in the coverage actually match the work the people are doing. See Work areas.
The repository picker shows nothing
The picker holds its results back until the search field has a query, so an empty field lists no repositories by design. Type part of the name or the remote URL. If a query that should match still returns No repositories match the search., the repository has not reported to the platform yet. See Connect integrations.
A developer's work is missing from a mixed work area
Mixed coverage is an intersection. Activity is reported only when the repository and the committer are both covered, so a commit in a covered repository by an uncovered person is excluded by design.
Coverage cannot be saved because it exceeds a limit
Each template caps repositories, developers, or child work areas. Reduce the coverage, or split the work area into several narrower ones and combine them.
The template is wrong
Open the work area, open the Work Area actions menu, then select Work Area settings. Change Work Area type, set the coverage that type requires, then select Save Details. Changing the type empties the coverage already entered, because the new type accepts different fields, so have the replacement coverage to hand before you change it. The default company work area is the exception: its type is fixed, and Company is not offered as a type for any other work area.
If this doesn't fix it
Contact support with all of the following. Tickets missing these take longer to resolve:
- The work area name, its template, and its complete coverage.
- The period you expected activity in, and a work area where that activity does appear.
- The grants on the work area, and the role of the person seeing the problem.
- Your deployment kind and server version.
Related
- Work areas — coverage and membership, and why they are separate.
- Work area templates reference — coverage fields and caps per template.
- Roles reference — what each work area role can do.
- Invite users to your organization — granting work area access as part of an invite.