Set up CodeTogether AI SaaS
Use this guide to set up a CodeTogether AI SaaS tenant from trial to activity. You'll start a trial, then work through the portal's setup guide to connect your repositories, activate developer workstations, and invite your team, and finally read the first results.
- Deployment: SaaS
- Role: Owner, Admin
Throughout these pages, capture means recording development activity — commits, IDE activity signals, and AI-agent sessions — from the repositories and tools a developer has configured. What is captured states the exact boundary, including what is never collected.
If you run the platform in your own environment instead, see Deploy CodeTogether AI on-premises.
Before you begin
To complete SaaS setup, you need all of the following:
- A Google account, or an email address you can receive mail at: The hosted sign-up step accepts either. An email sign-up needs a password of at least 12 characters with a number, a lowercase letter, an uppercase letter, and a special character.
- The repositories you want tracked: Either permission to install a GitHub App in your GitHub organization, or the addresses of the repositories on any host, which you add by hand.
- A way to reach your developers: You send them one setup link; email or chat is enough.
1. Start your trial
The trial starts on the CodeTogether website, not in the portal.
- Open the Start your free trial form on the CodeTogether website.
- Enter a Workspace name, what you'll call this trial, such as a team or project name, and your Company name, the organization the workspace belongs to.
- Select I agree to the Terms of Service, then select Start a trial. The note under the button names the region your workspace is created in.
- Create your account on the hosted sign-up step, with Google or with an email address and password. The portal opens on Home, headed Set up and your workspace name, with the setup guide the rest of this page follows.
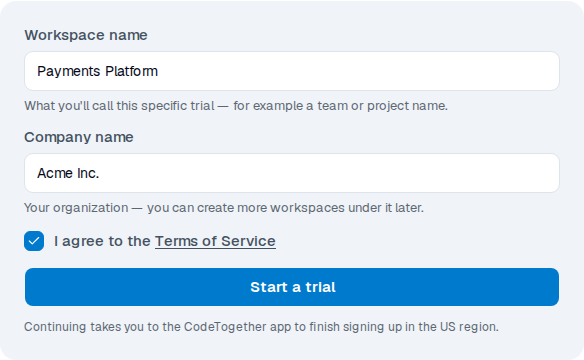
The form's workspace is what the portal calls your organization. Your organization starts with one default work area, All Areas, that covers the whole organization. You add more focused views after activity arrives.
Verify your email address
If you signed up with an email address, every portal page carries a Verify your email address banner until you confirm it. Open the email titled Verify your CodeTogether AI email and select its link; the page that opens reads Your email address is confirmed and returns you to the portal. The link expires 24 hours after it is sent, so if it has lapsed, select Resend verification email on the banner.
Sign in to more than one organization
If you later sign in to the portal directly, the page reads Sign in to CodeTogether AI and sends you to the hosted sign-in step on its own; a Continue button is there for when you signed out on purpose.
If your account belongs to more than one organization, a page titled Choose an organization is shown after sign-in, listing each organization with its plan and region. Inside the portal, the organization name at the top of the sidebar is the organization switcher: select it to list your organizations and move between them. A check mark marks the current one.
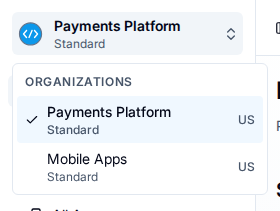
An account holds as many workspaces as its plan allows. Starting another trial from an account at that limit stops at You've reached your workspace limit; to work in another organization, have one of its Owners or Admins invite you.
2. Connect repositories
Step 1 of the setup guide, Connect repositories, decides what is captured. AITrax, the tracker each developer installs, only records activity on repositories you connect. Activity on other repositories is not kept, and connecting a repository later does not bring back activity from before it was connected, so complete this step before you send the setup link.
The step offers two ways to connect:
- Connect GitHub (marked Recommended): installs the CodeTogether app on your organization's GitHub. Repositories are linked automatically, and new ones are picked up as they appear. You provision nothing and manage no credentials.
- Add repositories manually (marked Any host): names the repositories to track yourself. It works with GitHub, GitLab, Azure DevOps, Bitbucket, and self-hosted Git.
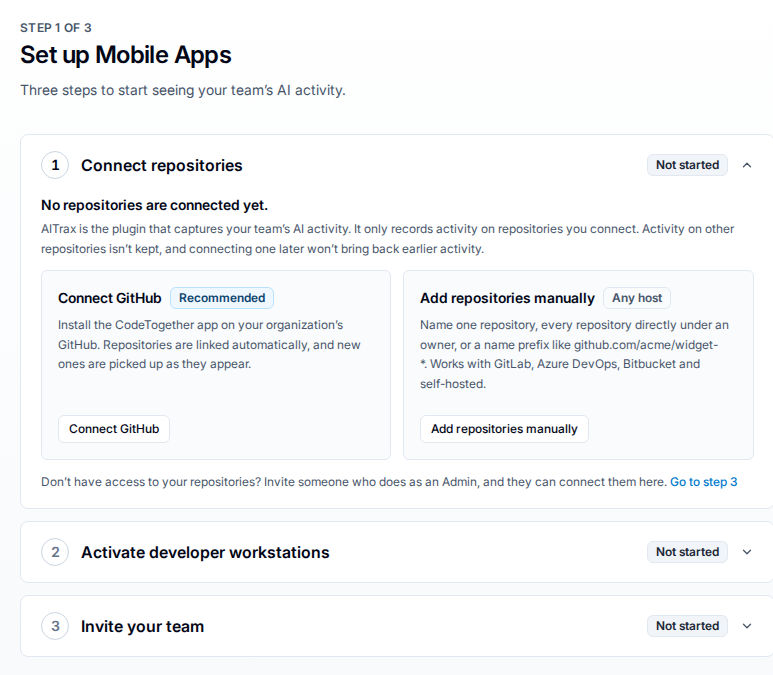
If you don't have access to your repositories, invite someone who does as an Admin from step 3 of the guide, and they can connect them.
Connect GitHub
- On Home, select Connect GitHub, or go to Settings > Integrations > Source Control and select Connect on the GitHub card.
- Choose the GitHub organization and, when GitHub asks, all repositories rather than a selection: an organization-wide install covers repositories created later, so you do not update it when a new repository is created. Complete setup on GitHub.
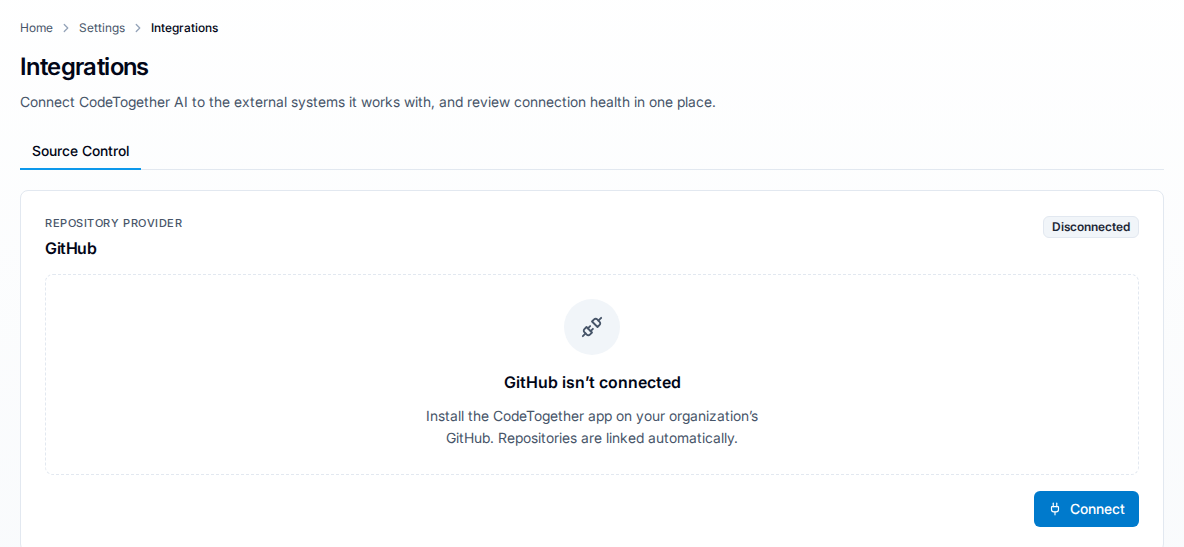
An installation you start and leave unfinished on GitHub reads Pending setup on the GitHub card, and Setup expired after the installation's verification window closes. In both states the card's button reads Resume setup and takes you back to the installation you left. For the card's full status list, see Connect integrations.
Add repositories manually
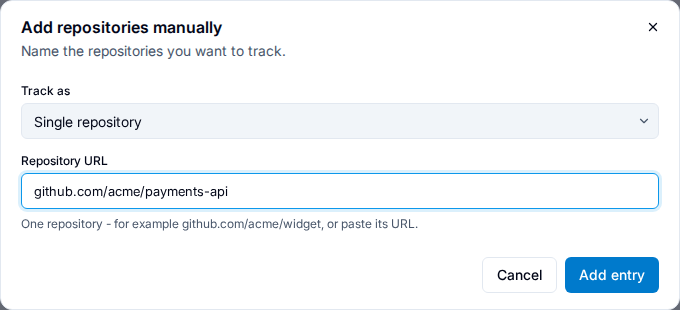
- On Home, select Add repositories manually. The Add repositories manually dialog opens.
- In Track as, choose what the entry covers: Single repository, Organization (every repository directly under an owner), or Name prefix pattern (every repository whose name starts with a prefix, such as
github.com/acme/widget-*). - Enter the repository, owner, or prefix. For a single repository, enter it as
github.com/acme/widgetor paste its URL. - Select Add entry. The dialog closes and step 1 of the guide reads Done.
Review what is tracked
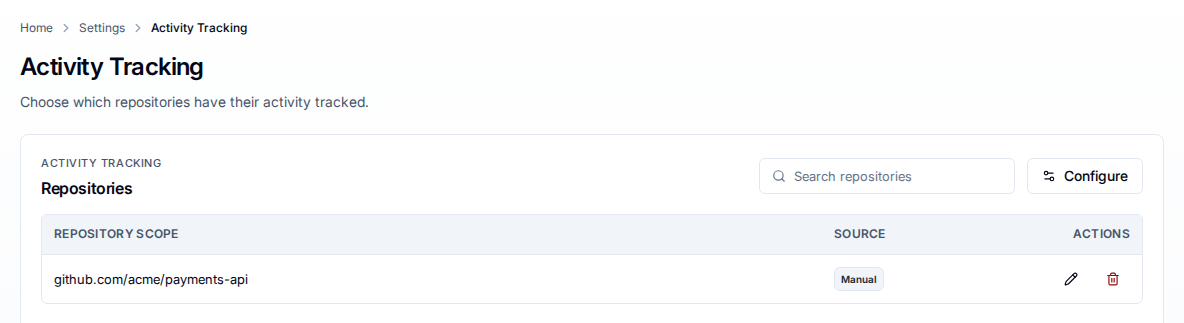
Every tracked entry, from GitHub or added manually, is listed at Settings > Activity Tracking > Repositories, with its scope and its source. Select Configure there to connect GitHub or add more entries. This is separate from workstation setup, which is system- and IDE-level and does not need to be run per repository.
3. Activate developer workstations
Step 2 of the setup guide, Activate developer workstations, gives you the setup link to send your developers. Developers are not invited like members: their work is captured once AITrax runs on their machine. You send one link, and each developer handles their own workstation. Set up your workstation is the developer's view of that installation.
- On Home, open step 2 and select Generate link and code. The step shows two tabs, Setup link and Activation code, with the expiry under them, as in
Expires Oct 5, 2026, 1:42 PM (in 7 days). - On the Setup link tab, select Copy link and send the link to your developers.
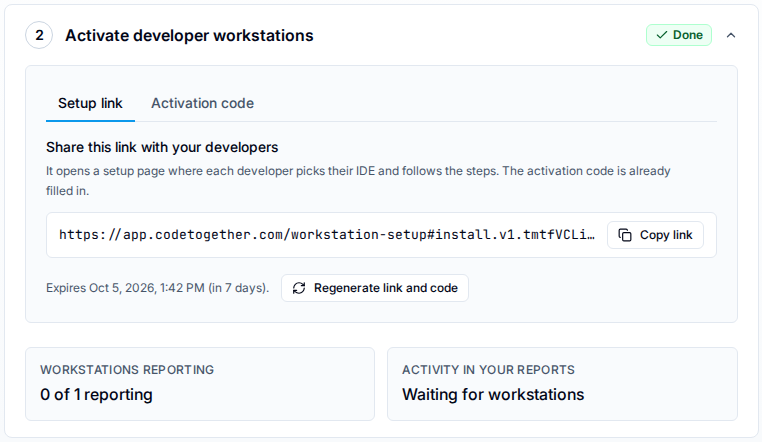
The link opens a product page titled Set up your workstation (not this site's guide of the same name), where a developer picks their IDE and follows the install steps with the activation code already filled in. The Activation code tab shows the code on its own, with Copy code, for a developer who pastes it into their IDE instead. See Activate a workstation on SaaS for the steps the developer follows.
The step reads Done once a workstation activates with the code. Under the tabs, Workstations reporting counts the activated workstations that are sending activity, as in 0 of 1 reporting, and Activity in your reports reads Waiting for workstations until that activity reaches your reports.
The code is the part of the link after #, and it never reaches a server: the browser reads it from the address and fills it into the steps. Some chat and email clients strip that part. If a developer reports landing on a page that asks for a setup link or an activation code, send the full link again, or send the code itself; the page has a field for pasting either.
Onboarding at the bottom of the portal sidebar opens Set up developer workstations, which carries the same setup link for managers and admins, and the IDE install steps for someone setting up the machine they're signed in on. See Onboard a developer for the manager-level view of the full onboarding flow.
Replace or revoke an activation code
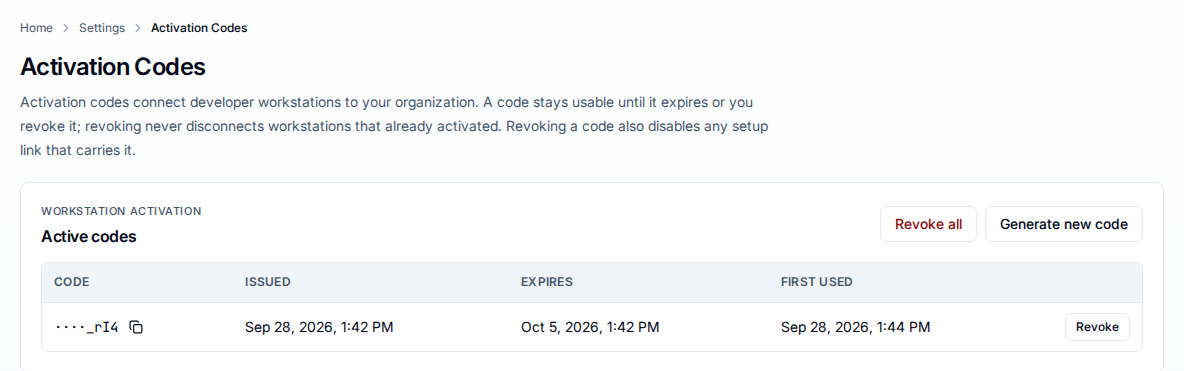
A code stays usable until it expires or you revoke it. Settings > Activation Codes lists every live code in its Active codes table, with when it was issued, when it expires, and when it was first used. Each code shows only its last four characters, with a copy action beside it and Revoke on its row.
Three things to know before you revoke or replace a code:
- Revoking a code disables every setup link that carries it, immediately. Workstations that already activated with it stay connected.
- Replacing a code asks what to do with the current one. Regenerate link and code in step 2 of the guide, and Generate new code on Settings > Activation Codes, both open Regenerate activation code: choose Keep the current code, which keeps working until it expires alongside the new one, or Revoke the current code, which stops working right away. Then select Generate new code.
- Revoke all revokes every active code at once, for when the rollout is finished.
4. Invite your team
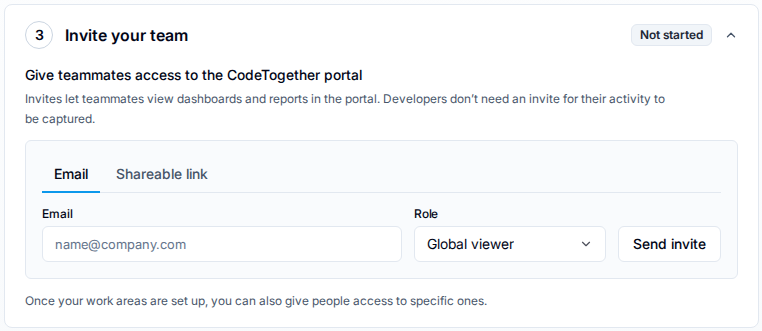
Step 3 of the setup guide, Invite your team, gives teammates access to the portal's dashboards and reports. Developers don't need an invite for their activity to be captured.
The person who started the trial holds the Owner role and has full control, including billing. If someone else carries day-to-day administration, invite them as Admin, which can manage integrations, onboard developers, and configure work areas. Owners retain sole control over billing and Owner-role changes.
- On Home, open step 3.
- Choose Email to invite one person by address, or Shareable link to create a link that anyone holding it can use.
- In Role, choose Admin or Global viewer, the read-only role that sees every work area.
- Enter the email address and select Send invite, or, for a link, set Expires after and Maximum uses and select Create link.
Someone who only needs one team's dashboards is invited from that work area instead, after you create it. For every invite option, and for tracking an invite until it is accepted, see Invite users to your organization.
5. Hide the setup guide
When steps 1 and 2 are done, the guide offers Hide setup guide. Hiding it shows your organization overview on Home, headed with your organization's name and at a glance. For an Owner or Admin the overview includes a System health section with the subscription, when it expires, and how many integrations are connected.
To bring the guide back until setup is complete, select the Setup guide card on the Settings page; the card names the steps that are left.
6. Read the results
As developers complete setup, activity flows to the portal.
- Open All Areas under Work Areas in the sidebar to see the full-organization view as the first activity arrives.
- After you have enough data to recognize patterns, create work areas scoped by team, project, or a custom combination. See Create a work area.
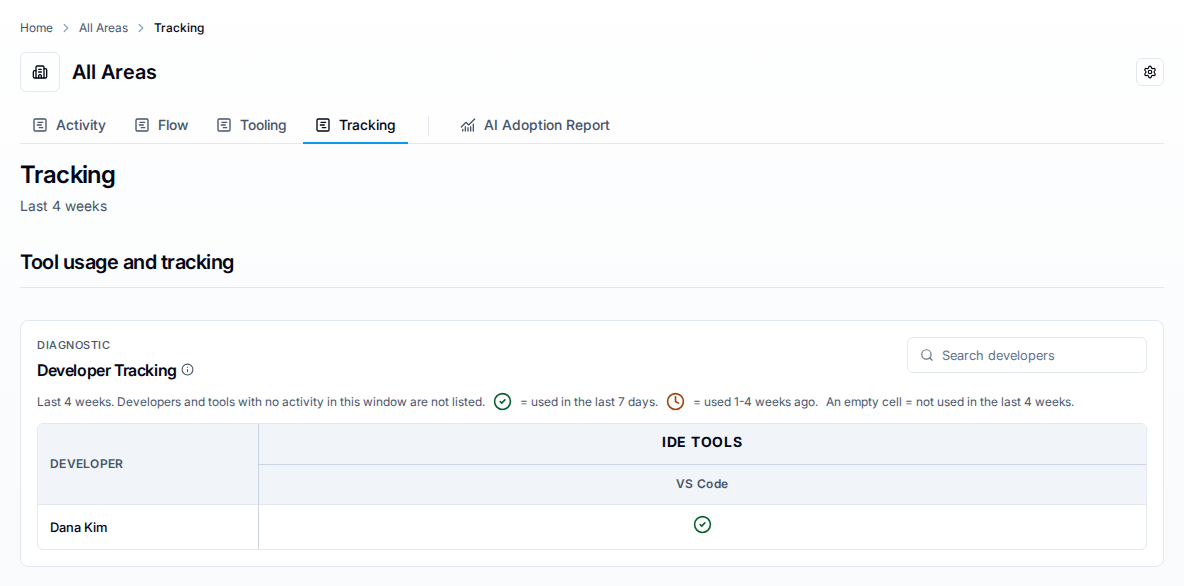
The Tracking tab of All Areas lists, per developer and per tool, who has reported in the last four weeks, which is the quickest way to tell a workstation that never activated from one that has gone quiet.
Work areas are far easier to scope after real data is present. All Areas is a good starting point and requires no configuration.
Related
- Activate a workstation on SaaS — the steps a developer follows after receiving the setup link.
- Set up your workstation — the developer's own workstation setup reference.
- Connect integrations — GitHub connection statuses and what each needs from you.
- Invite users to your organization — adding members who need the dashboards and delegating admins.
- Work areas — what a work area is and how templates define coverage.
- Deploy CodeTogether AI on-premises — the self-hosted path instead.