Set up your organization
Use this guide to complete the initial configuration of your organization once your on-premises server is up and you can sign in to the portal. You'll install the license, connect source control, add co-administrators, and get developer data flowing.
- Deployment: On-premises
- Role: Owner, Admin
The order matters: each step depends on the one before it, and configuring work areas before data arrives is guesswork you will redo.
Before you begin
To set up your organization, you need all of the following:
- A running on-premises server: You can sign in to the portal. See On-premises deployment.
- Your license file: Obtain the
.txtlicense file from CodeTogether before starting. - Permission to install a GitHub App (for step 2): Required if you intend to connect GitHub.
1. Install your license
Your license activates the platform. Install it before any other configuration, because the dashboard cannot be used until a valid license is installed.
- Open the Update license dialog:
- On a new installation, the portal opens on the License required screen. Select Update license.
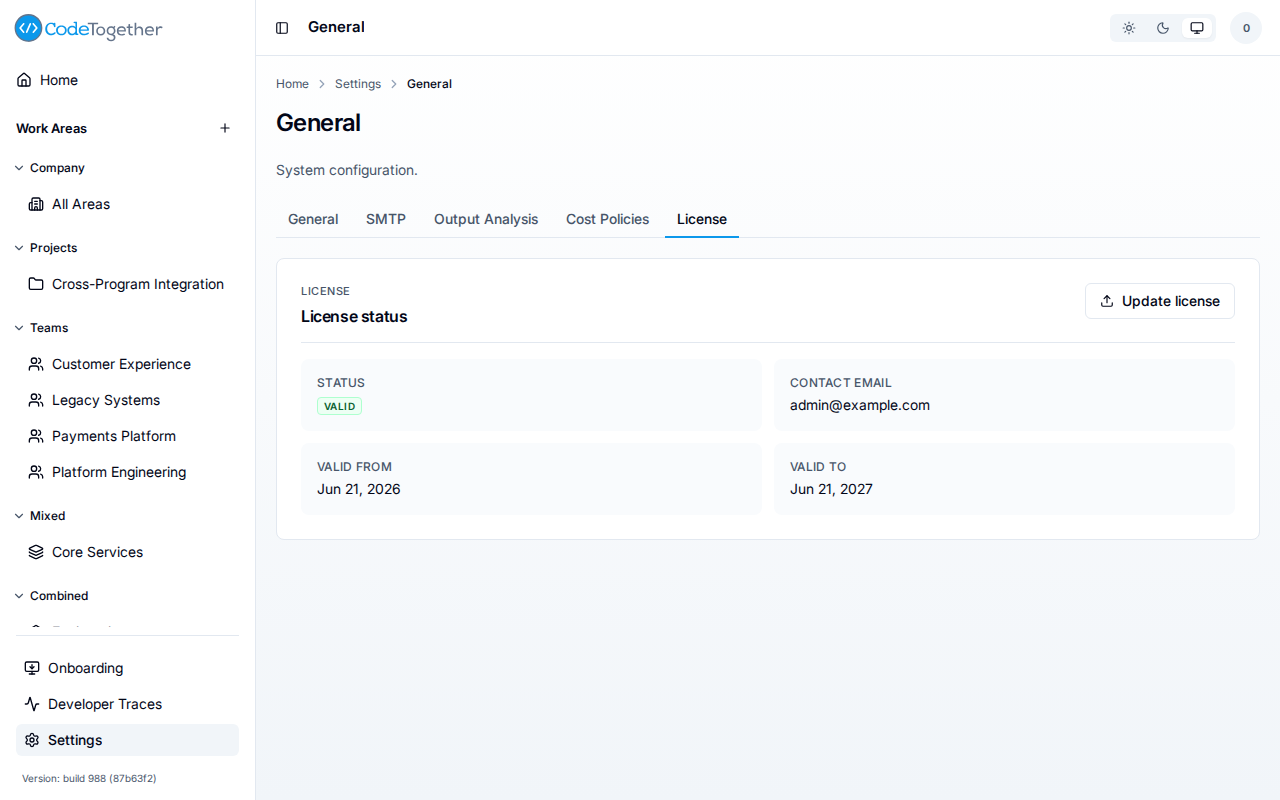
- On an installation that already has a valid license, go to Settings > General, select the License tab, and select Update license.
- In the Update license dialog, choose how to provide the license.
- To use the license file: Select Choose or drop a license file and pick your
.txtlicense file, or drag the file onto that area. The dialog imports the file as soon as you pick it. - To paste the license text: Select Expand this section to paste the raw license text., paste the license into License text, and select Update.
- To use the license file: Select Choose or drop a license file and pick your
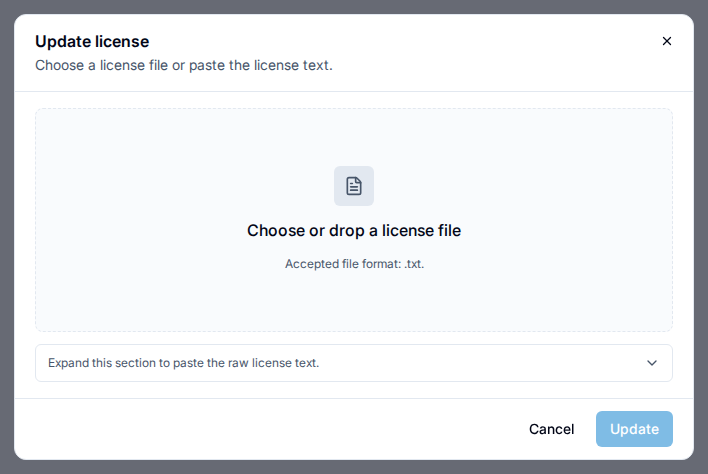
When the license is valid, the dialog closes and the platform activates immediately. In Settings > General, the License tab reports the status as Valid. If the license is not accepted, the dialog stays open with a License was not updated message that explains why.
2. Connect GitHub
Connecting GitHub gives the platform merge-outcome data. Without this connection the platform captures commits and push events, but cannot resolve a push to a merged pull request, so merge-based metrics read as unavailable.
If your organization does not use a supported source-control host, skip this step — see Connect integrations for what's supported. Workstation capture of commits and push events does not depend on this connection, but merge-based metrics stay unavailable.
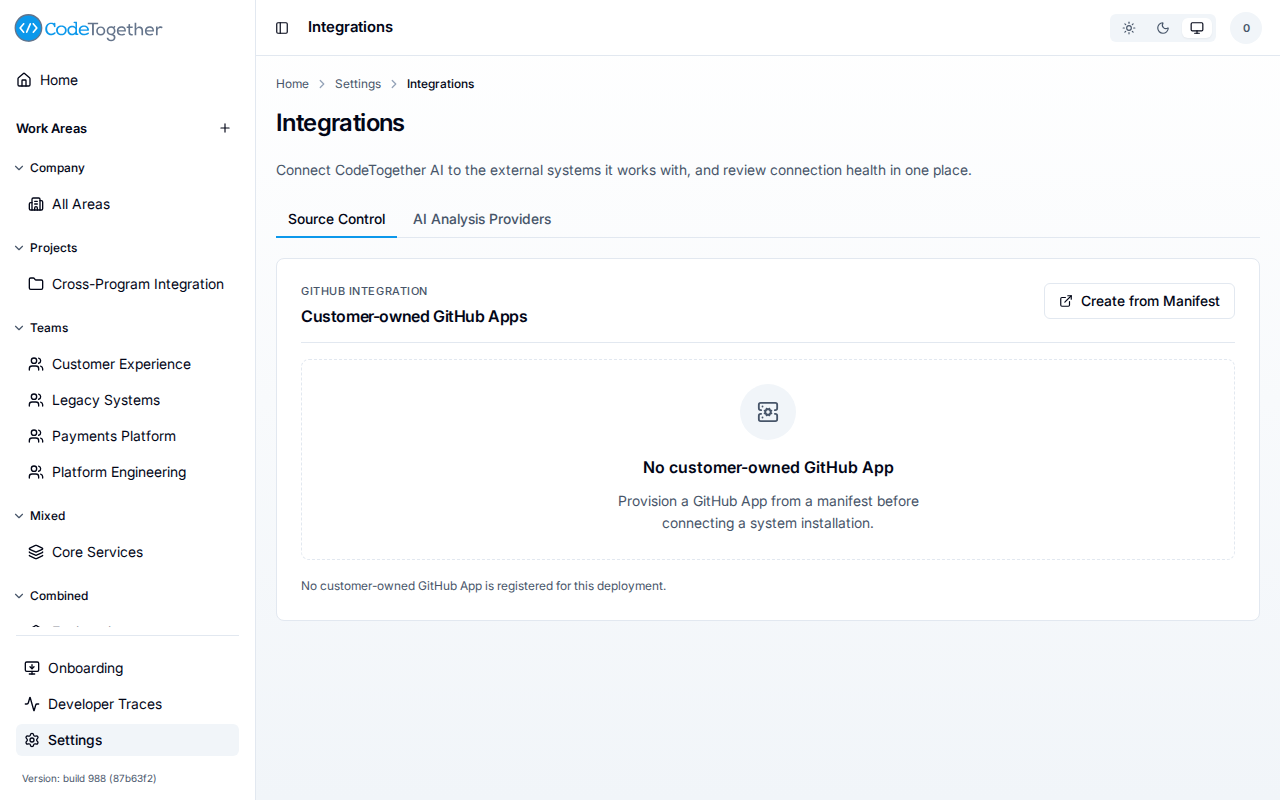
- Go to Settings > Integrations, then select the Source Control tab.
- Select Create from Manifest to provision a customer-owned GitHub App.
- Select Connect to install the App in your GitHub organization.
See Connect integrations for the full procedure, credential rotation, and troubleshooting.
3. Add co-administrators
Add at least one other person with Admin or Super Admin access. A co-administrator can carry ongoing configuration tasks, including managing work areas, integrations, and users, so that initial setup does not depend on a single account.
The two system-level roles are Admin and Super Admin. An Admin can do everything except granting the system-level role and deleting the organization; a Super Admin has full control. See Roles for the full capability table, which lists the role under its wire value Owner alongside this display label. On-premises the role reads Super Admin wherever it is shown or selectable; on SaaS it reads Owner.
- Go to Settings > Access > Users.
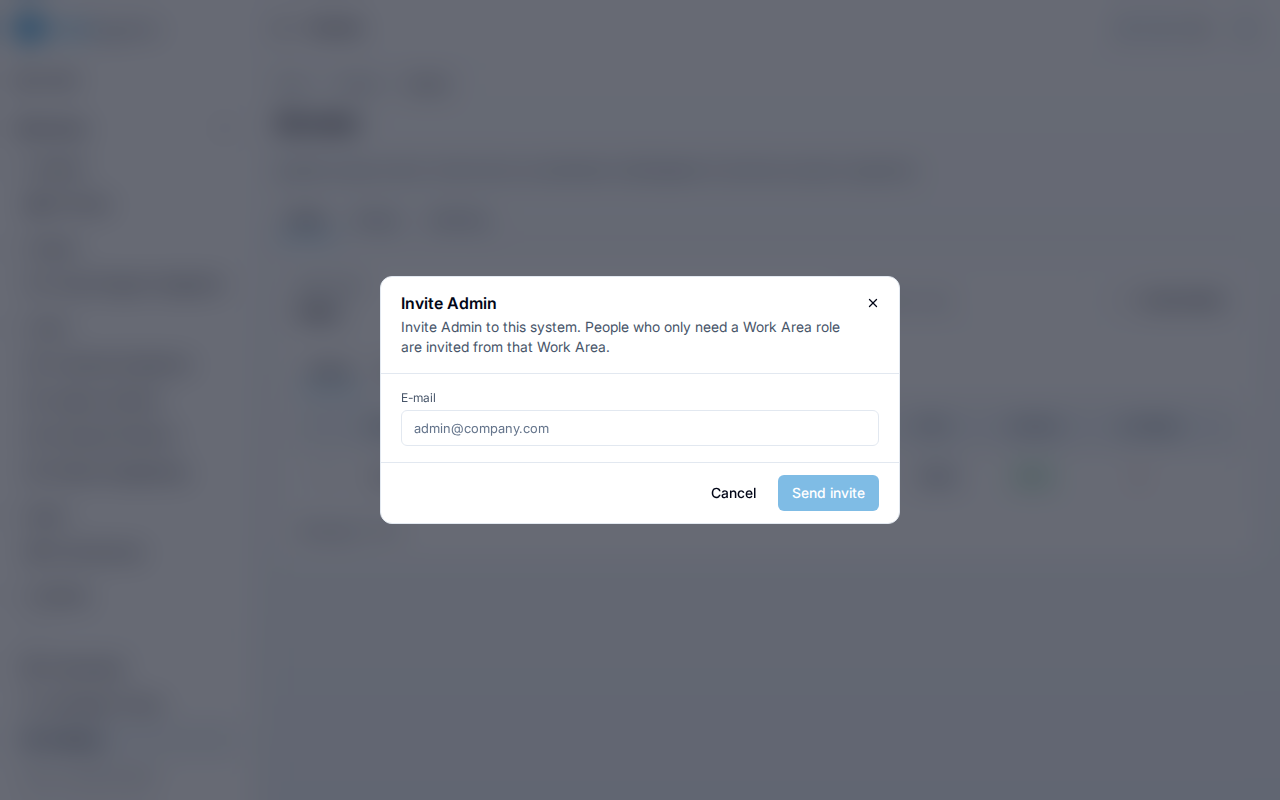
- Select Invite Admin.
- Enter the co-administrator's email address and select Send invite.
The person accepts the invite and receives Admin access on acceptance. To grant Super Admin access instead, change the value in the Role column on the Users page after the invite is accepted. Only an existing Super Admin can make that change; for an Admin the option is disabled. See Invite users to your organization for invite kinds, expiry settings, and troubleshooting.
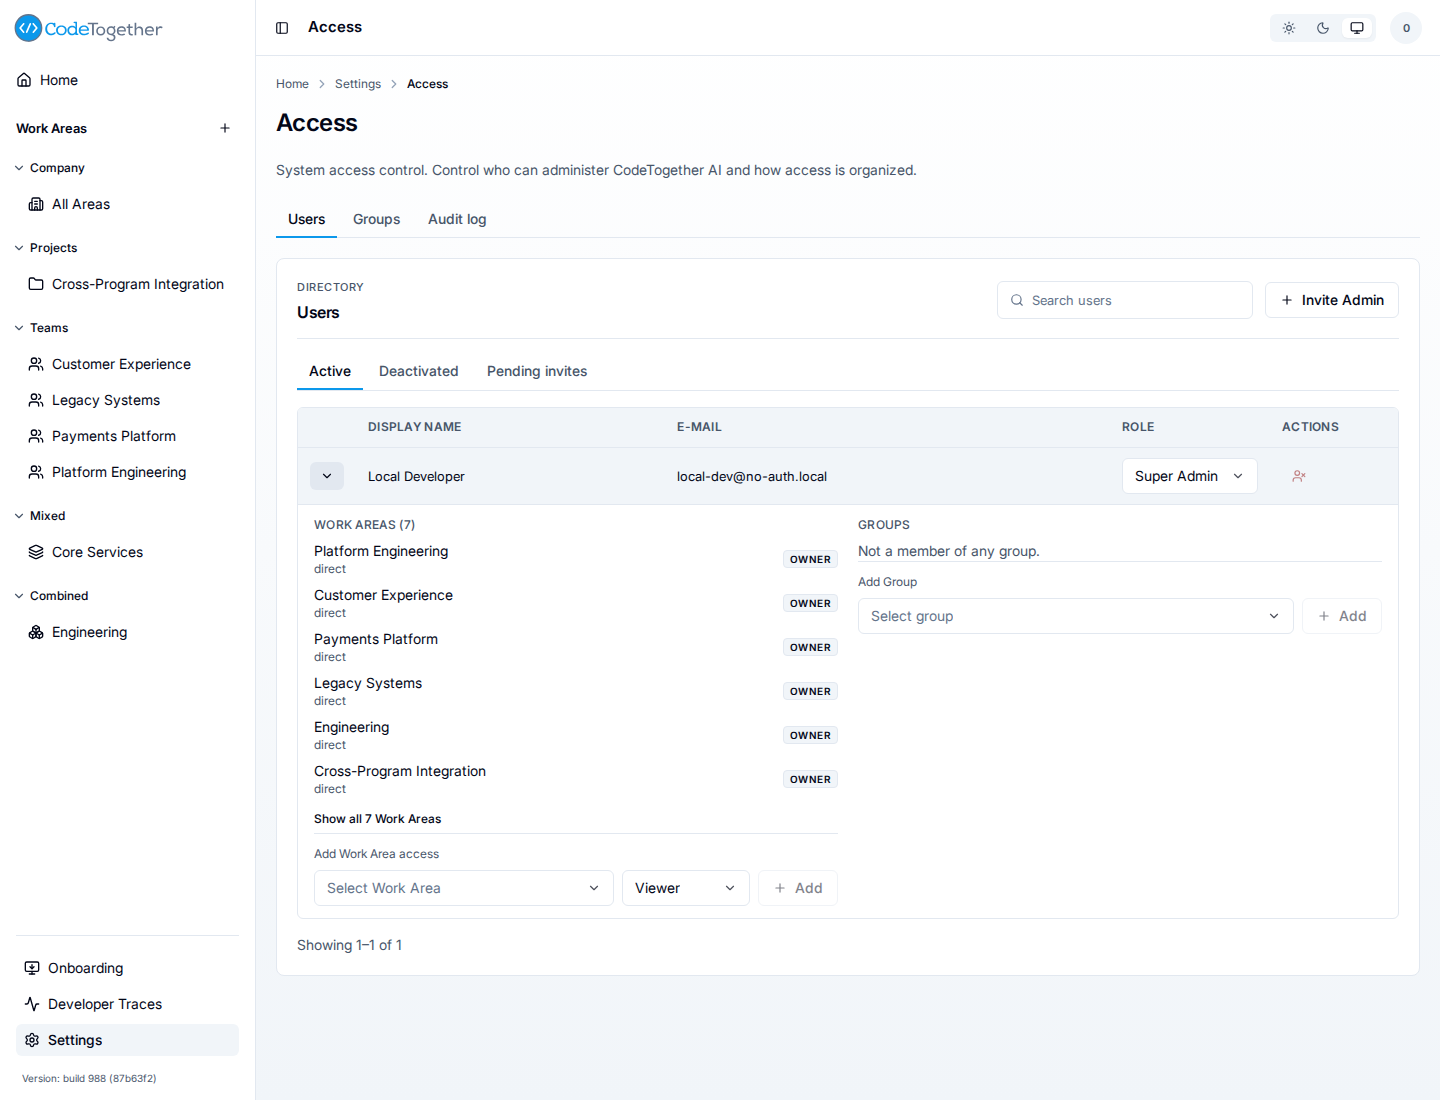
The Users tab opens on Active, whose columns are Display name, E-mail, Role, and Actions; Deactivated and Pending invites sit beside it.
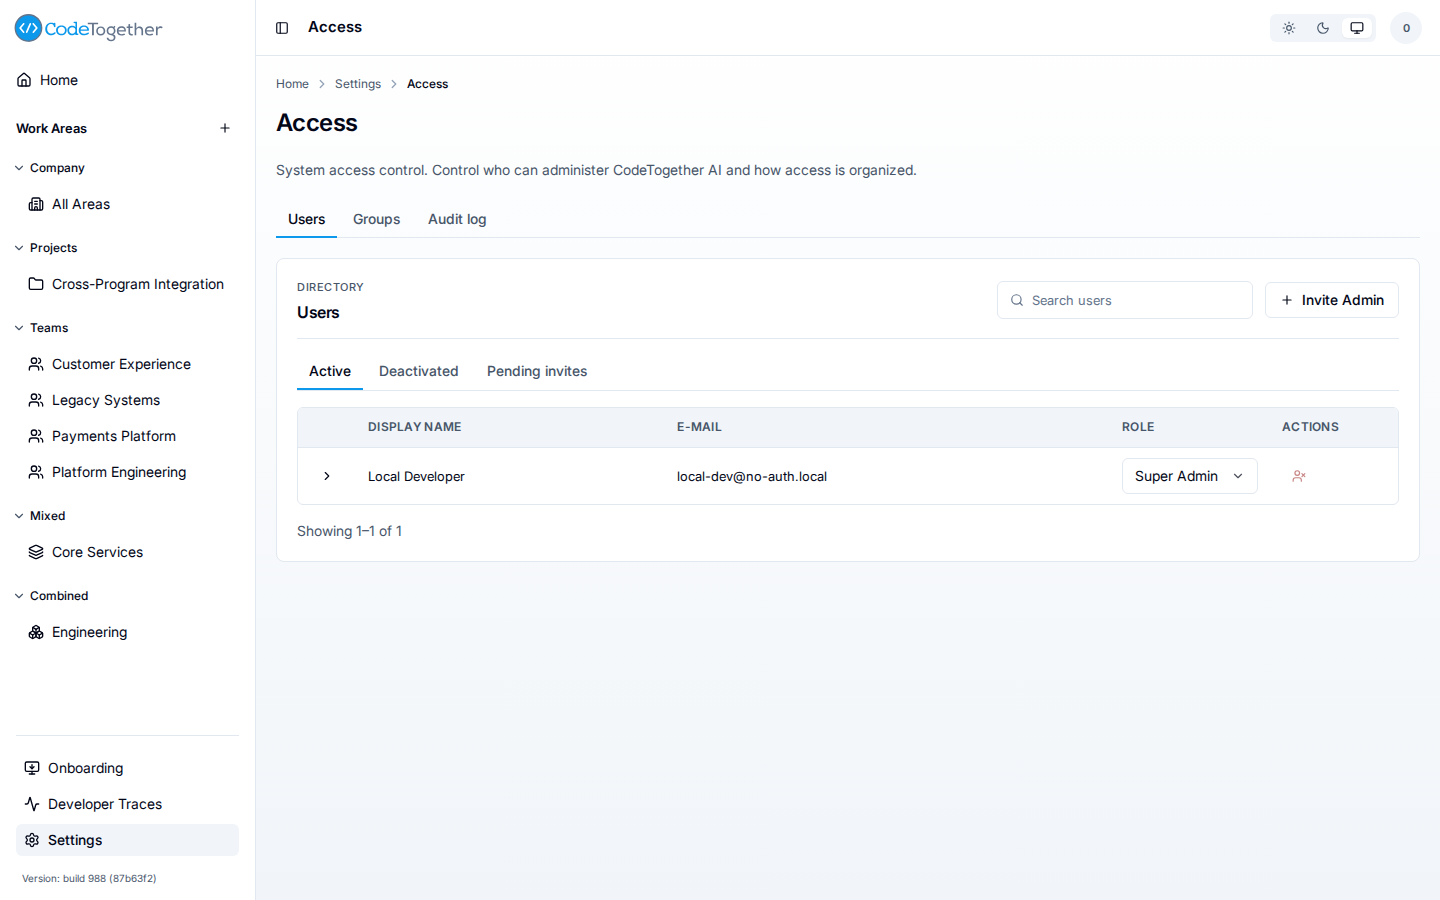
Expanding a user's row shows every work area that user can reach, with each grant marked direct or attributed to the group that confers it. The Add Work Area access form grants another one: pick the work area, pick the role to grant — it defaults to Viewer, so change it if the co-administrator needs more — and select Add.
4. Get developer data flowing
Developers are not invited like members. Their work is captured from the moment the AITrax tracker runs on their machine, and is attributed to their existing Git committer identity — see Members and developers. Sending the workstation setup link is the fastest way to onboard a team.
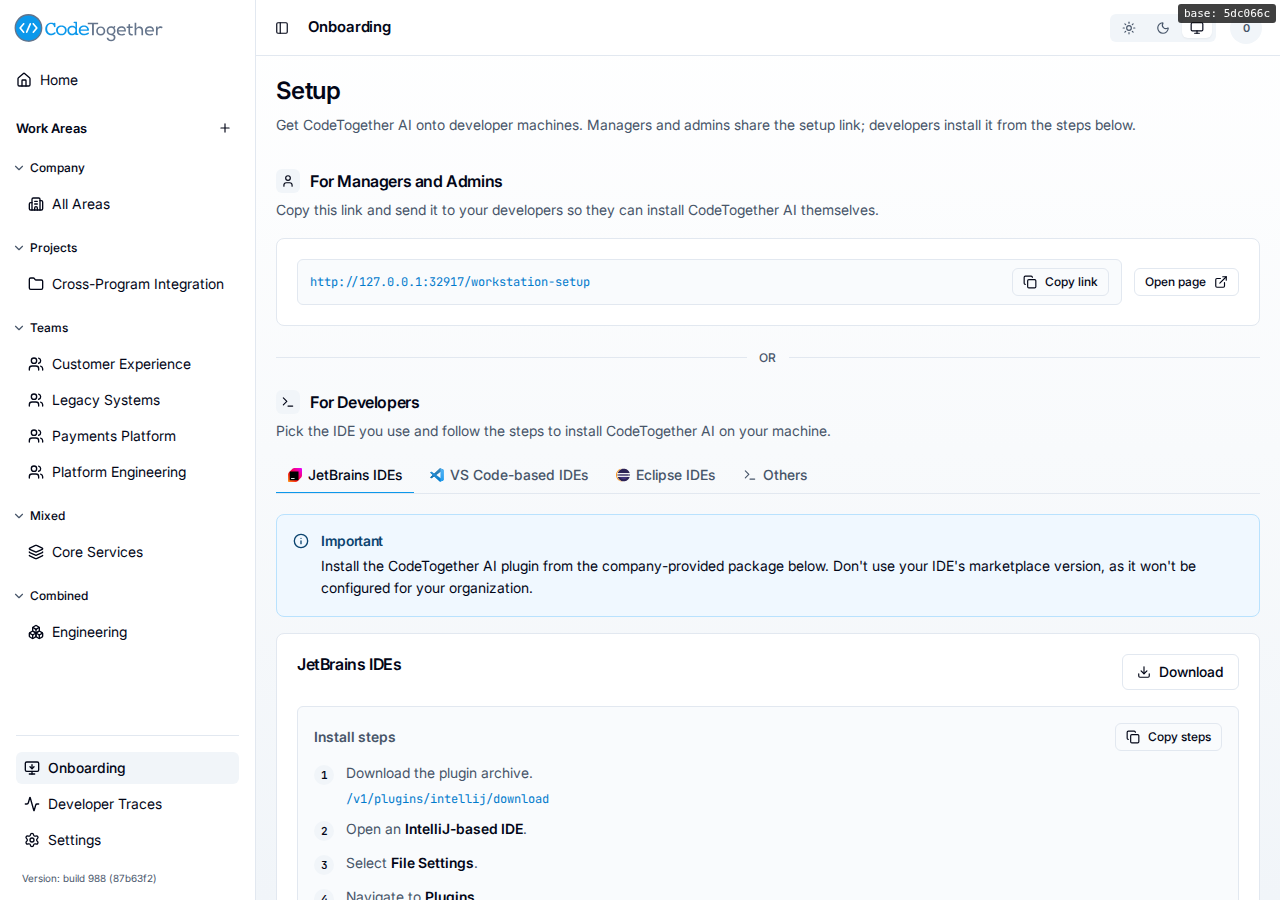
- Select Onboarding in the sidebar. The page itself is headed Setup.
- Under For Managers and Admins, copy the workstation setup link using the Copy link button.
- Send the link to your developers. Each developer opens it, picks their editor, and completes installation without needing a portal login.
The page's For Developers section carries one tab per IDE family — JetBrains IDEs, VS Code-based IDEs, Visual Studio when your server packages that extension, Eclipse IDEs, and Others — each with a Download button for the plugin artifact served from your on-premises server, and numbered install steps. Use these when developers need to install manually rather than following the setup link.
Tell your developers to install from these packages and not from their IDE's marketplace: the marketplace build is not configured for your organization. Each IDE tab opens with an Important callout that says so.
For the developer's own steps, see Onboard a developer and Set up your workstation.
5. Shape the views
Work areas define the slices of activity you want to report on. Configure them after data is arriving, not before — the activity that exists makes the right coverage obvious. Your organization already has a company-wide work area provisioned automatically.
See Your first ten days for what to do as the first data arrives, and Create a work area when you are ready to build additional views.
Troubleshooting
The Update license dialog shows License was not updated
The license was read but did not replace the installed license. The message under License was not updated gives the reason — for example, the license is for a different deployment or is not yet valid. Confirm the license file matches the one issued for this server. If the license is still not accepted, contact support with the license's issuance date and the message the dialog displays.
Developers are not appearing in dashboards after completing setup
Activity processing is asynchronous. Allow a few minutes after a developer completes setup before checking. If a developer stays absent, see No activity appears for a developer.
If this doesn't fix it
Contact support with all of the following. Tickets missing these take longer to resolve:
- The step that failed and the error text or behavior you observed.
- Your server version (shown at the bottom of the portal sidebar).
- Your deployment kind (on-premises, Helm).
Related
- Your first ten days — what to do as activity starts arriving.
- Connect integrations — source control and AI analysis provider setup.
- Invite users to your organization — adding co-administrators and members.
- Onboard a developer — the developer setup flow in detail.
- Create a work area — defining coverage once data is flowing.